

Wix Hotels by HotelRunner: Adding and Setting Up Your Hotel
9 min
In this article
- Step 1 | Add Wix Hotels by HotelRunner
- Step 2 | Set up the Book a Room page in your editor
- Step 3 | Create your rooms
- Step 4 | Add your business information
- Step 5 | Set up your payment methods
- Frequently asked questions (FAQs)
Wix Hotels by HotelRunner is our new and improved hotel management system. Start by adding the app and setting up the page your guests use to book their stay. Then, create the room types you want to offer, add your business details and connect one or more payment methods.
Important:
- This article refers to the latest version of Wix Hotels by HotelRunner.
- Wix Hotels by HotelRunner is currently available in English, French, Portuguese, Spanish, Turkish, Italian, Dutch, Japanese, and German.
- Make sure that you have read the legal requirements for Wix features before adding Wix Hotels.
- For information on the previous version of Wix Hotels, click here.
Step 1 | Add Wix Hotels by HotelRunner
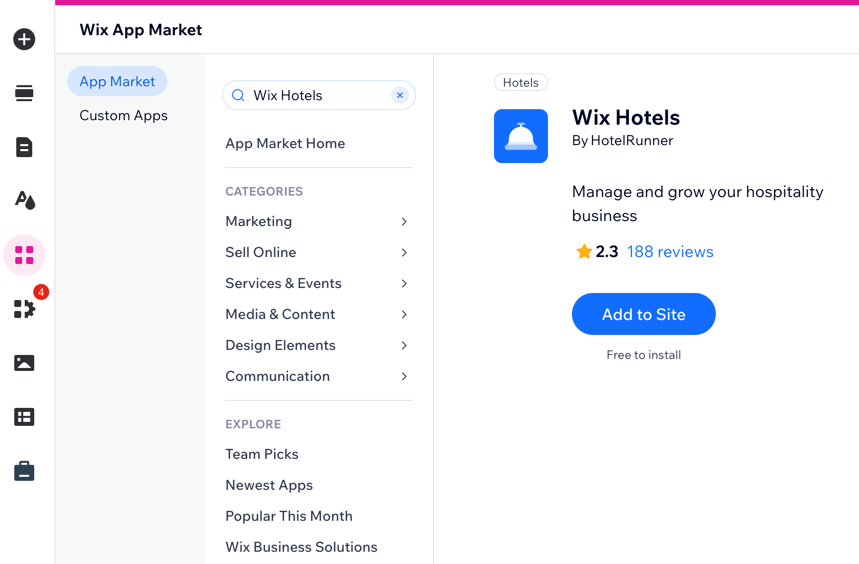
Let's start by adding Wix Hotels by HotelRunner to your site from the app market.
Wix Editor
Studio Editor
- Go to your editor.
- Click Add Apps
 on the left side of the editor.
 - Search for the Wix Hotels app in the search bar.
- Click Add to Site below Wix Hotels by HotelRunner.
- Click Agree & Add.
- Click Go to Editor.
- Click Save at the top right.
Step 2 | Set up the Book a Room page in your editor
Now you're inside your editor, on a newly-created page called Book a room. This is the page where your guests view the different rooms you offer, including all the rates and amenities. Customize how you display the information, adjust the text and then tweak the design to suit your brand.
Wix Editor
Studio Editor
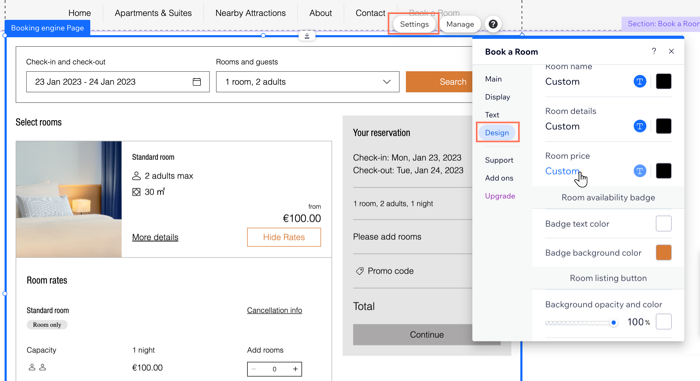
- Click the Booking Page element in your editor.
- Click Settings.
- Choose what you want to customize:
- Display: Choose where to display your reservation summary and whether you show icons for the amenities for each room.
- Text: Edit the text you display throughout the page, including the search bar, reservation summary and room listings.
- Design: Customize the general page design, the search bar, reservation summary and room listings using the available options.
Step 3 | Create your rooms
With your Book a Room page all set up, you can now begin adding your room types. You can create and edit the different rooms you offer using the Room Types tab in your site's dashboard.
Tip:
Repeat the steps below to create more room types.
To add a room type:
- Click the Booking Page element in your editor.
- Click Manage.
- Enter your Property Name and select your Property Type from the drop-down.
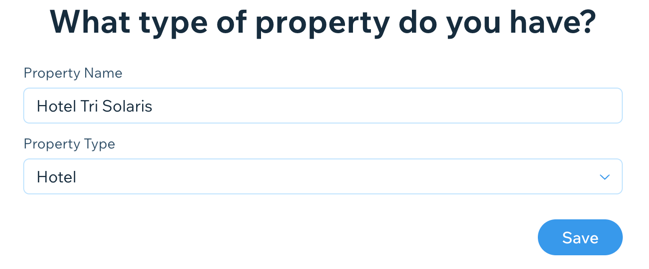
- Click Save.
- Click the Room Types tab on the left.
- Click + Create Room Type.
- Select the relevant room type from the drop-down then, click Next.
- Enter your room's details:
- Display name: Enter the room name your customers see when they search for available rooms on your site.
- Adult capacity: Enter the number of adults the room can accommodate.
- Total capacity: Enter the total number of people the room can accommodate, including children.
- Number of rooms: Enter how many of this room type your property offers.
Note: The number here refers to the number of a specific room type you offer. So, if you rent out an apartment or villa, a dog hotel, or a deluxe suite, the number of rooms is the total number of the relevant room type. - Revenue Account: Choose Accommodation from the drop-down (you can update this later if required).
- Click Next.
- Enter your base price details:
- Base Price (per night): We recommend you enter a value as high as your most expensive rate.
- Set base price for what occupancy?: Choose the relevant number of guests that your base price applies to from the drop-down. The options you see depend on the details you enter in the steps above.
- Different occupancy: Set the pricing using the available options:
- Percentage: Click the Percentage icon
 . Choose whether the price increases or decreases by the percentage amount.
 - Fixed amount: Click the Fixed amount icon
 . Choose whether the price increases or decreases by the fixed amount.
- Percentage: Click the Percentage icon
- Click Next.
- Click the checkbox next to the amenities you offer in this room type (e.g. bed types, room features, domestic appliances, etc). Then, click Next.
- Click the Add photo icon
 to upload photos of this room.
 - Click Complete Setup.
- Select the room availability:
- Start selling this room: Choose the dates this room is available to book.
- Do not start selling this room: Choose this option to hide this room from guests until ready.
- When ready, click Save at the top.

Tip:
Make sure you've included all necessary information for your guests to book right away. Check your room's content score in the Summary section on the right.
Step 4 | Add your business information
After creating your rooms, enter important business information and contact details for your property. This information is visible to guests across your site.
Important:
You receive notifications at the email address you provide in the Business Info section. Make sure you include the correct email address to maintain seamless client communication and management.
To add your business information:
- Go to Business Info in your site's dashboard.
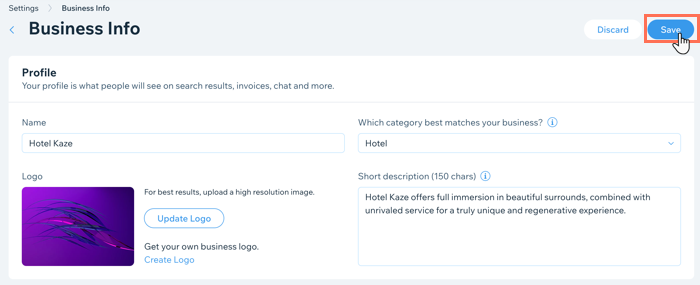
- Enter your business information under Profile:
- Enter or update your hotel Name.
- Enter or update your Category.
- Click the Add icon or the Add Logo button to upload your company logo.
- Enter a description.
- Enter your location under Location and contact info:
- Enter your business address.
- Add an address description.
- Add a location name. Your business address appears as your location by default.
- Enter your Contact Info (email address, phone number and/or fax).
- Click Save at the top.
Note:
Reservation notifications are sent from noreply@hotelrunner.com. If you do not receive them, check your spam or junk folder and add noreply@hotelrunner.com to your whitelist.
Step 5 | Set up your payment methods
After creating your rooms and filling in your business info, set the way you accept payments. You can add 1 or more payment methods for guests to use when they reserve rooms and pay for their extras.
Important:
Upgrade your site to a Business & eCommerce Premium Plan so you can start accepting bookings.
To set up your payment methods:
- Go to Accept Payments in your site's dashboard.
Tip: Check your business location at the top right. If incorrect, click Change to edit it. - Select the payment methods you want to use or click See More Payment Options.
- Click Complete Setup / Connect next to your payment method(s) to finish the process.
What's next?
Finish setting up your hotel and site:
- Go to your editor to design the rest of your site pages.
- Use your site's dashboard to add more information about your property (Property Setup tab) and manage reservations (Property Management).
Frequently asked questions (FAQs)
Click on a question below to learn more:
If I used the previous version of Wix Hotels, can I transfer my existing reservations?
What languages are available in Wix Hotels by HotelRunner?
Can I manage Wix Hotels by HotelRunner from the Wix App?
How many external channels can I add in the channel manager?
Where do I update my prices and room availability?


