

Wix Multilingual: Auto-Translating Your Site
9 min
In this article
- Auto-translating your entire site
- Auto-translating individual elements
- Updating your translations
- Purchasing translation packages
- FAQs
Make your website available in multiple languages with Wix Multilingual. You can automatically translate your site to over 130 languages.
Before you begin:
To translate your site, you need to add and set up Wix Multilingual on your site.
Auto-translating your entire site
Auto-translate your entire site in one go and update the translation every time you add or change your site's content.
To auto-translate your entire site:
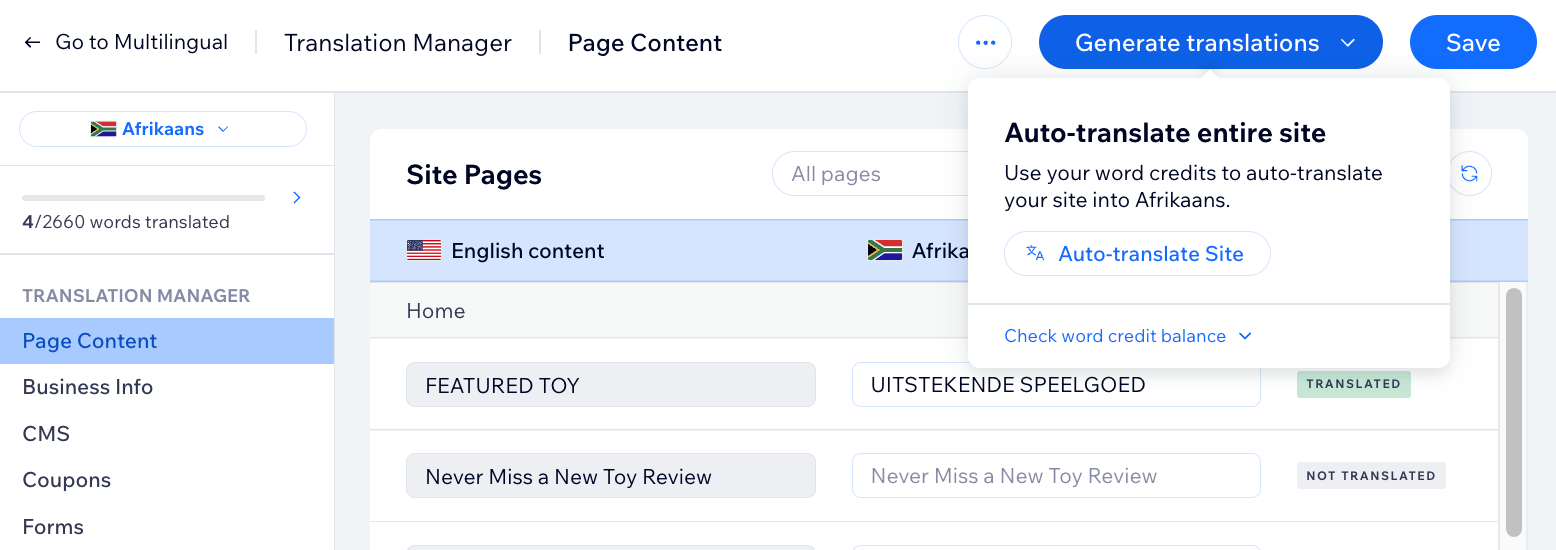
- Go to the Translation Manager in your site's dashboard.
- Click Generate translations.
- Click Auto-translate Site.

- Review each page of your site and edit the translations if needed.
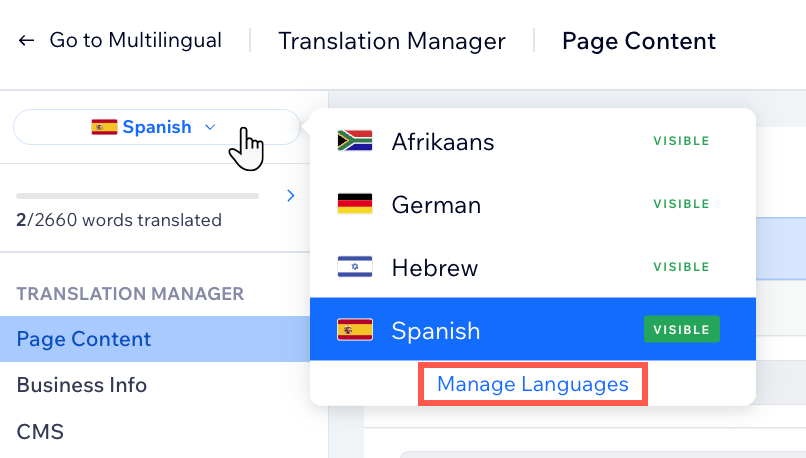
- (If the newly added language is still hidden) Publish your translations:
- Click the Language drop-down under your language and select Manage Languages.
- Click Hidden next to the relevant language in the status column and select Visible.
- (In your editor) Click Publish at the top right to publish your site.
Tip:
Some elements take longer to be auto-translated. We recommend waiting a few minutes and refreshing the page if you can't see the translation.
Auto-translating individual elements
Translate your site's individual elements using auto-translate. This is best when you want to have more control over when and what you translate.
Wix Editor
Studio Editor
Dashboard
- Go to your editor.
- Click the Switch languages drop-down menu at the top of your editor.
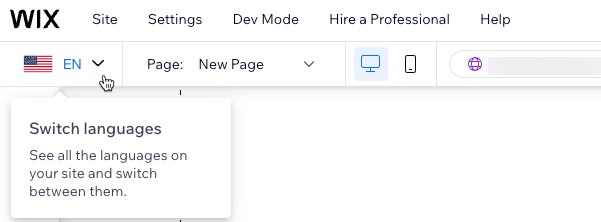
- Select the language you want to edit.
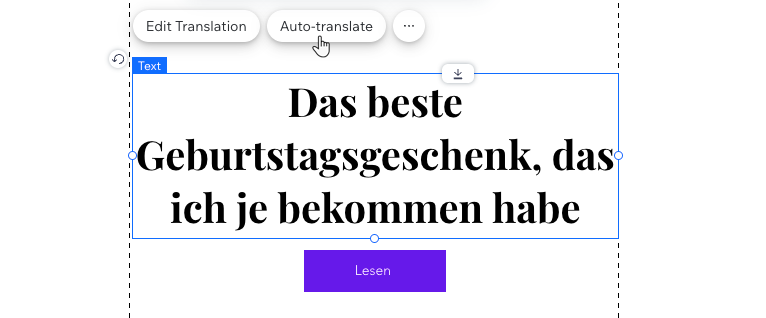
- Select the text element you want to translate in your page.
- Click Auto-translate.
- (Optional) Design the text element in your secondary language.
- (Optional for buttons and links) Click the Link icon
 to change the link.
 - Click Save.
- Click Publish.
- (Optional if the newly added language is still hidden) Publish your translations:
- Go to Multilingual in your site's dashboard.
- Click the Status drop-down next to the relevant language and select Visible.
Note:
Currently, collapsible text can only be translated manually.
Updating your translations
Auto-translating your site is an ongoing process, not a one-time task. When you update your site’s content in your main language, like changing the call-to-action text on a button or publishing a blog post, you need to translate the updated content. If you don’t update the text, it will stay in your site’s main language.
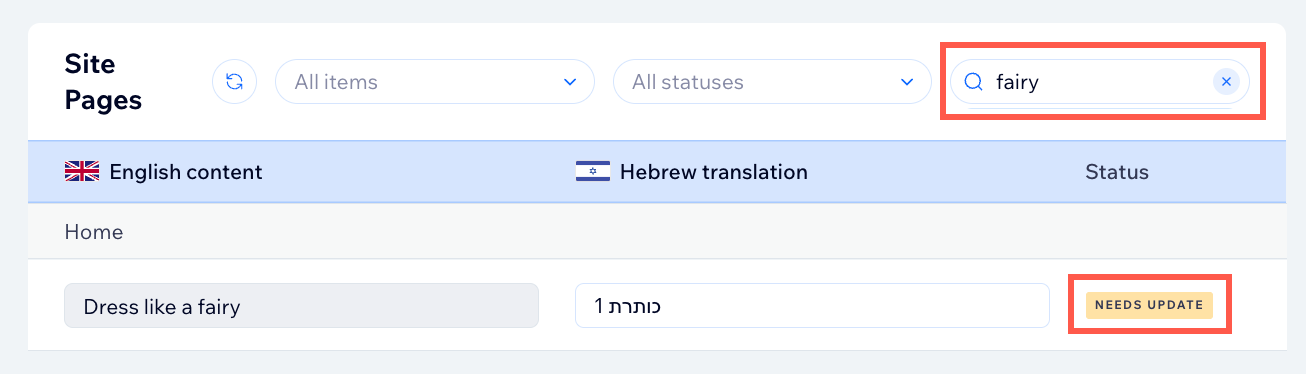
To simplify this process, use the 'Needs Update' status in the Translation Manager to quickly identify relevant content.
There are two statuses for you to look out for:
- New content: Marked with the 'Not translated' status.
- Updated content: Marked with the 'Needs update' status.
Notes:
- Click Save when moving between pages and filters to ensure your changes are applied.
- Manually filter for the content status 'Needs update'.
- You can also use the import and export tool to manually update your secondary language.
To update your translations:
- Go to the Translation Manager in your site's dashboard.
- Choose the relevant language at the top left.
- Find the relevant content:
- Filter using the relevant status: Click the All statuses drop-down and select Not translated or Needs update.
- Use the search bar to look for a specific phrase: Click the search bar and enter your text.
- Translate your content:
- New content: Click Generate translations to auto-update all the new content.
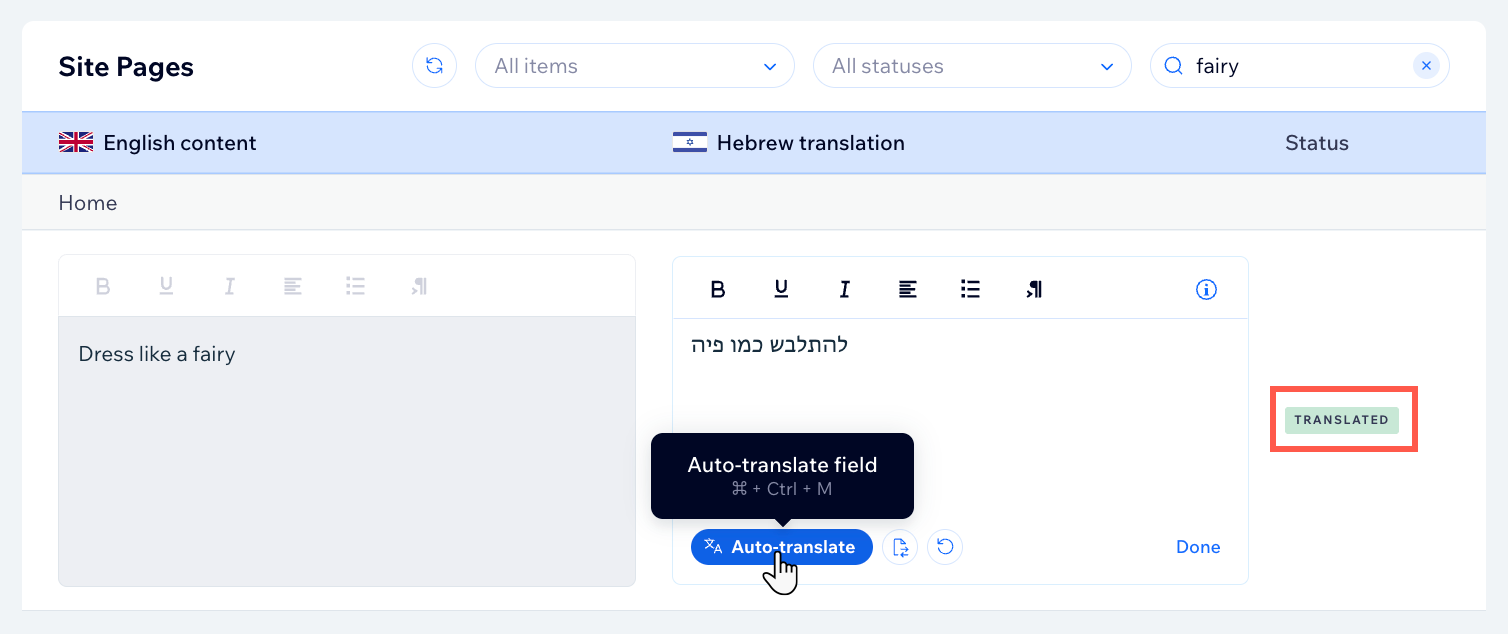
- Updated content: Click an item from the list and choose what you want to do:
- Auto-translate: Click Auto-translate to use your word credits to automatically translate the text.
- Manually translate: Edit the existing translation.
Purchasing translation packages
Whether you've run out of word credits or just want to top up, you can purchase a translation package at any time. Choose from an additional 3K, 10K or 50K word credits.
To purchase a translation package:
- Go to the Translation Manager in your site's dashboard.
- Click Generate translations.
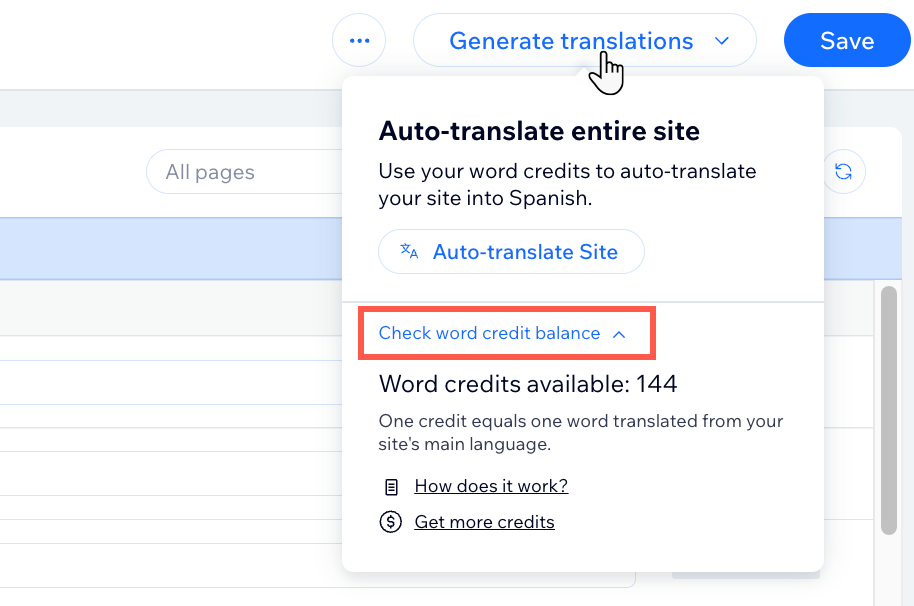
- Click Check word credit balance.
- Click Get more credits.
- Select the relevant package.
- Enter your payment details and click Submit Purchase.
FAQs
Click a question below to learn more about auto-translating your site:
What is the difference between "Auto-translate" and "Auto-translate Site"?
How many languages does auto-translation support?
Is auto-translation initiated automatically for newly added languages?
Will newly added elements / pages be auto-translated?
If I update content that has already been translated, will the updates apply to all languages?
Can I translate icons in my text elements with the auto-translate service?
Can I auto-translate collapsible text?
How can I view my word credit balance?

Can I transfer word credits to another site in the same or different account?
If I purchase multiple packages, will the word credits accumulate?
Are translation packages refundable?
Can I edit my translations?
 . When you're done, click Save and Publish.
Can I keep my original language for some of my text?
 . When you're done, click Save and Publish.
Can I check for translations that need updating after making content changes?
