

Wix Bookings: Collecting Payments and Managing Sessions Using the Booking List on the Wix App
9 min
In this article
- Filtering and sorting the booking list
- Collecting payment from the booking list
- Selling and redeeming sessions from a plan or membership
- Charging a cancellation fee from the booking list
- Marking attendance on the booking list
- FAQs
Collect payments, track attendance, and approve booking requests quickly using the booking list on the Wix app. Sort by booking date and filter bookings by service type, client, booking status and payment status. You can also view detailed appointment, class session, and course information.

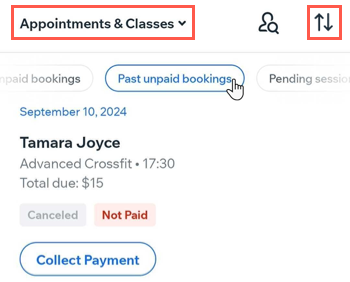
Filtering and sorting the booking list
The booking list allows you to view your appointments and classes, or courses. You can search by client, or you can sort your past bookings by newest to oldest, or vice versa. You can also choose from preset timeframes.
To filter and sort the booking list:
- Go to your site in the Wix app.
- Tap Manage
 at the bottom.
 - Tap Booking Calendar.
- Tap Booking List.
- Choose how you want to view the booking list using the following options:
- Service type: Select which services you want to view from the drop-down at the top: Appointments & Classes, or Courses.
- Search by client: Tap the Search by client icon
 and then tap to select the relevant client(s) from the list.
 - Sort by: Tap the Sort by icon
 and choose the relevant option: Newest to oldest, or Oldest to newest.
 - Select a preset: Tap to select one of the presets: All, Last 7 days unpaid bookings, Past unpaid bookings, Pending sessions.
Collecting payment from the booking list
The booking list makes it easier for you to follow up with clients about any unpaid sessions. You can find the relevant session on the booking list, and then charge for it in different ways. You can charge with an invoice, mark as paid, or redeem the session from one of the client's plans or memberships.
To collect payment from the booking list:
- Go to your site in the Wix app.
- Tap Manage at the bottom.
- Tap Booking Calendar.
- Tap Booking List.
- Find the relevant booking you want to charge and tap Collect payment.
- Select an option:
- Go to checkout: Select this option to collect cash, card, tap-to-pay, or gift card payment. You'll be able to add discounts, tips, coupons, or a custom charge to the sale. If you sell Wix Stores products, you can add products to the sale, as well.
- Charge with invoice: Issue an invoice requesting payment for the session.
- Mark as paid: Accept payment offline and mark the session as paid.
- (If you selected Go to checkout) Click Continue to Checkout and finish charging the client:
- (Optional) Tap Add More Items to add additional products or services to the order.
- (Optional) Tap Add Custom Charge to add a custom amount to the order.
- (Optional) Tap Add a Discount to add a price reduction.
- Tap Charge.
- Choose how you want to accept payment:
Cash
Card
Manual card entry
(US only) Tap to Pay
Gift card
Split payment
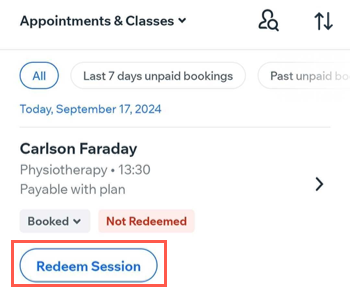
Selling and redeeming sessions from a plan or membership
You can also use the booking list to sell pricing plans (memberships and packages) to your clients, and then redeem past sessions from those plans. This is especially useful when you offer plan-only services.
To sell a pricing plan from the booking list:
- Go to your site in the Wix app.
- Tap Manage at the bottom.
- Tap Booking Calendar.
- Tap Booking List.
- Tap the Search by client icon .
- Enter the client name in the search field.
- Tap the checkbox to select the relevant client from the list.
- Tap Apply.
- Tap Sell a Plan.
Note: The plan's start date must begin before the session you're redeeming. - Tap Continue.
- Select the relevant plan.
- Tap Collect Payment, and charge the client for their pricing plan.
- Tap Redeem Session.
- Select the relevant plan you want to redeem the session from.
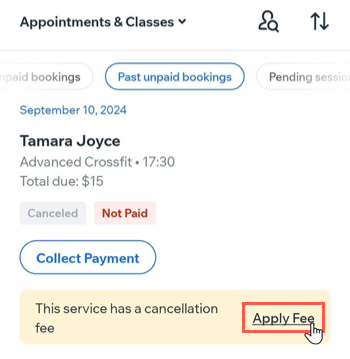
Charging a cancellation fee from the booking list
You can also charge cancellation fees using the booking list feature on the Wix app. Make sure to make your cancellation fee policy clear by updating your booking policies for all of your services.
Notes:
- Adding a cancellation fee to your booking policies is currently only available on desktop.
- Policy descriptions are mandatory when charging cancellation and no-show fees. This will show up as your payment policy when clients are checking out.
To charge a cancellation fee from the booking list:
- Go to your site in the Wix app.
- Tap Manage at the bottom.
- Tap Booking Calendar.
- Tap Booking List.
- Find the booking that you want to charge a cancellation fee for.
- Tap Apply fee.
- Tap Confirm Fee & Continue. This adds the cancellation fee to the order, which you can then charge in different ways.
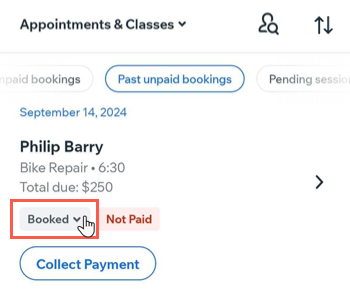
Marking attendance on the booking list
Mark attendance with the booking list to keep accurate records, manage no-shows, and improve scheduling. Quickly see who attended for easier follow-up and client management.
To mark attendance on the booking list:
- Go to your site in the Wix app.
- Tap Manage at the bottom.
- Tap Booking Calendar.
- Tap Booking List.
- Tap the Search by client icon to find the relevant participant, or scroll through the list to find the correct date of the session.
- Tap the booking status under the participant name and choose the relevant option: Check in or Mark as no show.
FAQs
Click a question below to learn more.
Can I collect tips from clients?
 at the bottom.
How can I filter and sort the booking list on the Wix app?
What kinds of payments can I collect from the booking list?
Is it possible to sell and redeem sessions from a plan or membership using the booking list?
