

Wix Bookings: Setting Up Your Booking Policies
10 min
In this article
- Video tutorial
- Adding new policies
- Managing connected services
- Setting your default policy
- Deleting policies
- FAQs
With booking policies, you can control when clients can book, cancel, or reschedule their sessions. You can set rules for how far in advance bookings must be made and how close to the session clients can make changes. For some services, you can allow group bookings and late bookings. You can also ask clients to add payment details and charge fees for cancellations and no-shows. Customize different policies for different services to give flexibility to both clients and staff.
Important:
Daylight saving time impacts your booking policies. For example, this may mean that when the time changes, clients will have a shorter or longer window to book, cancel or reschedule a session.
Video tutorial
Check out this video tutorial or scroll down to read the full article.
Adding new policies
You can add new policies at any time and customize them to suit your needs. Offer different booking policies for each of your services or connect several services to the same policy. This is a great way to ensure you stay as fully booked as possible and that your staff have enough time to prepare everything.
Notes:
- Certain policy rules and options only apply to specific service types, such as classes or courses.
- When you add a new policy, the policy's rules take effect for all connected services for both current and future bookings.
- You can also add checkout policies to your site, in addition to your booking policies.
Show me examples of new booking policies
To add a new policy:
- Go to Booking Settings in your site's dashboard.
- Scroll down and click Booking policies.
- Click + Add a New Policy.
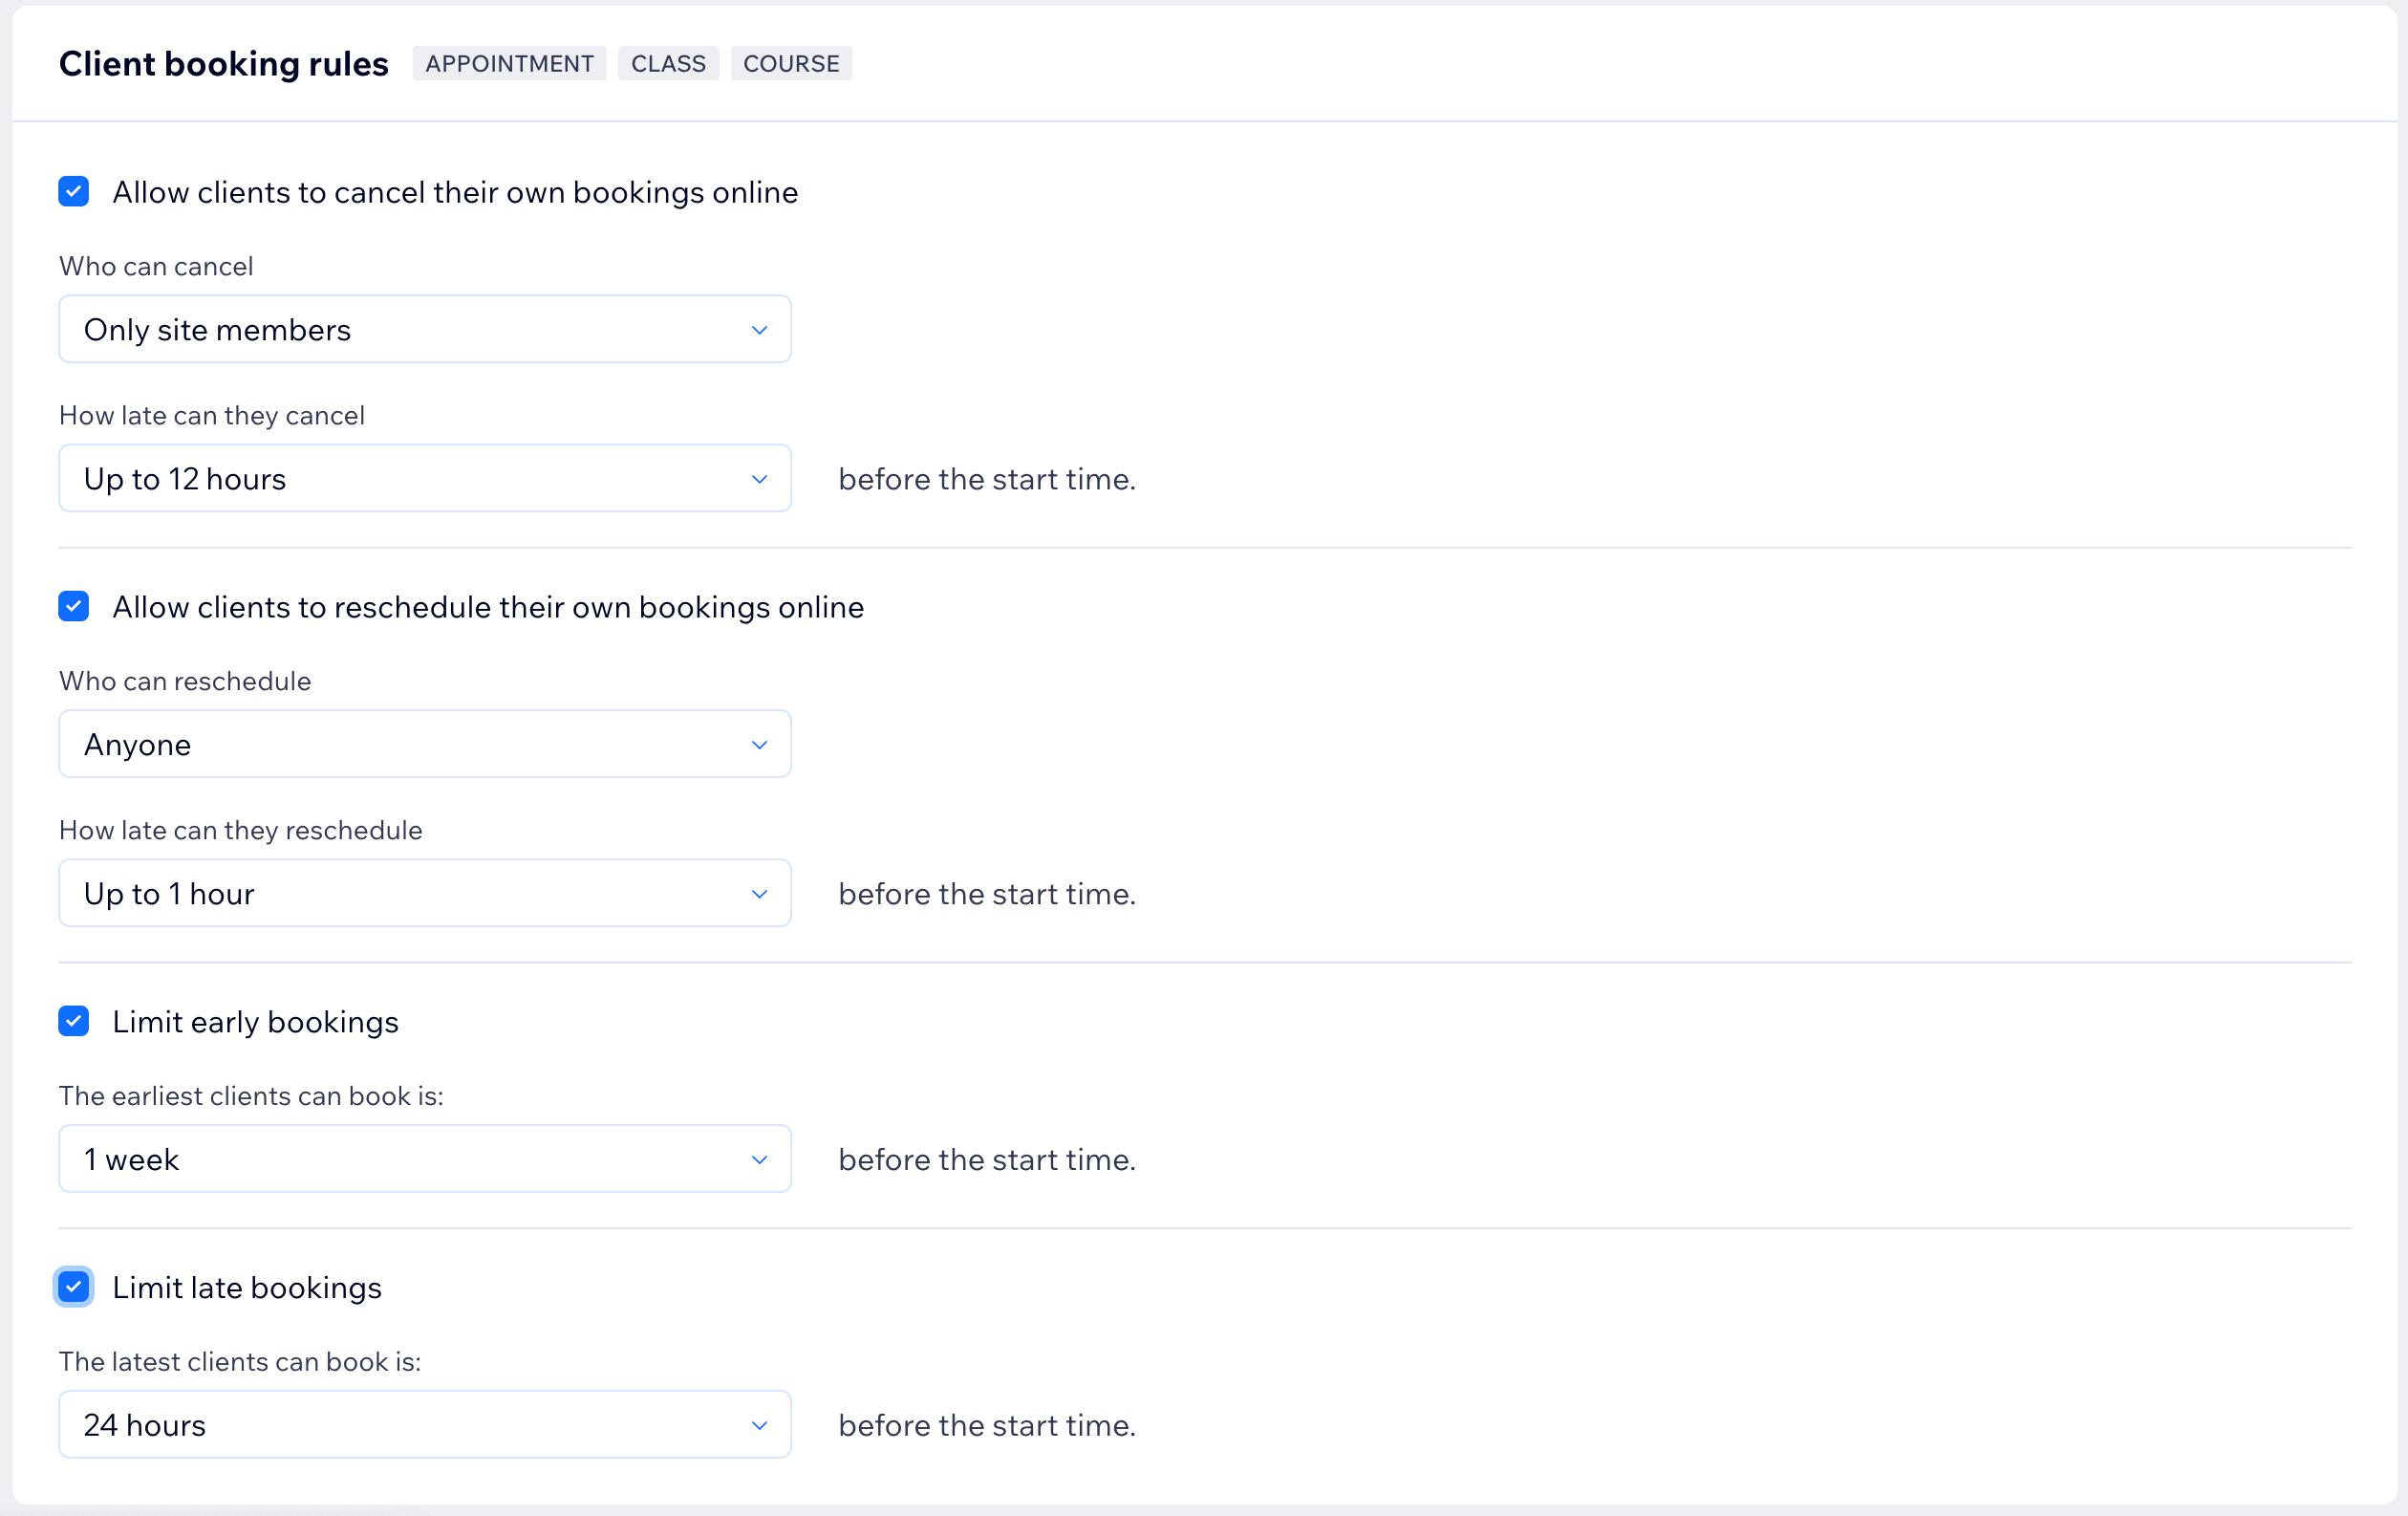
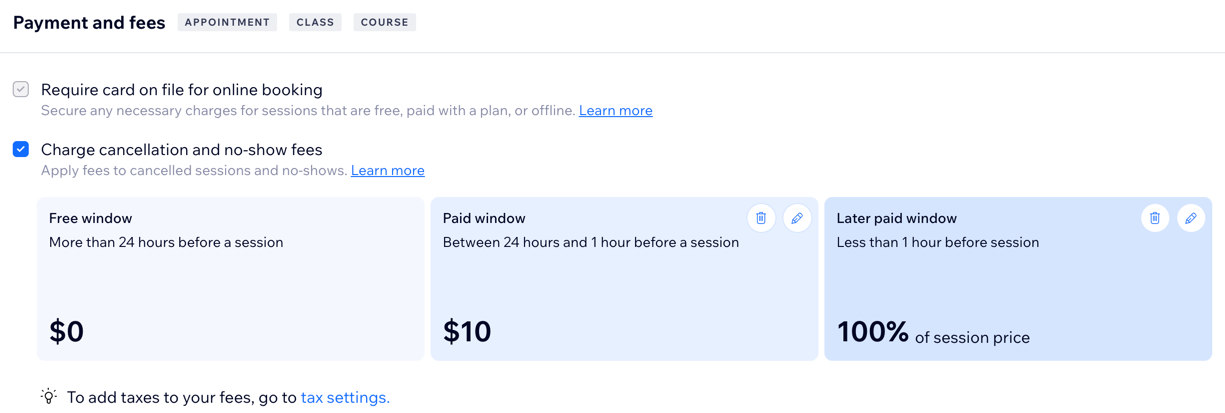
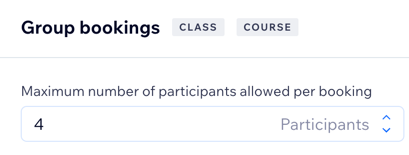
- Customize your policy:
Policy details
Client booking rules
Automatic staff assignment
Payment and fees
Waitlist
Group bookings
Book a course after start date
5. Click Save.
Tip:
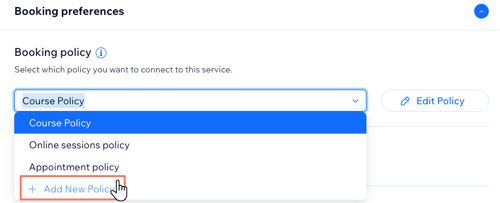
You can also add new policies while creating new services. In the service creation form, scroll down to Booking preferences, then click the drop-down under Booking policy. Click + Add New policy, then follow the steps above to finish creating the new policy.
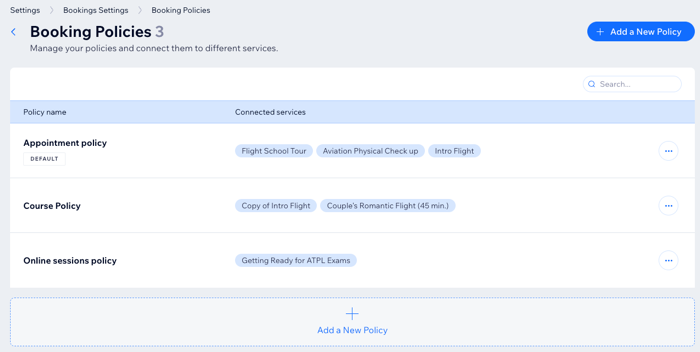
Managing connected services
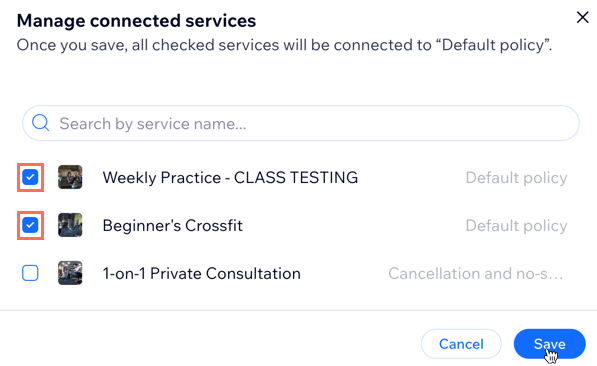
You can move or connect services to different policies at any time. This is great for when you notice a spike in demand for particular services and need a more restrictive policy to manage the number of bookings.
To manage connected services:
- Go to Booking Settings in your site's dashboard.
- Click Booking Policies.
- Click the More Actions icon
 next to the relevant policy.
 - Click Manage connected services.
- Select the checkbox next to each service you want to connect to the policy.
- Click Save.
Setting your default policy
Choose which of your policies you want to automatically apply to all your services. This is useful when you are adding new services as your business grows. You can then link services to more customized policies whenever you need.
Important:
- You can't delete your default policy. However, you can make another policy the default, then delete the original default policy.
- When you change which of your policies is the default, and delete the original policy, all services automatically link with the new default policy.
To set your default policy:
- Go to Booking Settings in your site's dashboard.
- Click Booking Policies.
- Click the More Actions icon next to the relevant policy.
- Click Set as default.

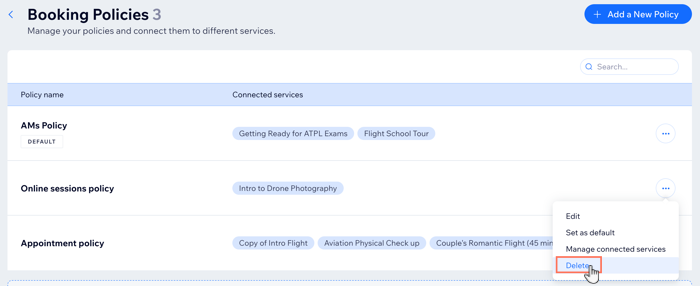
Deleting policies
As your business grows, and your needs change, you may want to delete some of your old booking policies.
You can delete policies at any time, but make sure you choose your default policy before deleting any irrelevant policies. When you delete a policy, all connected services move to your default policy. You must have at least one booking policy at all times.
To delete a booking policy:
- Go to Booking Settings in your site's dashboard.
- Click Booking Policies.
- Click the More Actions icon next to the relevant policy.
- Click Delete.
- Click Delete to confirm.
FAQs
Click a question below to learn more.
Can I create new policies while I'm adding a new service to my site?
Can I edit an existing policy?
Can I see an example of a booking policy with multiple rules and how it works?


Can I add checkout-specific policies to a Wix Bookings site?
