

Wix Blog: Editing a Blog Post Using the Blog Post Sidebar
4 min
In this article
- Editing settings using the blog post sidebar
- Editing SEO using the blog post sidebar
- Adding and assigning categories using the blog post sidebar
- Adding and assigning tags to blog posts
- Adding a subscription plan to a blog post
- Translating your blog post
The blog post sidebar is a quick and handy way to manage things like settings, SEO and categories. For example, as you write your post, you can easily make changes to things like the cover image, the post URL, and the post category etc.
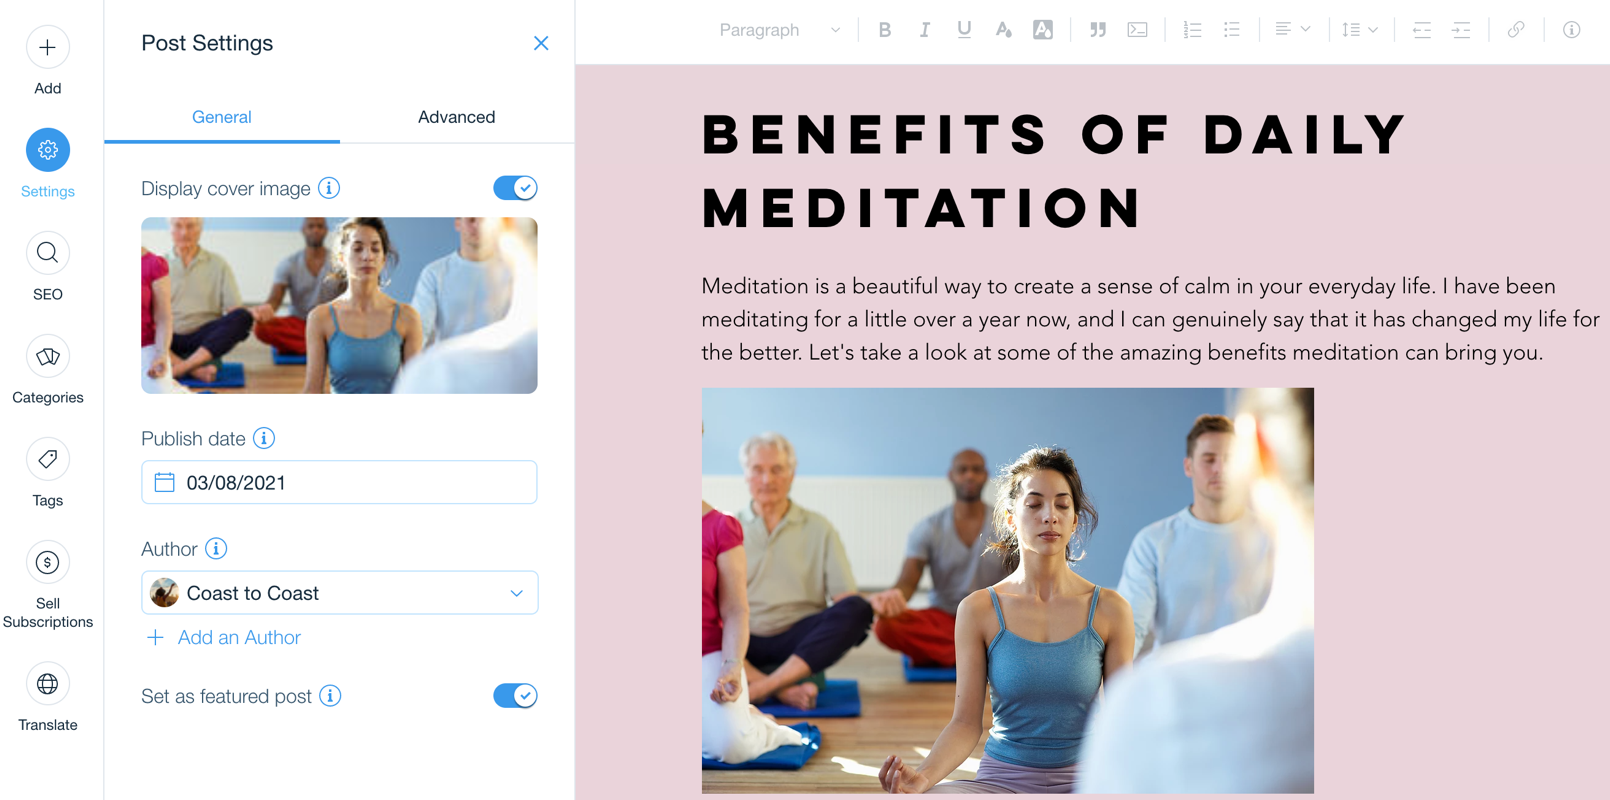
Editing settings using the blog post sidebar
You can make quick edits to some settings while writing using the post sidebar. Edit things like the display cover image, the author name, and more.
To edit settings using the blog post sidebar:
- Go to the Blog tab in your site's dashboard.
- Click Manage My Blog.
- Click Create New Post or Edit to edit an existing post.
- Create or edit the post to include the relevant information.
- Click the Settings tab on the left sidebar.
- Edit the following settings:
- Click the Display Cover Image toggle to enable or disable the cover image.
- Choose the publish date.
- Choose the author.
- Add an excerpt about the post.
- Click the Set as Featured Post toggle:
- Enabled: The post appears in the post list.
- Disabled: The post does not appear in the post list.
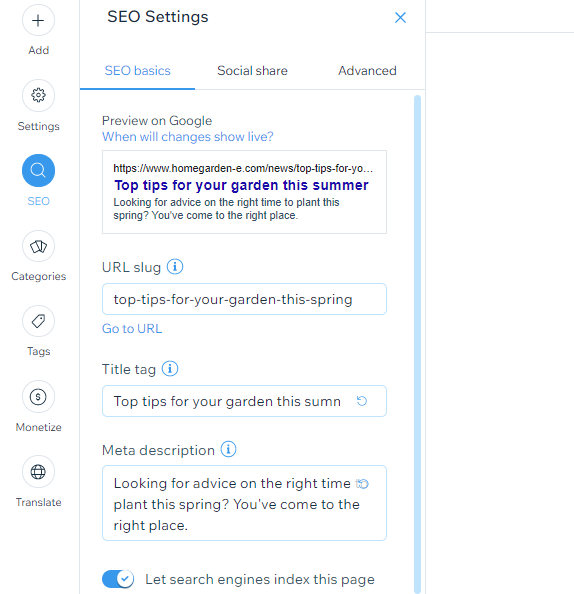
Editing SEO using the blog post sidebar
Using the sidebar, you can access some SEO settings while writing posts. Here you can edit things like the post URL, the post's title tag and meta description that appears in search engines, and more.
To edit SEO using the blog post sidebar:
- Go to your Blog in your site's dashboard.
- Select the blog post you want to edit.
- Click SEO in the left sidebar.
- Customize the following SEO settings:
- URL slug: This text is the last part of your page's URL. You should only change this if it's necessary to reflect the content of your page. We recommend keeping it short and easy to read.
- Title tag: Add a title tag that summarizes the content of the page. Enter your title tag as it is meant to appear on search engines results.
- Meta description: Add a short meta description of the content on the page. This description helps users decide if the blog post is relevant to them.
- Click the Let search engines index this page toggle to set whether search engines can crawl and index your page or not:
- Enabled: Search engines will index your page. People can find your page when searching keywords and phrases in search engines.
- Disabled: Search engines will not index your page. People cannot find your page when searching keywords and phrases in search engines.
- Click Publish.
Adding and assigning categories using the blog post sidebar
You can easily add and assign categories to a blog post as you create your post. You can also create new categories if you don't have a suitable existing category.
To add and assign categories using the blog post sidebar:
- Go to the Blog tab in your site's dashboard.
- Click Manage My Blog.
- Click Create New Post or Edit to edit an existing post.
- Create or edit the post to include the relevant information.
- Click the Categories tab on the left sidebar.
- Do one of the following:
- Select a category from the existing options.
- Create a new category for your post.

Tip:
You can assign a post to more than one category.
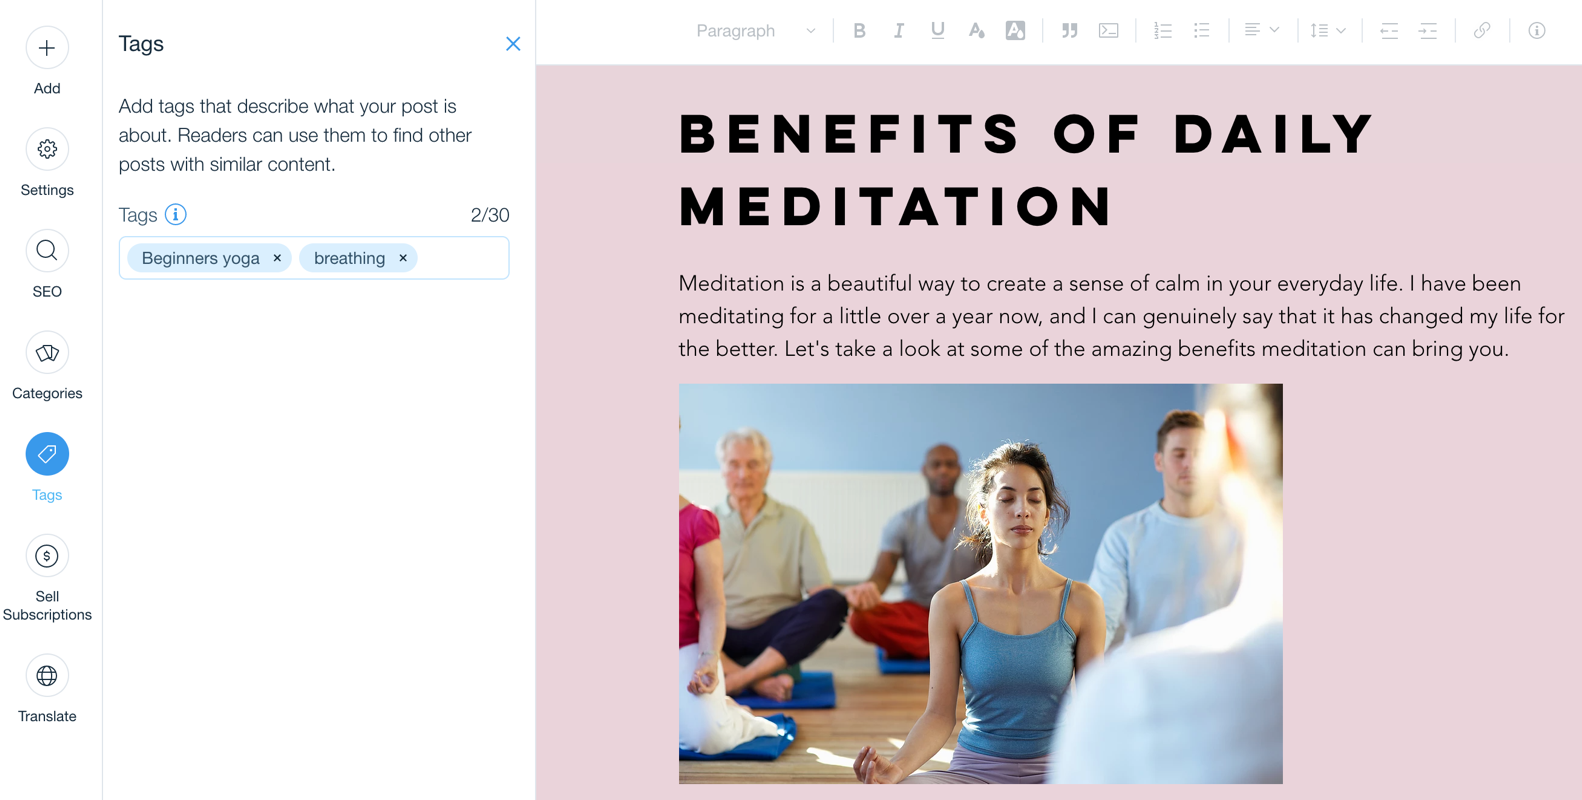
Adding and assigning tags to blog posts
You can add keywords known as tags that help organize and describe your post.
To add and assign tags to blog posts:
- Go to the Blog tab in your site's dashboard.
- Click Manage My Blog.
- Click Create New Post or Edit to edit an existing post.
- Create or edit the post to include the relevant information.
- Click the Tags tab on the left sidebar.
- Click the text box and add some keywords that define your post.
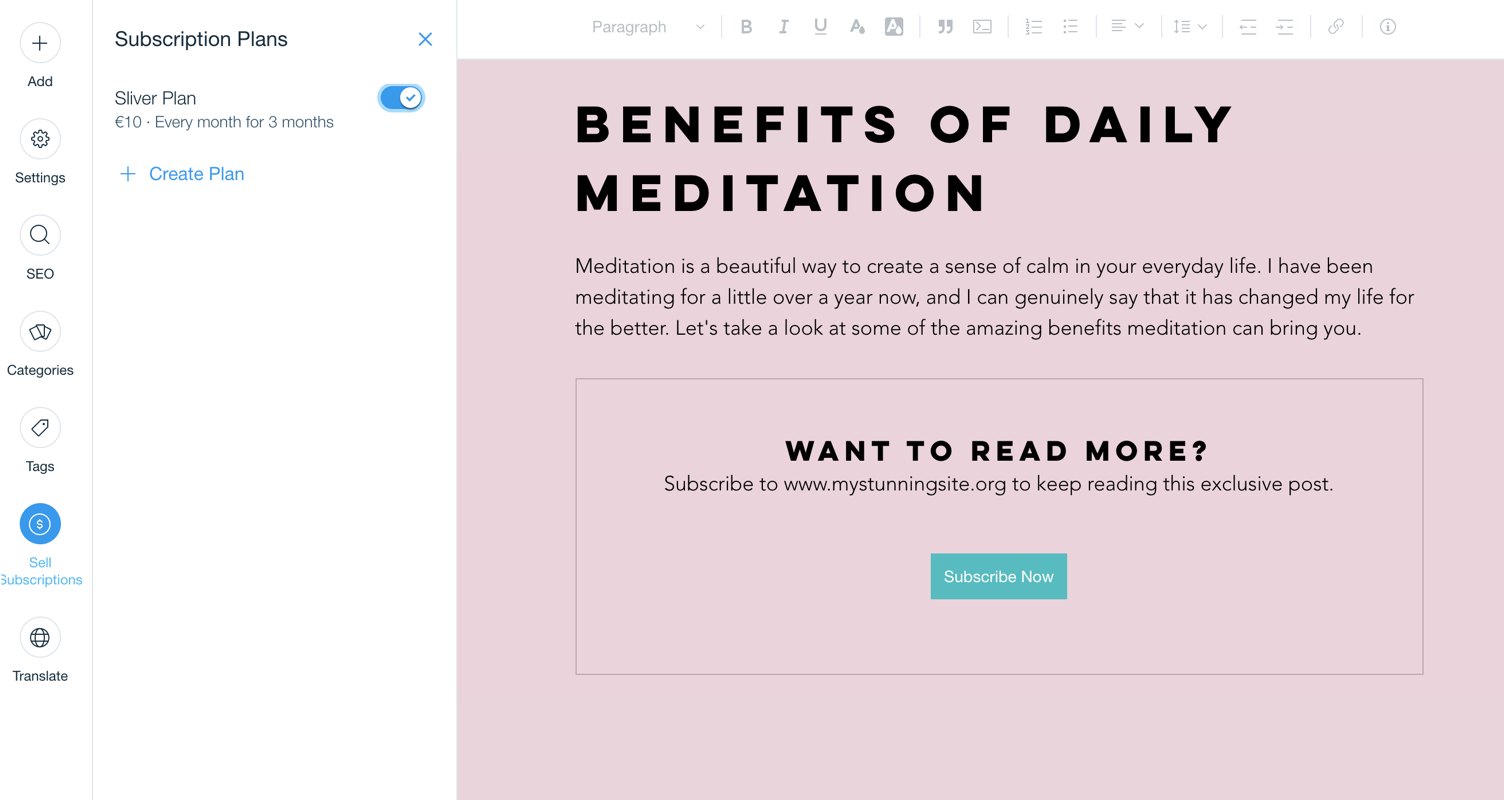
Adding a subscription plan to a blog post
Monetize your blog by adding paid subscription plans to your posts.
To add a subscription plan to a blog post:
- Go to the Blog tab in your site's dashboard.
- Click Manage My Blog.
- Click Create New Post or Edit to edit an existing post.
- Create or edit the post to include the relevant information.
- Click the Sell Subscriptions tab on the left sidebar.
- Do one of the following:
- Click Create Plan to create a new plan.
- Click the toggle next to the relevant existing plan to enable it.
Tip:
Click here to learn more about creating blog post subscriptions.
Translating your blog post
Use this tab to manage your translations.
To translate your blog post:
- Go to the Blog tab in your site's dashboard.
- Click Manage My Blog.
- Click Create New Post or Edit to edit an existing post.
- Create or edit the post to include the relevant information.
- Click the Translate tab on the left sidebar.
- Add Wix Multilingual to your site and start translating your categories and posts.
Hire a Professional WriterGet the content you need for your website. Hire a writer from the Wix Marketplace to create text that fits your message and brand.
