

CMS: Adding a Dynamic Page for Managing Items on Your Live Site
11 min
In this article
- How the dynamic Manage Item page works
- Input elements let users select and edit collection items
- How authorized site viewers use this Manage Item page
- Permissions in the collection
- Permissions in the page settings
- Adding and setting up the dynamic Manage Item page
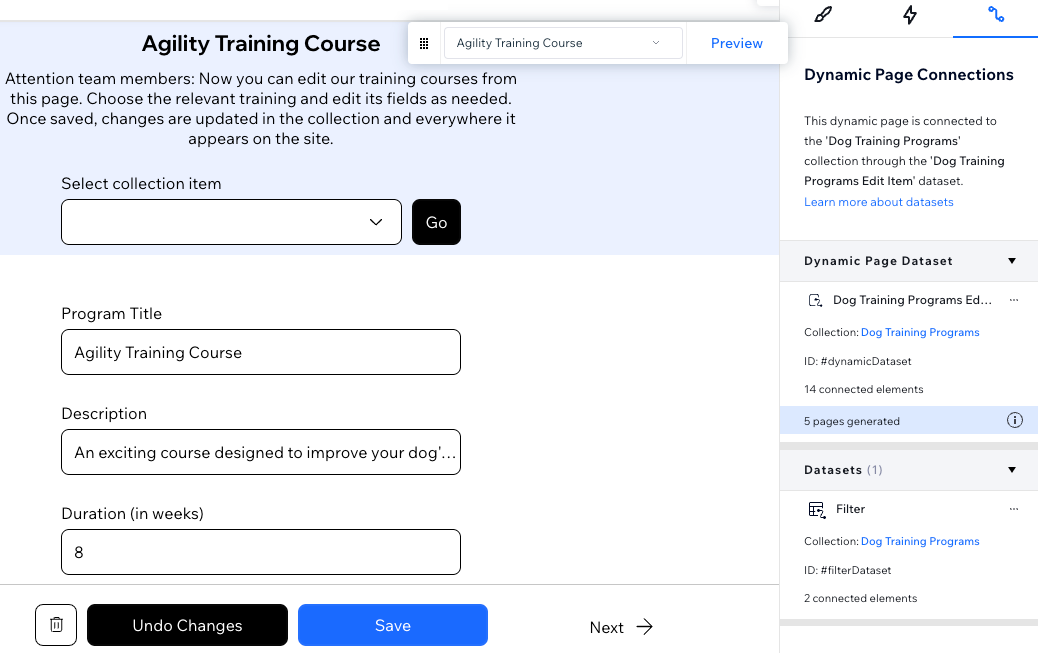
Add a pre-built dynamic page to your site that lets collaborators or site members manage CMS collection content directly from your live site. This Manage Item page includes a version for each collection item, each with its own dynamic URL. Visitors select the item they want to manage using a dropdown input, which navigates them to the relevant page version. From there, they can use input elements and buttons connected to dataset actions to add, edit, or delete content.
You can control which roles have access to this page, including specific collaborator roles, and tailor their permissions to view, add, update, or delete collection items. This allows you to customize access levels to suit your site’s needs and ensure that sensitive collection data is handled only by trusted individuals. Just like any dynamic page, this page can be customized to fit your site’s design and functionality.
Additionally, you can choose to only allow certain site members to access the page itself from permissions in the page settings. This lets you restrict access to all site members, specific member roles, or members with pricing plan subscriptions.
Important:
This feature is available in the Studio Editor only. However, you can create a similar page in the Wix Editor with input elements and interactive buttons. Learn how to create a page in the Wix Editor that lets members manage collection content from your live site.
How the dynamic Manage Item page works
View details about how this dynamic Manage Item page is set up and used below.
Input elements let users select and edit collection items
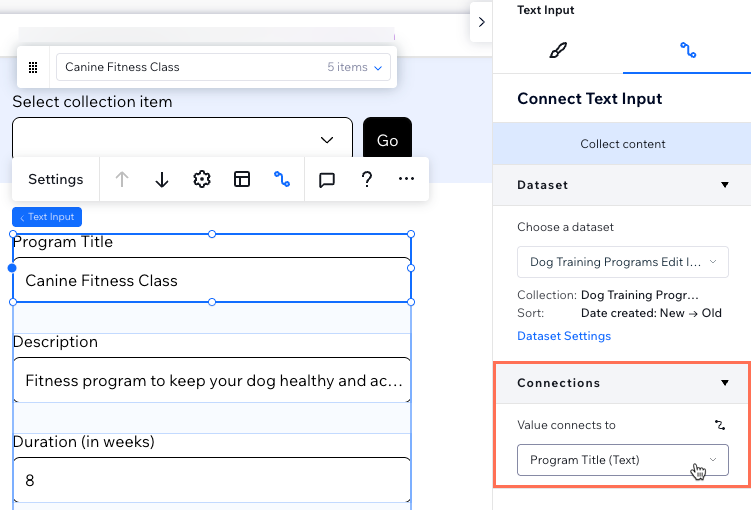
The dynamic Manage Item page uses a dynamic URL that changes depending on which collection item is selected on the page. The page includes input elements that are pre-connected to each of the collection's supported fields. Authorized site members and collaborators can use these input elements to update the field values of the selected collection item.
When you create a dynamic Manage Item page, the following supported collection field types automatically connect to input elements on the page: Text, Number, URL, Boolean, Date, Time, Image, Rich Text, Address
How authorized site viewers use this Manage Item page
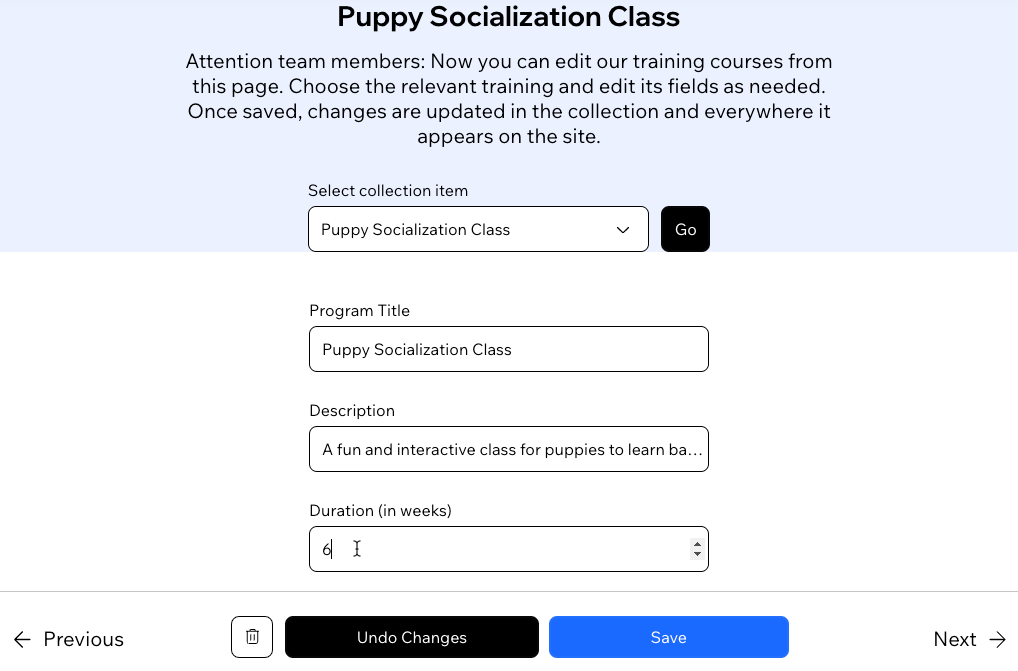
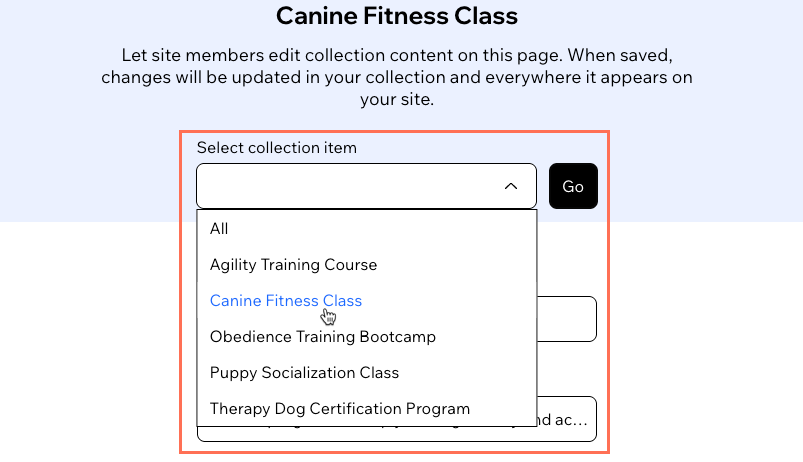
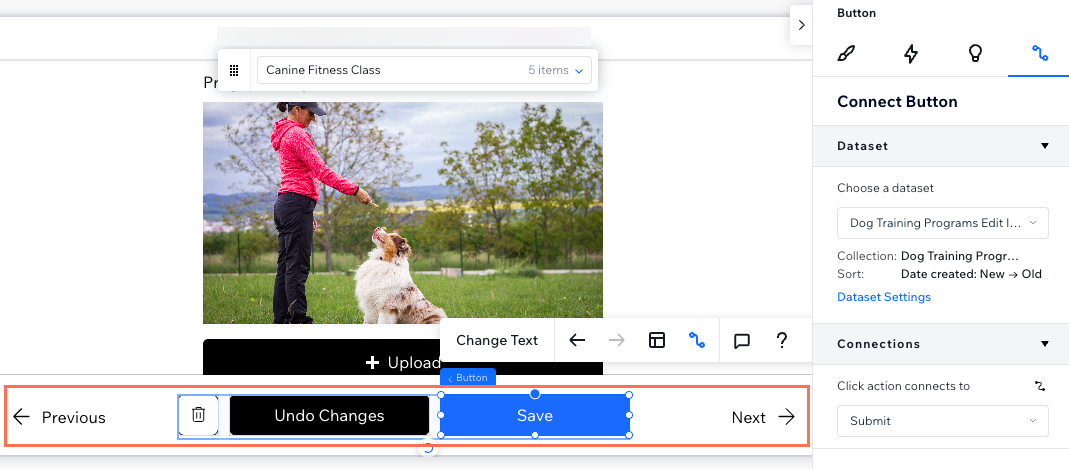
On your live site's Manage Item page, visitors first choose which collection item they want to edit from the dropdown input element at the top. This dropdown input connects to a 'Read' mode dataset named 'Filter', and is set to filter the dataset by whichever item the visitor selects.
The site visitor then clicks the 'Go' button, which connects to the same 'Filter' dataset. The 'Go' button has a click action that takes visitors to the selected item's version of the page. As a result, the URL ending of the page changes to reflect the selected item and the inputs display the item's existing field values.
The visitor can now begin editing the item's existing field values displayed in the input elements. The updated values do not save to the collection until the visitor clicks the 'Save' button.
Visitors can choose from the following interactive buttons at the bottom of the page:
- Save: The 'Save' button causes the input elements to update the existing collection item's field values. After updating the values in the input elements, users must click the 'Save' button to submit these changes and update the selected item. This button connects to the dataset's 'Submit' click action.
- Delete: The 'Delete' button completely removes the item and its field values from the collection. This button connects to the dataset's 'Delete' click action.
- Undo Changes: The 'Undo Changes' button reverts the input elements in case the user made changes to them but hasn't submitted the changes. This button connects to the dataset's 'Revert' click action.
- Previous / Next: The 'Previous' and 'Next' buttons load the previous or next item's unique version of the page. This lets visitors cycle through each collection item that is read by the dataset. These buttons connect to the dataset's 'Previous / Next dynamic page' click action.
Dynamic Manage Item pages are configured to update existing collection items:
The Manage Item page is set up to allow visitors to update existing collection items. If you want them to add new items to your collection from this page, you can add a 'New' button and connect it to the same dataset as your input elements. Alternatively, you could connect input elements and a 'Submit' button to a separate 'Write' mode dataset that connects to your collection. Visitors can also use the Data API to add items as long as the collection permissions allow 'Add' access.
Permissions in the collection
By default, collection permissions are set to 'Show content'. This means that only site owners and CMS admin collaborators can use the inputs to update the collection items. To allow other people to interact with this page, adjust the collection's permissions to specify who can view, add, update, and delete content.
If you want to control the access level of specific collaborator roles more precisely, you can use the 'Advanced' permissions settings. Advanced permissions are particularly useful for managing sensitive information, such as user submissions. By limiting access, you simplify the collaborator's navigation and ensure only relevant collections are visible to them.
Show me how to control access levels for specific collaborator roles


Permissions in the page settings
By default, the Manage Item page's permissions are set to "Members only - All members", which also grants page access to site collaborators. You can fine-tune the permissions page settings if needed. For example, you could set the page permissions to "Members only - Specific members", then allow access to members with specific member roles or members who purchased a pricing plan.
Learn more about restricting pages to specific types of members.

Adding and setting up the dynamic Manage Item page
In your editor, add a dynamic page for the relevant collection and choose the Manage item page option. Adjust your collection's permissions and set the page permissions to limit access to collaborators or members with specific roles.
To add and set up a dynamic page for managing content:
- Go to your editor.
Note: This feature is available in the Studio Editor only. - Click CMS
 on the left side of the editor.
 - Click Your Collections.
- Hover over the relevant collection and click the More Actions icon
 .
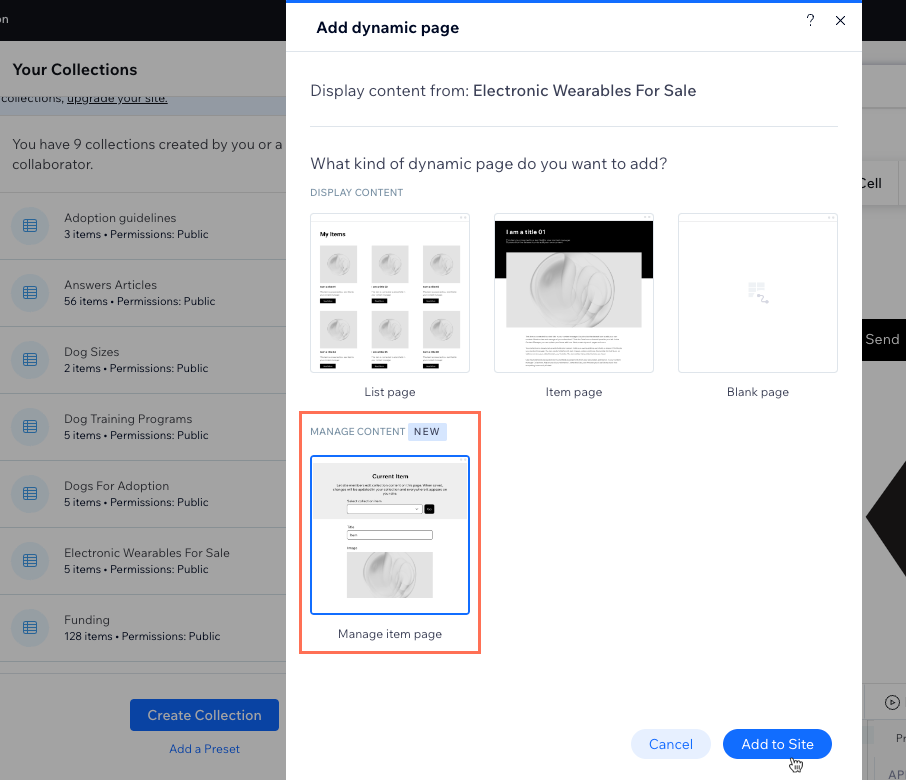
. - Select Add dynamic page.

- Select Manage item page and click Add to Site.
- Click Create Page.
- Modify the collection permissions:
- Click Go to permissions in the banner at the bottom of the editor to edit the collection permissions.
Tip: If the banner disappears before you click it, follow the steps below to go to your collection permissions:- Click CMS on the left, then click Your Collections.
- Hover over the relevant collection, click the More Actions icon
 and select Permissions & privacy.
- Click CMS
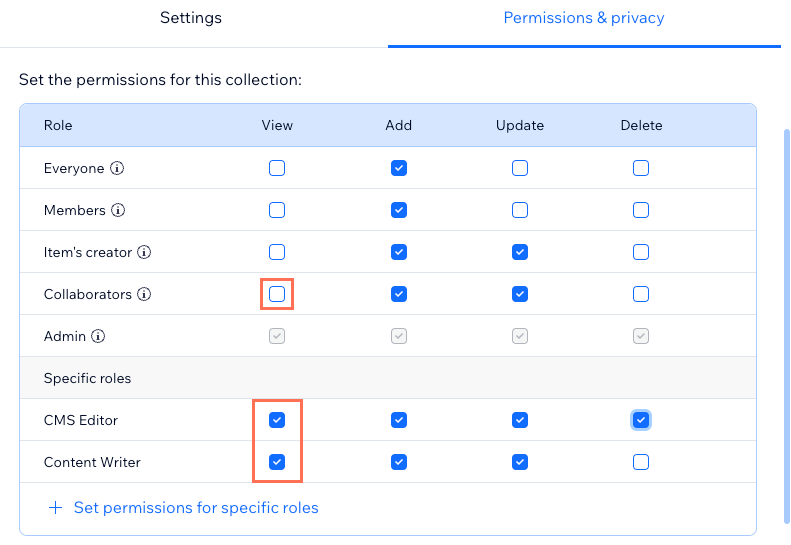
- Choose which permissions you want the collection to have:
Tip: We recommend choosing Advanced for the most control over who can view, add, update, and delete collection items.- Show content: Allow everyone or only site members to view the collection content on your live site. Admins and collaborators with CMS access always have full access to view, add, update, or delete collection items.
- Collect content: Allow everyone or only site members to add new items to the collection from your live site. Also, specify who can view the content. Admins and collaborators with CMS access always have full access to view, add, update, or delete collection items.
- Advanced: Set custom permissions to control what people with each access level can do with the collection content:
- (Optional) Set permissions for specific collaborator roles:
Note: By default, all collaborators with CMS access roles share the same permissions unless you create permissions for specific collaborator roles. - Click + Set permissions for specific roles.
- Click the checkbox next to each collaborator role that you want to set specific permissions for. Only roles that allow for CMS access are available. Click Roles & Permissions at the bottom if you need to create or modify any collaborator roles.
- Click Done.
- Click the relevant checkboxes next to each role to choose whether users with the role can view, add, update, or delete collection items. For example, uncheck the View permission next to any collaborator roles that you want to hide the collection from. You can select or deselect the Add, Update, and Delete checkboxes to further adjust the access levels of your collaborators.
- (Optional) Set permissions for specific collaborator roles:
- Click Save.
- Click Go to permissions in the banner at the bottom of the editor to edit the collection permissions.
- Edit the page permissions to determine who has access to your Manage Item page:
- Click Pages
 on the left side of the editor.
 - Hover over your dynamic Manage Item page and click the More Actions icon
 .
.
Tip: By default, the page is titled: {Collection Name} (Manage Item) - Select Settings.
- Click the Permissions tab at the top.
- Select the relevant option(s) under Which members can access this page?.
Tip: Learn more about restricting pages to specific types of members.
- Click Pages
- (Optional) Modify any of the input elements or buttons that connect to your dataset and CMS collection:
- Click the relevant input element or button and select the Connected to CMS icon
 .
. - Edit the connections in the Inspector panel on the right. Learn more about connecting elements to a dataset to display collection content.
- Click the relevant input element or button and select the Connected to CMS icon
- Customize any other elements on the page you'd like to adjust. For example, you could edit the text near the top that explains to site members how to use the components to edit collection content.
- Click the Preview icon
 at the top right to test your Manage Item page in the admin role.
 - Click Publish when you are ready to make the changes go live.

Tip:
Add a link to your new dynamic Manage Item page so visitors with relevant permissions can access it on your live site.
