

CMS: Managing Collection Content from Your Live Site
20 min
In this article
- Step 1 | Create a form with input elements
- Step 2 | Connect the input elements to your collection
- Step 3 | Add and set up interactive buttons
- Step 4 | (Optional) Add a table to select and edit specific items
- Step 5 | (Optional) Add a filter to only show members items they created
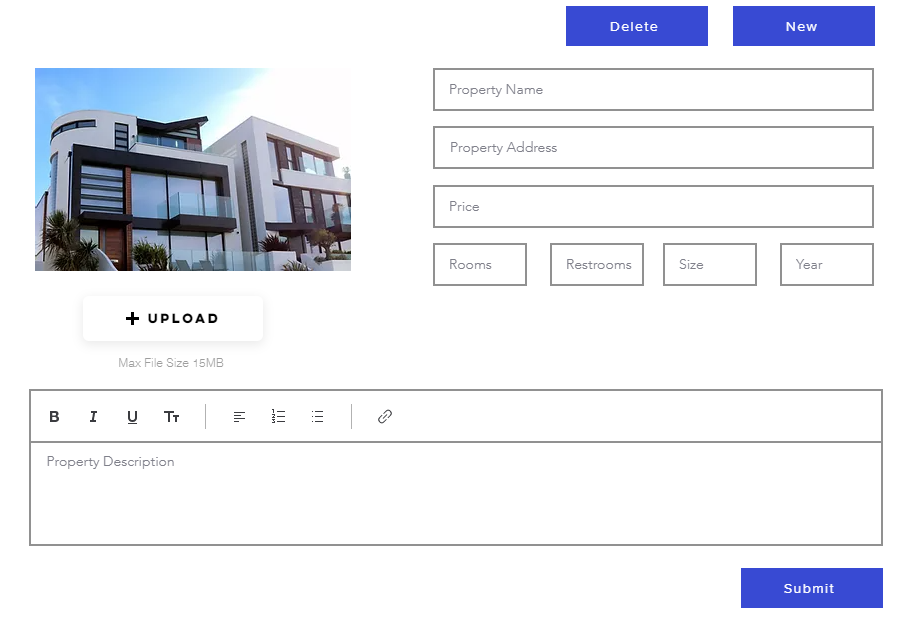
Manage your collection content directly from your live site by creating custom forms with input elements. This lets you gather and update information from site visitors in real time, keeping your site content fresh without backend access. For example, if you manage a real estate website, agents can submit and edit property listings directly on the site, ensuring accurate and current information.
Start by creating a form with input elements to collect content from visitors. Connect these elements to your collection, set up interactive buttons for actions like submitting or deleting data, and optionally add tables or filters to enhance the user experience.
Using the Studio Editor?
- We've simplified this process in the Studio Editor where you can add a dynamic manage item page. The dynamic manage page includes a pre-built page that allows authorized site visitors to manage collection content from your live site.
- You can also use Velo by Wix to streamline the process of creating content in your collection. Learn how to build a members area where visitors can easily view and update their personal profiles anytime.
Before you begin:
- If you haven't already, add the CMS (Content Management System) to your site.
- Create a collection that you want people to manage from the live site.
Step 1 | Create a form with input elements
Build custom forms for your site's specific needs by adding input elements to your site. The elements used to make up your form accept content such as text and file uploads from visitors. Your collection saves the content submitted through the form. Learn more about creating a form with user input elements.
Wix Editor
Studio Editor
- Go to your editor.
- Go to the page or section where you want to create a custom form.
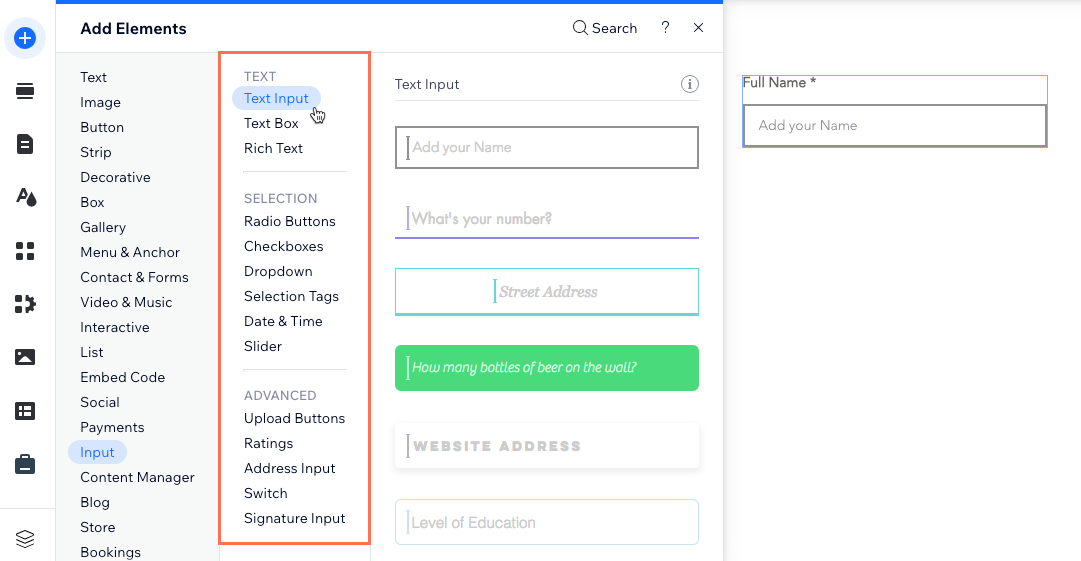
- Click Add Elements
 on the left side of the editor.
 - Click Input.
- Click the type of input element you want to add.
- Click and drag the relevant input element onto the page.
- Click the input element you added and select Settings.
- Fill out the settings. The options vary depending on which input element you selected.
- (Optional) Click the Layout
 and Design icons
  to change the layout or design.
 - Repeat steps 3-9 above to add as many input elements as your form needs.
Step 2 | Connect the input elements to your collection
Connect the input elements to a dataset that connects to the collection you want visitors to edit from the live site. Set the dataset mode that determines whether the dataset can read content from the collection, write content to the collection, or both. Then set the collection permissions that control which roles can view, add, update, and delete collection content.
Wix Editor
Studio Editor
- In your editor, click any of the input elements you just added.
- Click the Connect to CMS icon
 .
. - Connect the element to a dataset that binds to the collection you want to manage on the live site:
- (If necessary) Select Collect content in the panel on the right.
Tip: If you haven't added a dataset to the page yet, add a dataset first (see the next step) then select Collect content. - Click the Choose a dataset drop-down and select a dataset that connects to the collection you want to manage on the live site.
Note: If your page does not have a dataset yet, click + Add a Dataset to add one. - Click the Value connects to drop-down and select the field you want the input to submit to. The field type determines what kind of data you can store in the field.
Tip: To add and connect a new collection field, select + Add, enter a name for the field, choose the field type, and click Add.
- (If necessary) Select Collect content in the panel on the right.
- Set the dataset mode:
- Click Dataset Settings.
- Click the Dataset mode drop-down and choose an option:
- Write: The dataset can modify collection content, but cannot read content from it to show the content on the connected elements.
- Read & Write: The dataset can modify the collection content and read it to show it in the connected elements.
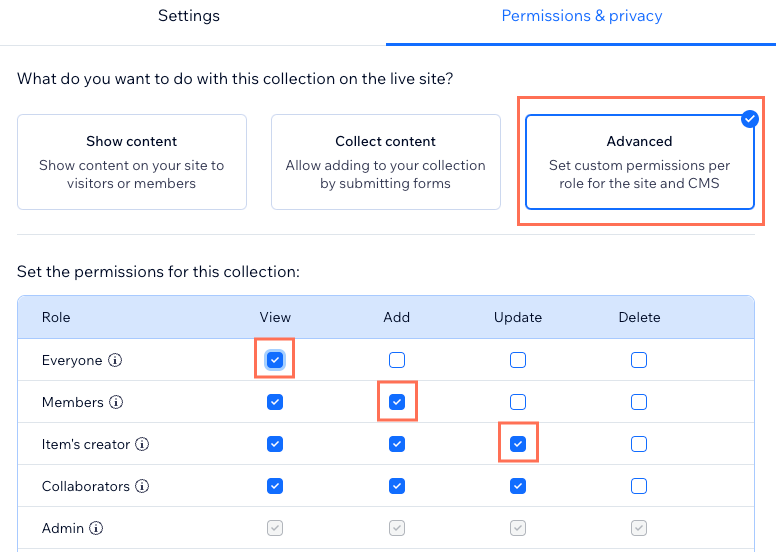
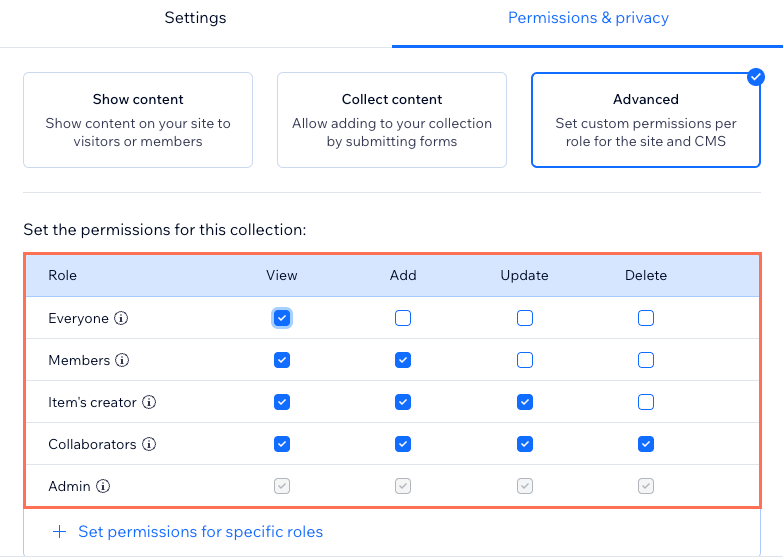
- Set the collection permissions:
- Click the permissions type next to Permissions.
- Click Advanced.
- (Optional) Click + Set permissions for specific roles to choose what each collaborator role has access to.
- Click the relevant checkboxes next to each role to choose whether visitors with the role can view, add new items, update existing items, or delete items:
- Everyone: This role applies to everyone who can access your live site. Selecting a permission for this role also selects it for the other roles in the table.
- Members: This role applies to site members only. Selecting a permission for this role also selects it for the 'Item's creator' role, the 'Collaborators' role, and any specific roles you add to the table.
- Item's creator: This role's permissions only apply to the specific items that a member creates themselves. For example, you can set permissions to allow the item's creator to update or delete only the items that they create. Selecting a permission for this role also selects it for the 'Collaborators' role and any specific roles you add to the table.
- Collaborators: This role applies to all collaborator roles with CMS access. Selecting a permission for this role also selects it for any specific collaborator roles you've set permissions for.
- Admin: This role applies to site owners and collaborator roles with CMS admin permissions. You cannot change the permissions of this 'Admin' role.
- Specific roles: If you add roles to the table, they apply to collaborators with specific CMS access roles. If you set permissions for a specific role, then deselect a permission in that role, the permission is also deselected in the main 'Collaborators' role.
- Click Save.
- Click Back to element at the top of the dataset settings panel to return to the element's connection options.
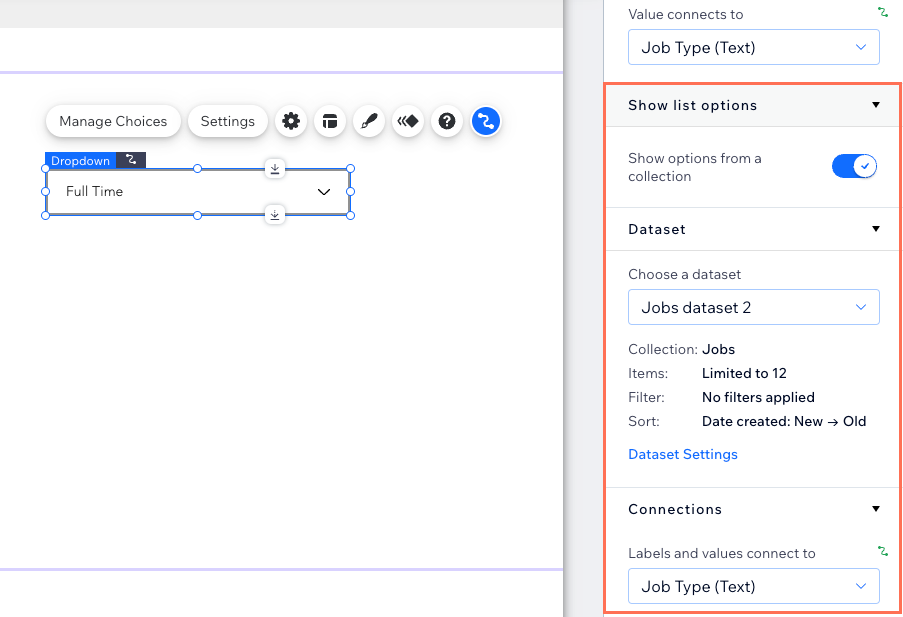
- (Dropdown and Selection Tags elements only) Choose how you want to manage the choices that visitors can select from in the element:
- Click the Show options from a collection toggle to choose where to manage the element's choices:
- Enabled: Use another CMS collection field for the choices. Connect the relevant dataset and choose the fields to use from the Labels and values connect to drop-down.
- Disabled: Click Manage Choices on the input element to set up the options visitors can select. Learn more about connecting Dropdown input elements or Selection Tags.
- (If enabled) For the collection you are using to display the options, set the dataset mode and collection permissions:
- Click Dataset Settings under the dataset that connects the list options.
- Click the Dataset mode drop-down and choose an option:
- Read: The dataset can read the collection content to show it on the connected elements.
- Read & Write: The dataset can modify the collection content and read it to show it in the connected elements.
- (Optional) Click the permission type next to Permissions to edit your collection's permissions & privacy settings. Click Save when you're done adjusting the permissions.
- Click the Show options from a collection toggle to choose where to manage the element's choices:
- Repeat these steps for each of your custom form's input elements.
Step 3 | Add and set up interactive buttons
After visitors make selections in the input elements, they need to click a separate button to submit the data. Create a 'Submit' button by connecting it to the dataset that connects to the collection being edited. Then set the button's click action to 'Submit'.
You can add other buttons for specific editing actions such as creating new items, reverting selections, or deleting items. To let visitors cycle through the displayed items, you could add navigational 'Next / Previous item' buttons. Learn more about the various dataset click actions you can set for buttons or images.
Wix Editor
Studio Editor
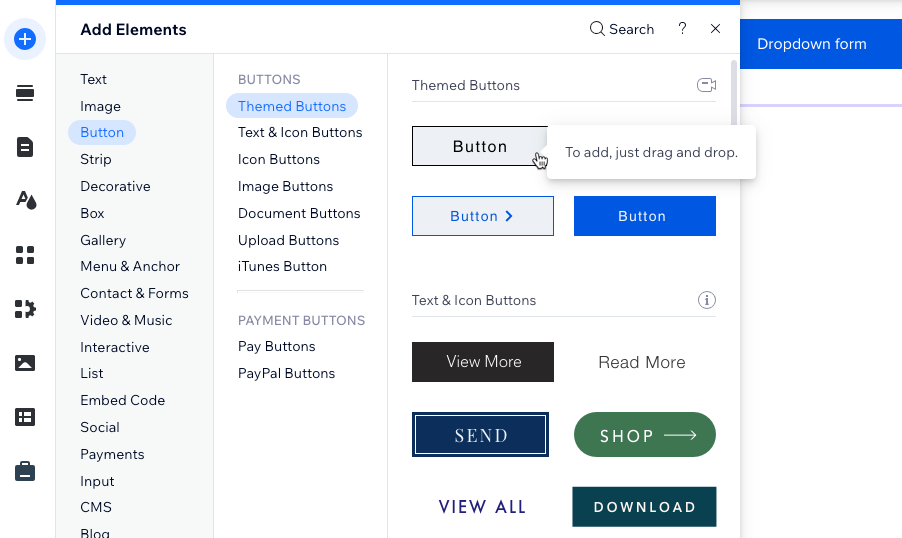
- Click Add Elements on the left side of the editor.
- Click Button.
- Click and drag the button you want to use as your submit button onto the page. You can use any of the following button types: Themed Buttons, Text & Icon Buttons, Icon Buttons, or Image Buttons.
Tip: Alternatively, you can add an image and use it as your submit button.
- Click Change Text & Icon and enter the text you want to display on the button (e.g. "Submit").
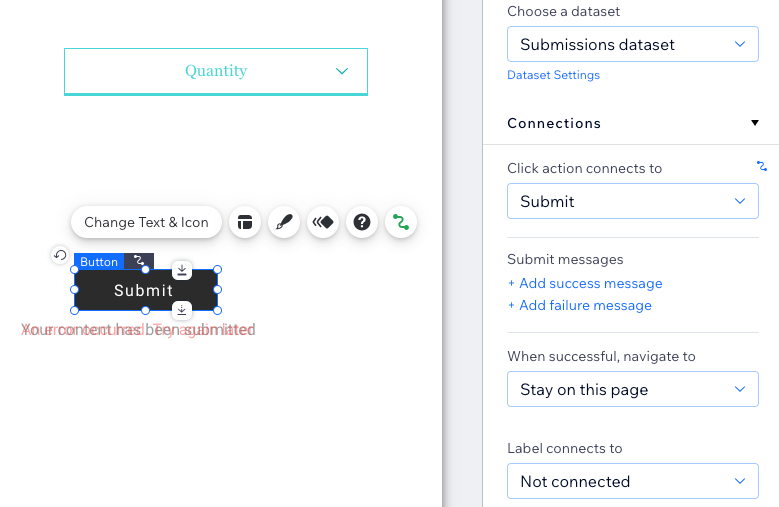
- Click the Connect to CMS icon .
- Click the Choose a dataset drop-down and select the dataset connected to your submissions collection.
- Click the Click action connects to drop-down and select Submit.
- (Optional) Add success and failure messages that appear when submissions are submitted successfully or unsuccessfully:
- Click + Add success message then click + Add failure message.
- Click and drag both messages to the place where you want them to appear. They can overlap because the messages do not display at the same time.
- Click Edit Text on each message to edit the messages.
- Select the button and click the Connect to CMS icon . Then click the When successful, navigate to drop-down, and select an option:
- Stay on this page: The visitor stays on the same page after submitting the form.
- A link: The visitor is redirected to another page after submitting the form. Click Choose under Choose a link and set up the link.
- Click the button and select the Design icon
 to customize the appearance of your submit button.
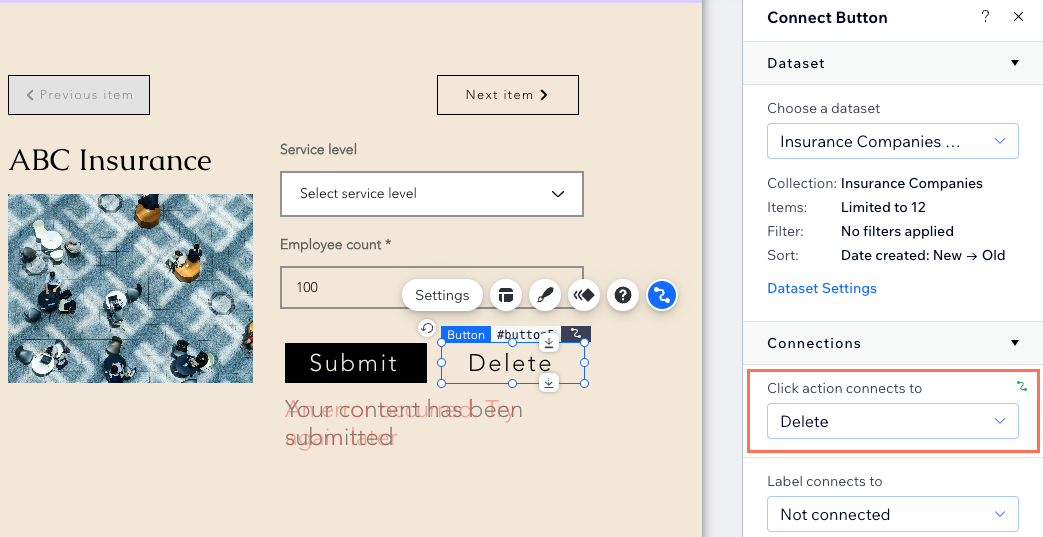
 - Add more interactive or navigational buttons:
- Repeat steps 1-3 above to add more buttons.
- Select the relevant button and click the Connect to CMS icon .
- Click the Choose a dataset drop-down and select the dataset that connects to the collection you want visitors to be able to edit.
- Click the Click action connects to drop-down and choose the click action you would like the button to have (e.g. New, Revert, Delete). Learn more about all the available dataset click actions.
- Repeat these steps for each interactive button you need.
- Customize each button's design, layout, and settings.
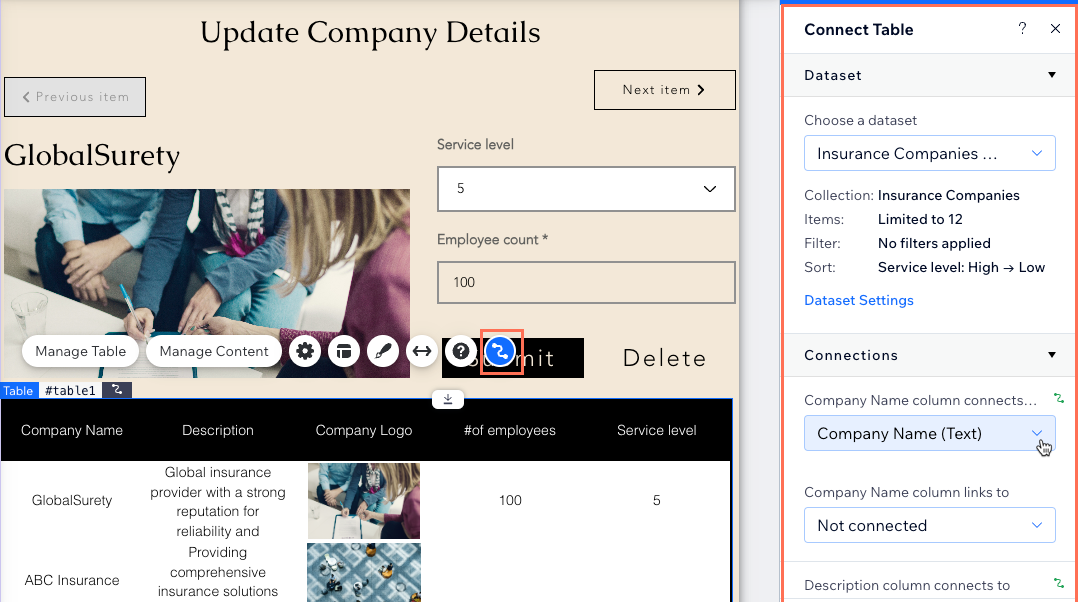
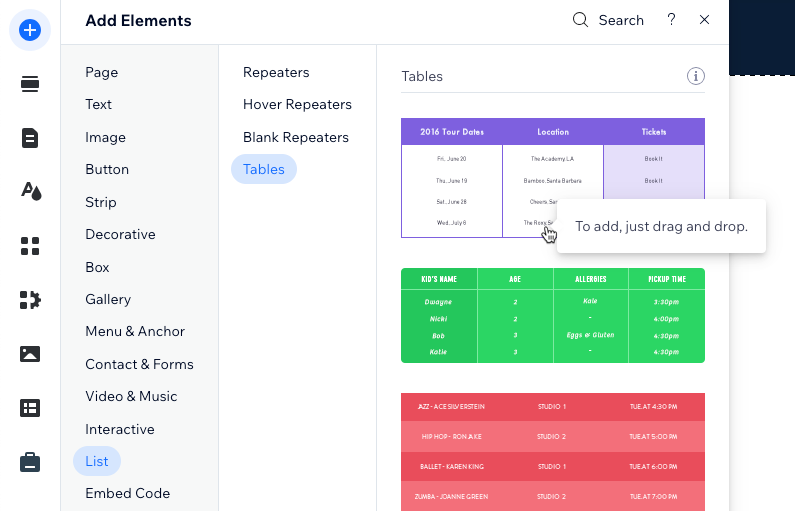
Step 4 | (Optional) Add a table to select and edit specific items
You can add a table that displays the collection content visitors will edit. Visitors can click in the table to select the item they want to edit, then use the input elements and interactive buttons to add or update the content.
Alternatively, you could add text and images and connect them to the same dataset as your inputs. As visitors click your navigational buttons to cycle through the items, the connected text and images will dynamically adjust to show the content the visitor is editing.
Wix Editor
Studio Editor
- Go to your editor.
- Click Add Elements on the left side of the editor.
- Click List.
- Click Tables.
- Click and drag the table you want to use onto the page.
- Click the Connect to CMS icon .
- Click the Choose a dataset drop-down and select the dataset that your input elements also connect to.
- Click the relevant drop-downs under Connections to choose which collection fields connect to each column.
- Customize your table.
- Publish your site if you're ready to make the changes go live.
Step 5 | (Optional) Add a filter to only show members items they created
You can set up the page so that everyone can view the collection items, but when site members log in, they can only view and update items they created themselves. This way, when site members log in to update their own data, they won't have to scroll through all the items created by other members.
To do so, add a dataset filter for the Owner (Text) field set to is logged in. You should also set the following advanced collection permissions:
- View: Everyone
- Add: Members
- Update: Item's creator
- Delete: Item's creator or Collaborators (depending on who you want to be able to delete the items)
Important:
The Owner (Text) field is only available as a dataset filter on regular datasets. Dynamic page datasets do not have this option. If you want to use this feature on a dynamic page, you can add a regular dataset to the page and connect it to the relevant elements. Then, add the Owner (Text) field dataset filter to this regular dataset.
Wix Editor
Studio Editor
- Go to the relevant page in your editor.
- Go to the relevant dataset settings:
- Click CMS
 on the left.
 - Click Manage Page Connections.
- Click the More Actions icon
 next to the relevant dataset and select Dataset settings.
- Click CMS
- Click + Add Filter under Filter.
- Click the Field drop-down and select the Owner (Text) field at the bottom of the list.
- Leave the Condition set to is and the Status set to logged in and click Add Filter.

- If needed, edit the collection permissions.
- Publish your site when you are ready to make the changes go live.
