

CMS: Setting Up the Selection Tags Input Element and Managing Tags
16 min
In this article
- Using the selection tags input element to filter content on your live site
- Using the selection tags input element to collect content from site visitors
- Managing tags in your CMS collection
Give visitors a way to filter the items that appear on your live site or let them submit choices to your collection with the selection tags element. In your CMS (Content Management System) collection, you add the Tags field and manage the values associated with each item. If you need to apply changes to a tag value, the changes automatically apply to every item using the tag, so you don't have to manually edit them everywhere in your collection.
Using the selection tags input element to filter content on your live site
Connect the selection tags input element to the same dataset that connects to a repeater or gallery. Then set the element to filter content and choose which collection field's values you want to show as filter options in the selection tags element. When visitors click these filter options in the element, the repeater or gallery only displays items that have a matching field value.
You can also apply advanced filtering conditions to choose an operator that controls how the filter is applied (e.g. Is any of, Equals any of, Includes any). Any filters or sorts you apply to the dataset also apply to the connected elements. This means you can add filters to the dataset to exclude items from appearing and add sorts to control their order.
Wix Editor
Studio Editor
- Go to your editor.
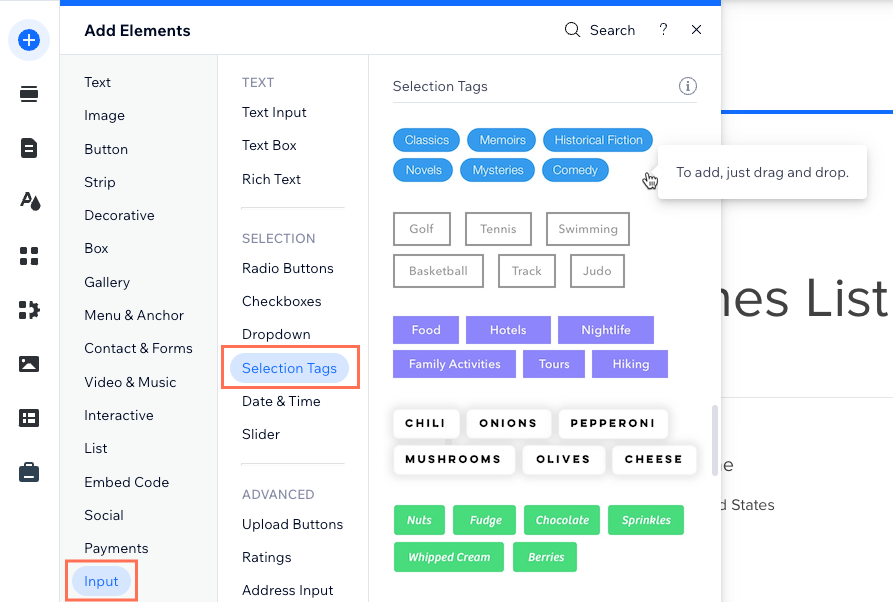
- Add the selection tags input element:
- Go to the page or section where you want visitors to filter content by tags.
- Click Add Elements
 on the left side of the editor.
 - Click Input.
- Click Selection Tags.
- Click and drag the relevant selection tags element onto the page.
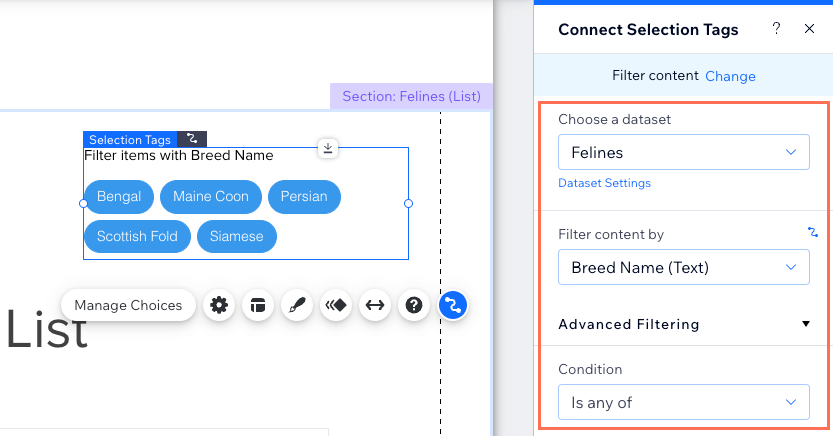
- Connect the selection tags element to the CMS:
- Click the Connect to CMS icon
 on the selection tags element.
 - Select Filter content in the Connect Selection Tags panel on the right.
- Click the Choose a dataset drop-down and select the same dataset that connects to the elements (e.g. repeater, gallery, table) that you want visitors to filter.
- Click the Filter content by drop-down and choose the field that visitors will use to filter the content.
Tip: To add a new field to your collection and use it for filtering content, select + Add, then enter the field name and select a Text, Number, Tags, or Reference field type. You can add content to the field in your CMS collection later. - (Optional) Click the Condition drop-down and choose an operator that controls how the filter is applied (e.g. Is any of, Equals any of, Includes any).
Note: The conditions vary depending on the connected field type.
- Click the Connect to CMS icon
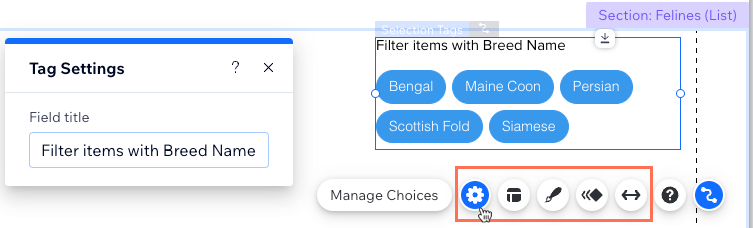
- Customize the selection tags input element:
- Click the Settings icon
 to edit the Field title.
 - Click the Layout icon
 to set the text indentation, padding, spacing and alignment.
 - Click the Design icon
 to choose a preset design and customize it further.
 - Click the Animation icon
 to choose and customize an animation effect.
 - Click the Stretch icon
 to set the element to full width.
- Click the Settings icon
- Click Preview to test your selection tags element.
- Click Publish if you are ready to make the changes go live.
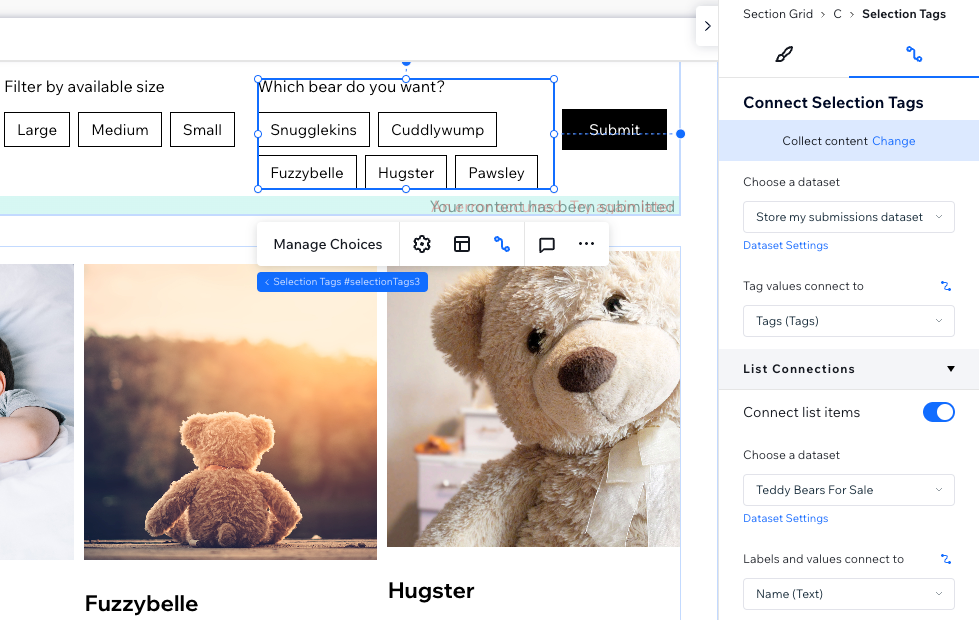
Using the selection tags input element to collect content from site visitors
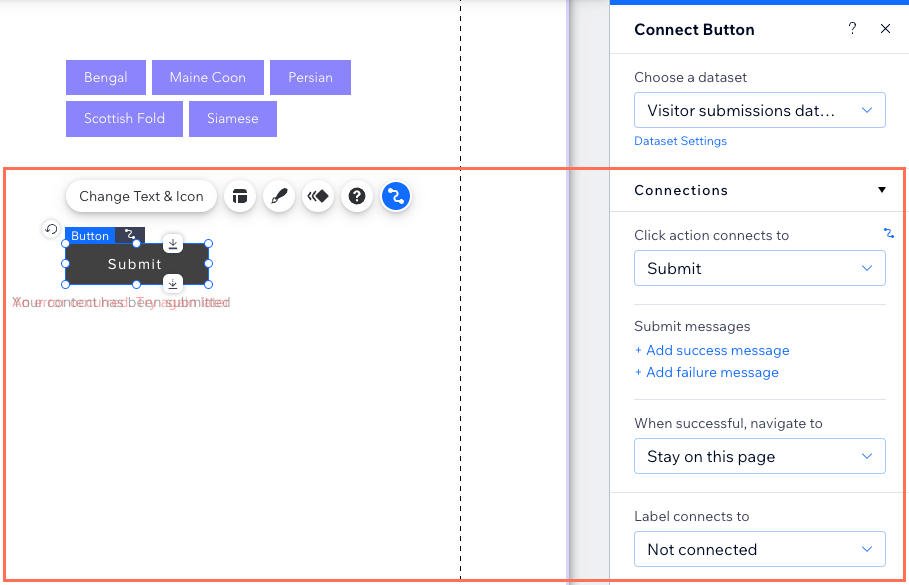
Use the selection tags input element to collect responses from visitors. You can use a collection field for the choices or manage the choices in the element itself. When visitors select an option from the selection tags element and press a 'Submit' button, their submission is saved to the relevant field in the collection you choose.
Wix Editor
Studio Editor
- Go to your editor.
- Add the selection tags input element:
- Go to the page or section where you want visitors to submit their selection.
- Click Add Elements on the left side of the editor.
- Click Input.
- Click Selection Tags.
- Click and drag the relevant selection tags element onto the page.
- Connect the selection tags element to the CMS collection where you will store the submissions:
- Click the Connect to CMS icon on the selection tags element.
- Click Collect content.
- Click the Choose a dataset drop-down and select the relevant dataset. Alternatively, click Add a Dataset to create a new one, then choose the collection to connect, enter the dataset name and click Create.
- Click the Tag values connect to drop-down and choose the Tags field in which you will store the submissions.
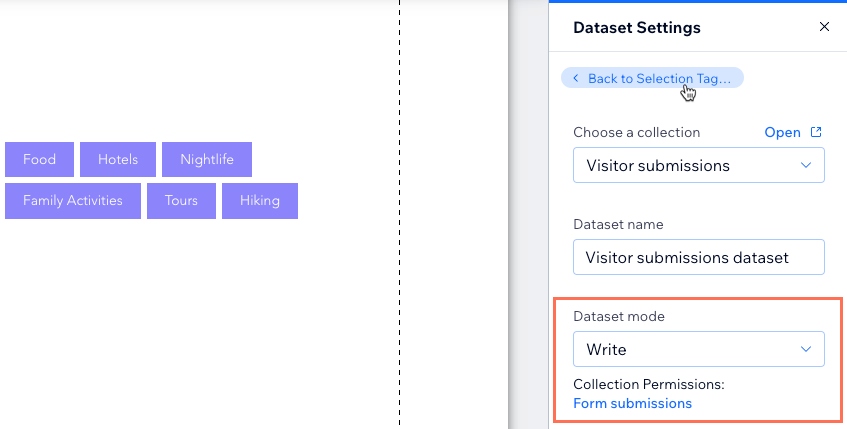
Tip: To add a new field for storing submissions, select + Add, then enter the field name and click Add. - Set the dataset mode and collection permissions:
- Click Dataset Settings in the panel on the right.
- (Optional) Click the permission type next to Permissions to determine who can view, add, update, or delete collection content.
- Click the Dataset mode drop-down and select the relevant option:
- Write: Connected input elements can add new items to the collection, but cannot edit existing items.
- Read & Write: Connected elements can update existing items in the collection. If you connect a 'New' button, visitors can use it to update existing items and add new items to your collection.
- Click Back to Selection Tags at the top of the Dataset Settings panel.
- Click the Connect to CMS icon
- Click the Show options from a collection toggle to choose where to manage the choices that appear in the selection tags element:
- Enabled: Use a field from another CMS collection for the choices. Choose a dataset that connects to the collection that has the field you want to use as the choices. Then click the Labels and values connect to drop-down and select the Text or Number field you want to use or select + Add to create a new field for the choices.
- Disabled: Click Manage Choices on the selection tags element to create and manage the choices in the element itself, rather than in a CMS collection.
- Customize the selection tags input element:
- Click the Settings icon to edit the Field title or require visitors to select a tag when submitting as part of a form.
- Click the Layout icon to set the text indentation, padding, spacing and alignment.
- Click the Design icon to choose a preset design and customize it further.
- Click the Animation icon to choose and customize an animation effect.
- Click the Stretch icon to set the element to full width.
- Click the Settings icon
- Add a 'Submit' button for visitors to click to submit after they make a selection in the selection tags element.
- Click Preview to test your selection tags element.
- Click Publish if you are ready to make the changes go live.
Managing tags in your CMS collection
After adding a 'Tags' field type to your collection, you can add the tag values for each item. When adding tag values to an item, a list appears where you can select from your existing list of tag values. If you need to rename, merge, or delete tags, the changes you make to the tags apply to all items and elements on your site where the tags are in use. This lets you manage your tags efficiently, without having to manually apply your changes to them in every item in which they appear.
To add and manage tags in your collection:
- Go to CMS in your site's dashboard. Alternatively, you can click CMS
 in your editor, then click Your Collections.
 - Click the relevant collection.
- Click Manage Fields.
- Click + Add Field.
- Select Tags and click Choose Field Type.
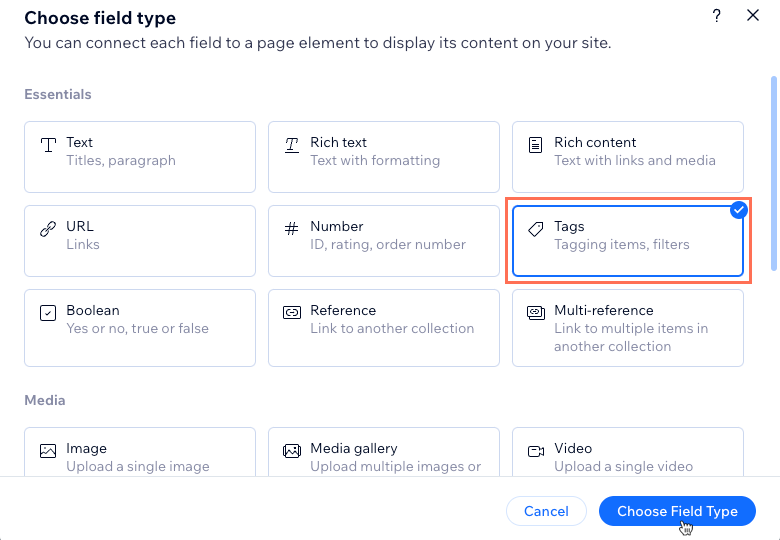
- Enter a name for the field in the Field name.
- (Velo only) If necessary, update the Field ID, which is used in the site's code. You cannot update this ID later.
- (Optional) Enter help text to include a tooltip in your collection next to the field name.
- Click Save.
- Click the 'Tags' field of the relevant item and choose what you want to do:
Add a new tag to an item

Add existing tags to an item

Rename, merge, or delete tags
 next to the relevant tag and select Merge.
Next
Learn how to add field validations to make the field a mandatory 'required' field in your collection.
