Pricing Plans: Making Site Pages Members-Only
3 min
Want to offer your subscribers access to exclusive content? Just connect your pricing plans to your members-only pages to set up a paywall.
Before you begin:
- Add the Pricing Plans app.
- Add a Members Area.
- Create the plans you want to offer on your site.
To make a site page members-only:
Wix Editor
Studio Editor
Wix Harmony Editor
- Go to your editor.
- Click Pages & Menu
 on the left side of the editor.
 - Hover over the relevant page and click the More Actions icon
 .
.
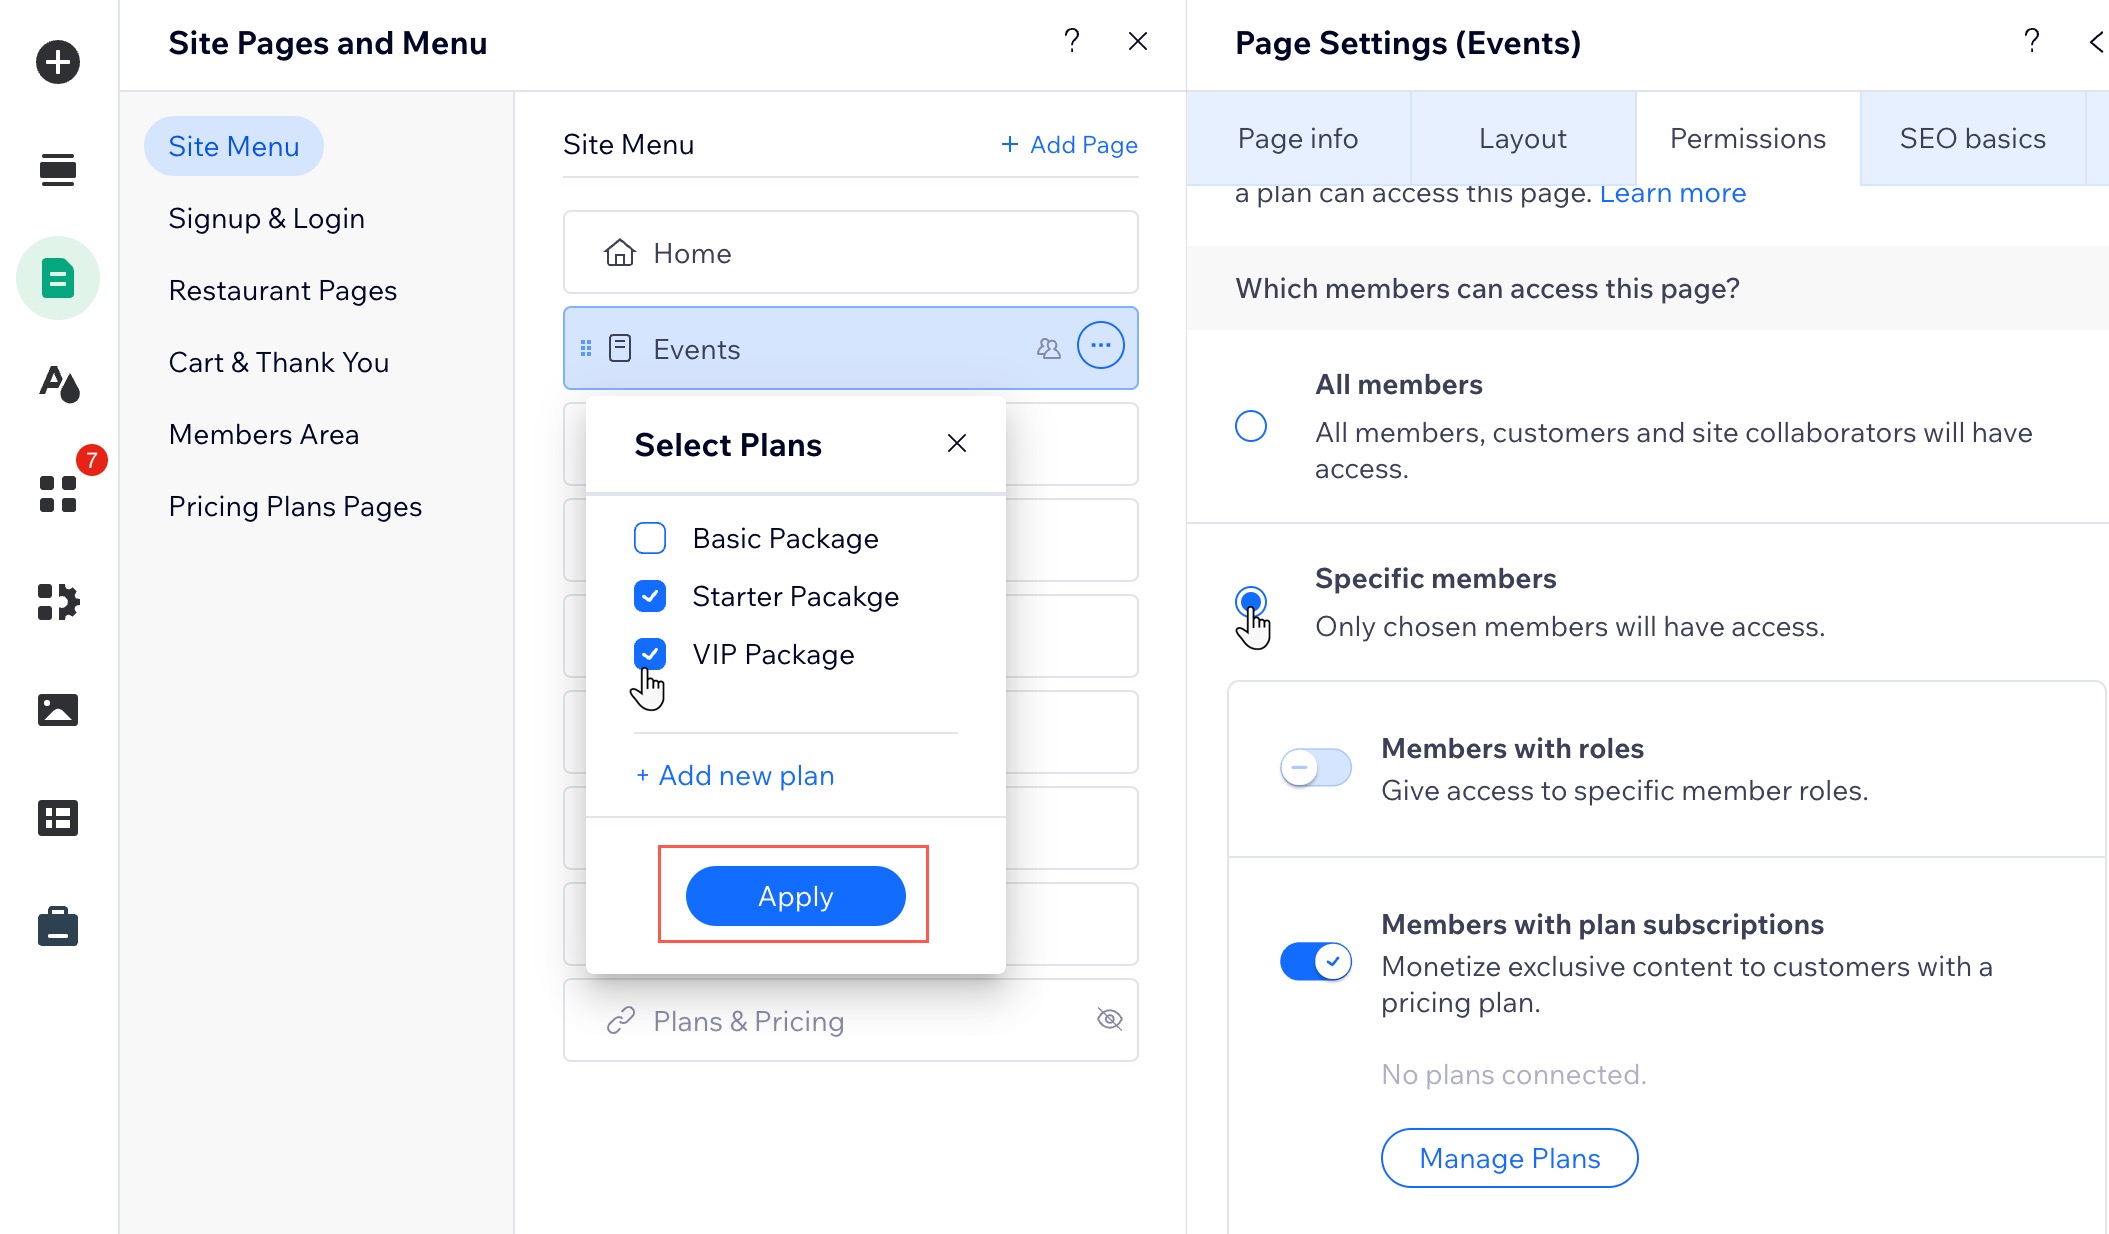
Tip: Make sure you don't restrict the main (original) Pricing Plans page. You can, however, restrict other pages where you display plans. You can also hide the main page. - Click Settings.
- Click Permissions.
- Click Site members.
- Select Specific members.
- Click the Members with plan subscriptions toggle to enable it.
- Click Manage Plans.
- Select the checkbox next to the relevant pricing plans.
- Click Apply.