

Studio Editor: A Guided Tour
8 min
In this article
- The canvas
- The top bar
- The left side panels
- The Inspector panel
- Breadcrumbs bar
- Additional panels
Welcome to the Studio Editor, our advanced and intuitive platform for agencies and enterprises to create exceptional sites.
In this article, we'll get to know every part of the Studio Editor - what it is, what it controls, and how it helps you work more efficiently.
Go to our Wix Studio Academy to check out additional Wix Studio webinars, tutorials, and courses.
The canvas
The canvas refers to the page you're designing, right in the middle of the editor.
You can set the default canvas size you want to work with, and drag the side handles to see how the page looks when resized.
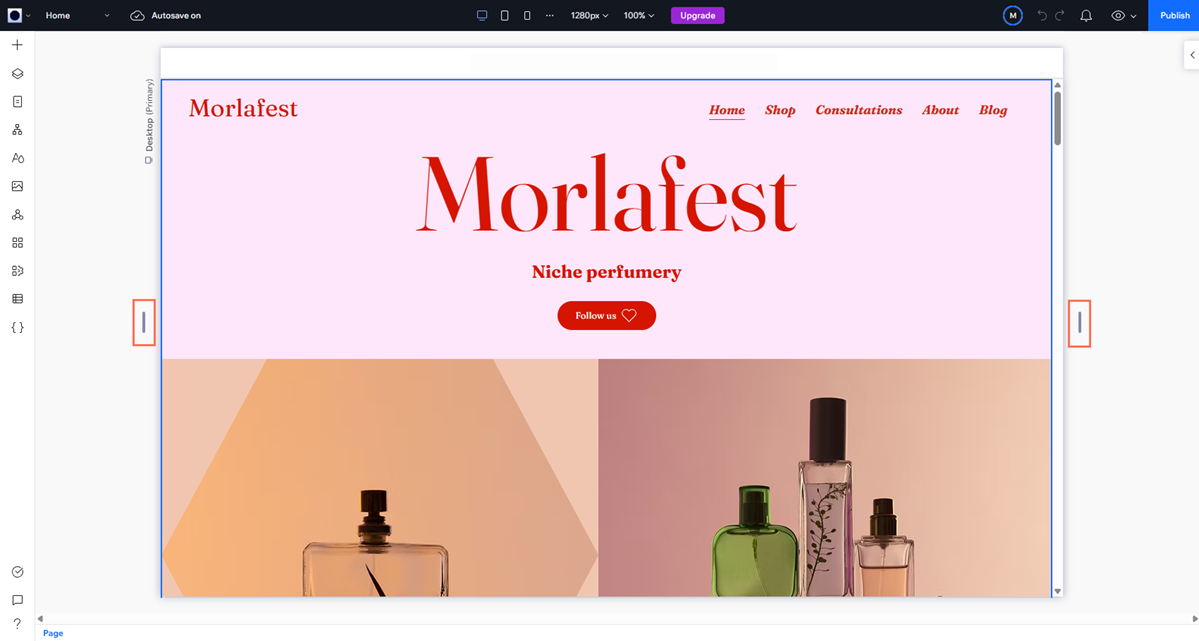
Clicking an element selects it, and opens a toolbar of options. These options vary depending on the specific element, helping you customize it to your needs.

You can hover over an element's label to select one of its parent elements instead.

Rotate elements on the canvas: 
Hover your cursor near a corner of the element until it turns into a rotate icon. Click and drag to spin the element to the angle you want.
The top bar
The top bar includes many useful tools to control the site and your view of the canvas.
Hover over the Wix Studio logo to open a menu with site actions, viewing options and shortcuts to other parts of your account.

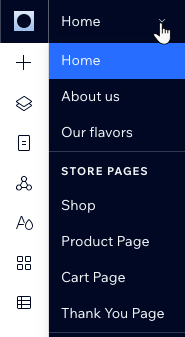
Use the page drop-down to quickly navigate between site pages. The list is organized by page type (e.g. store pages, member pages) so you can find the one you need even quicker.
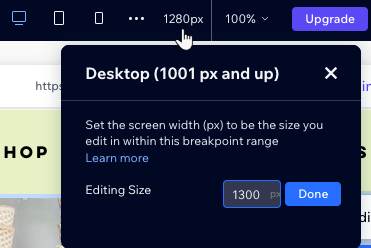
In the middle of the top bar, you can find everything to do with breakpoints, zoom and canvas size. Click the breakpoint icons to see and adjust a page in different screen sizes.
The screen size you see is the current size of the canvas. It's also the default editing size for the breakpoint you're currently on. Each breakpoint has its own default size that you can set to whatever is comfortable for you.
On the right hand side, you can see who else is currently working on this site. You can also check site notifications, undo or redo actions, preview and publish.

Having issues with zoom?
We recommend using the preview  , as it allows you to simulate many different screen sizes with ease.
, as it allows you to simulate many different screen sizes with ease. The left side panels
On the left side of the Studio Editor, you can find the main panels you'll work with:
- Add Elements
 : Find hundreds of elements to add to the site, whether they are design elements or business apps like an online store. Use the tabs to navigate between the different categories.
 - Layers
 : See the page's layers and elements, in a hierarchy from top to bottom. When selecting a parent element (e.g. section, container) in the panel, you can see all of the elements inside, change their order, hide them and more.
 - Pages
 : Add new pages, edit each page's settings and delete those you no longer need.
 - Global Sections
 : This panel shows all the global sections, which are the sections you set to appear on multiple pages. You can rename, duplicate, delete or add global sections to pages they don't appear on.
 - Site Styles
 : See and adjust the site's visual language. The typography styles, colors and page transitions you set here apply to the entire site.
 - App Market
 : Browse through hundreds of apps in the Wix App Market and find the ones that suit your needs.
 - CMS (Content Management System)
 : Manage the site's content, collections and dynamic pages.
 - Code
 : Turn on dev mode to add your own code to your client's site.

The Inspector panel
The Inspector panel is the "control center" for each and every element.
Once you select an element on the canvas, you can set its size, position and design from this panel. You can also apply animations to the element or add an anchor, allowing you to link directly to it.

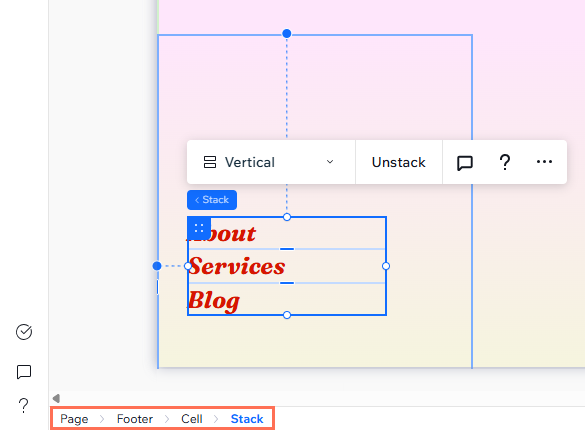
Breadcrumbs bar
When selecting an element on the canvas, a breadcrumbs bar at the bottom left corner shows its hierarchy. This lets you see (and select) the element's parent, grandparent and so on, helping you navigate through the page's layers with ease.
Additional panels
Last but not least, there are several panels at the bottom left of the editor that you should know about.
- Site Checker
: Open the Responsive Checker to make sure your client's site looks great across every device, and use the Accessibility Wizard to optimize the site's accessibility.
- Comments
 : Communicate with teammates who are also working on this site, directly in the Studio Editor. Every page has a separate comments board so you can leave specific feedback for others and ask them questions. Learn more about site comments.
 - Learn From the Community
 : Get all the information you need without ever leaving your editor. You can search topics, get tutorials, and access community threads. Read more about Learn From the Community.
 - Help
 : Browse through our resources, share feedback about the Studio Editor or contact Customer Care.
Work faster using our shortcuts:
Check out our full list of keyboard shortcuts, allowing you to perform actions quicker and more efficiently.
