Studio Editor: Using Global Sections
9 min
In this article
- Setting a global section
- Managing global sections
- Displaying a global section on other pages
- Detaching a section from the global version
- FAQs
Global sections in Wix Studio let you streamline your workflow by syncing content across multiple pages. Design a section once, set it as global, and add it to any page you need.
When you update a global section, the changes instantly reflect everywhere it’s used—keeping your client’s site consistent and saving you serious time.

Tip:
A global section has a green overlay when you hover over it so you can instantly recognize it.
Setting a global section
By default, Studio Editor sites come with a global header and footer, appearing on all pages. However, you can set other sections as global if you want to show them on more than one page – not just a header or a footer.
Which sections can I set as global?
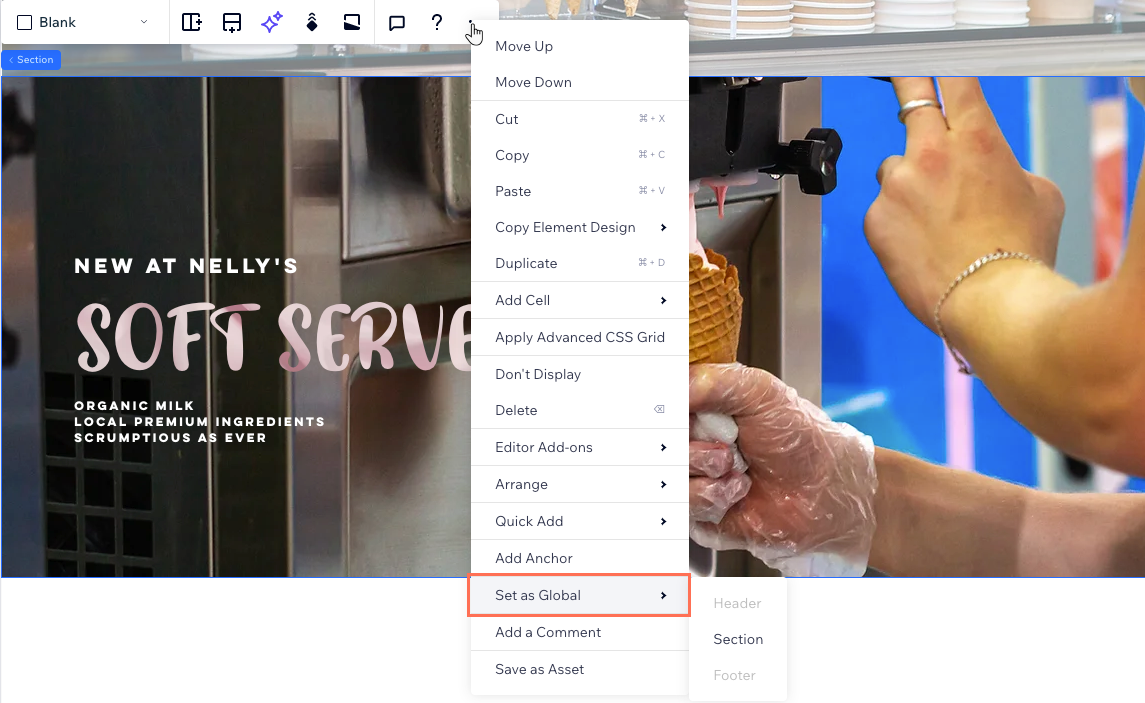
To set a global section:
- Select the relevant section in the Editor.
- Click the More Actions icon
 .
. - Click Set as Global.
- Select the relevant option:
- Header: Sections that appear at the very top of the page.
- Section: Sections that appear in the middle of the page (anywhere between the header and footer).
- Footer: Sections that appear at the very bottom of the page.
- Enter a name for the global section.

Can't set a section as a header / footer?
Ensure that the section is at the very top / bottom of the page on all breakpoints.
Managing global sections
See and manage the site's global sections in one place. From the Global Sections panel, you can rename, duplicate, and add global sections to pages they don't appear on. You can also delete global sections that you no longer need.
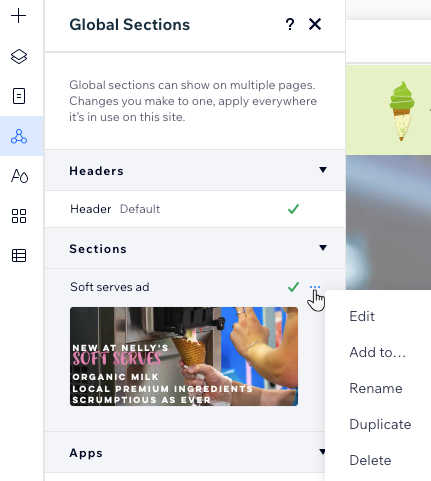
To manage a global section:
- Click Global Sections
 on the left side of the Editor.
 - Hover over a global section and click the More Actions icon
 .
. - Choose what you want to do next:
- Edit: Edit the content, design and layout of the global section.
Note: The changes you make apply everywhere this global section appears. - Add to: Add this global section to multiple site pages at the same time.
- Rename: Change the name of the global section.
- Duplicate: Create a copy of the global section. This is useful when you want to replicate an existing design.
- Delete: Remove a global section you no longer need.
Note: This deletes the section from the site.
- Edit: Edit the content, design and layout of the global section.

Tip:
Pin a global section to the screen to keep it in place as visitors scroll up and down the page. This is a great way make a menu stand out, for example, or a banner you want to display during scroll. Keep in mind – you can set 1 pinned global section per site page.
Displaying a global section on other pages
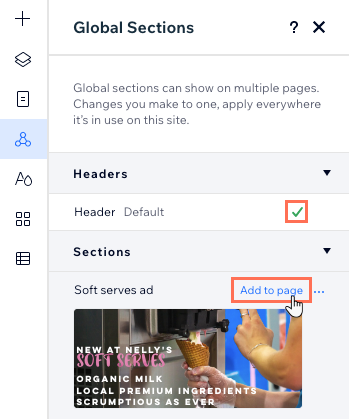
After setting a section as global, start adding it to other pages. The Global Sections panel shows a checkmark  next to sections that appear on the current page. You can also see the sections that are not displayed, and add the ones you want.
 next to sections that appear on the current page. You can also see the sections that are not displayed, and add the ones you want.
Before you begin:
Click a section in the panel to see a preview before adding it to the page.

To display a global section on other pages:
- Go to a page you want to add the global section to.
- Click Global Sections
 on the left side of the Editor.
 - Choose where to add the global section:
- Add it to the current page: Hover over the relevant section and click Add to page.
- Add it to multiple pages:
- Hover over the relevant section and click the More Actions icon
 .
. - Click Add to...
- Select the checkbox next to the relevant pages.
- Click Apply.
- Hover over the relevant section and click the More Actions icon
- Move the global section to the right place on the page:
- Click Layers
 on the left side of the Editor.
 - Drag the section to the desired location.
- Click Layers
Tip:
Global headers / footers are always displayed at the top or bottom of the page, accordingly. You can place other types of global sections wherever you want on every page they appear.
Detaching a section from the global version
Changes you make to a global section apply everywhere it appears. If you want to make a change to the section on a single page without affecting the rest, you can detach that specific one from the global version.
The global section still exists, but this specific section is no longer related to it. It becomes a regular section on the page.
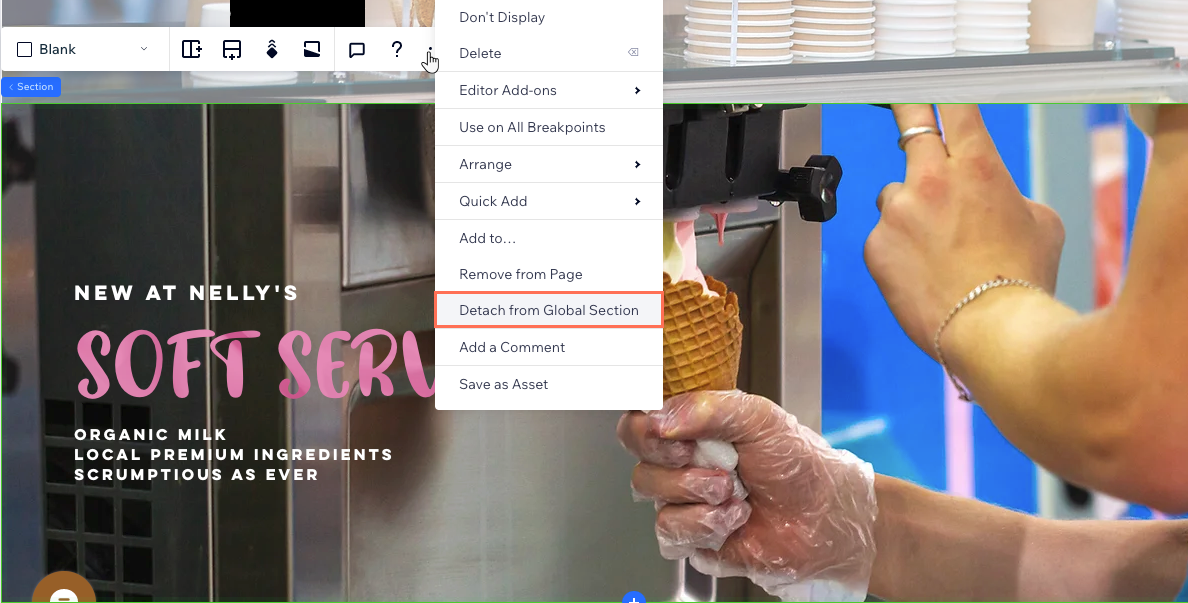
To detach a section:
- Select the relevant section in the Editor.
- Click the More Actions icon
 .
. - Click Detach from Global Section.

FAQs
Click a question below to learn more about using global sections in the Studio Editor.
Why can't I set a global header / footer?
Do I need to define breakpoints for global sections?
How can I keep the Studio Editor performing well when I use global sections?
I detached a section from global. Can I re-attach it?
Can I hide a global section from breakpoints?


 " on the breakpoint you're working on.
 at the top right of the editor.