

Adding Your Site's Business Information
2 min
The details you add to your site’s business info are displayed in several places, such as in Wix Chat and Wix Invoices.
When you add a business name and location to your site's dashboard, Wix automatically creates Local Business structured data markup for your site's homepage and adds it for you. Local Business markup lets you give search engines information about your business and can help improve your website's search results and ranking. Search engines can also use this information to create rich results.
To add your business information:
- Go to Business Info in your site's dashboard.
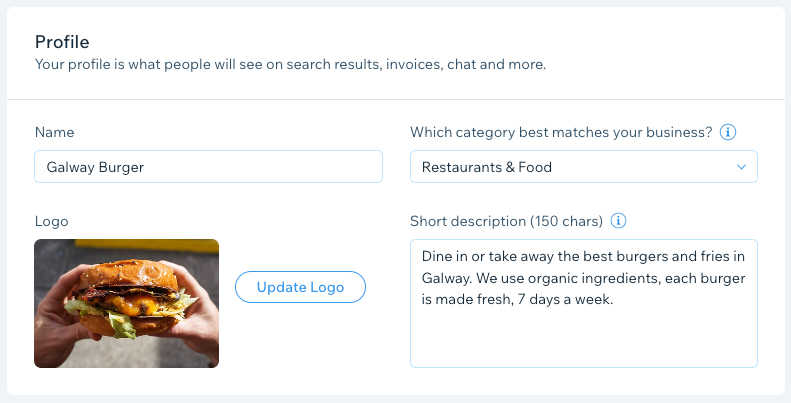
- In the Profile section, add your:
- Name: Add your business or website name.
- Which category best matches your business? Select the closest match.
- Logo: Click Add Logo and upload your logo image through the Media Manager.
Tip: You can create a logo with Wix Logo Maker. - Short Description: Briefly describe your business. This description appears in search engine results.
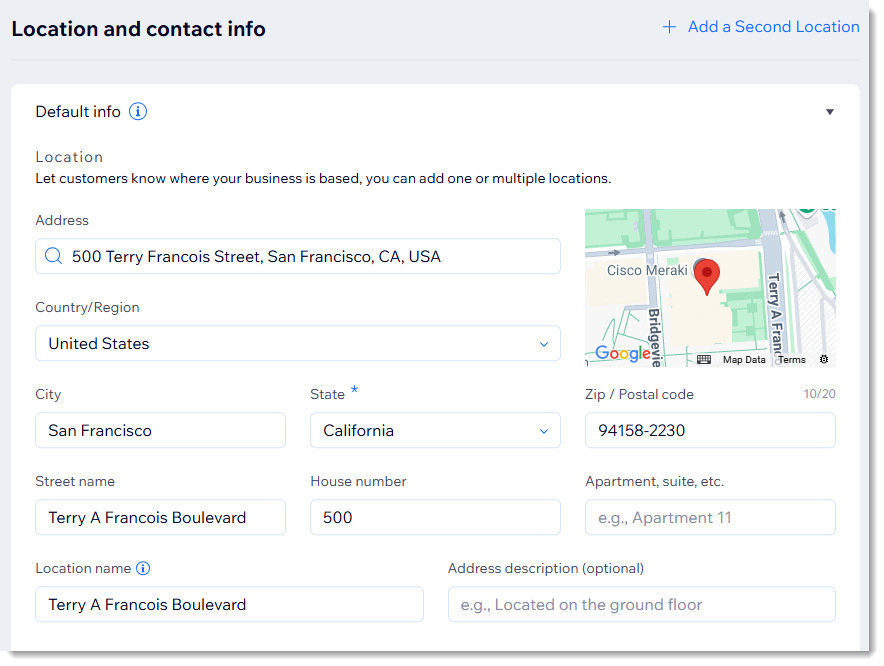
- In the Location and Contact Info section, start by adding your business location:
- Address: Start typing your address and select it from the list. If necessary, edit your address information below including country, apartment/suite, city, and postal code.
- Location Name: Enter your location name.
- Address Description: Enter a description to help customers find your business, e.g. Use the rear entrance.
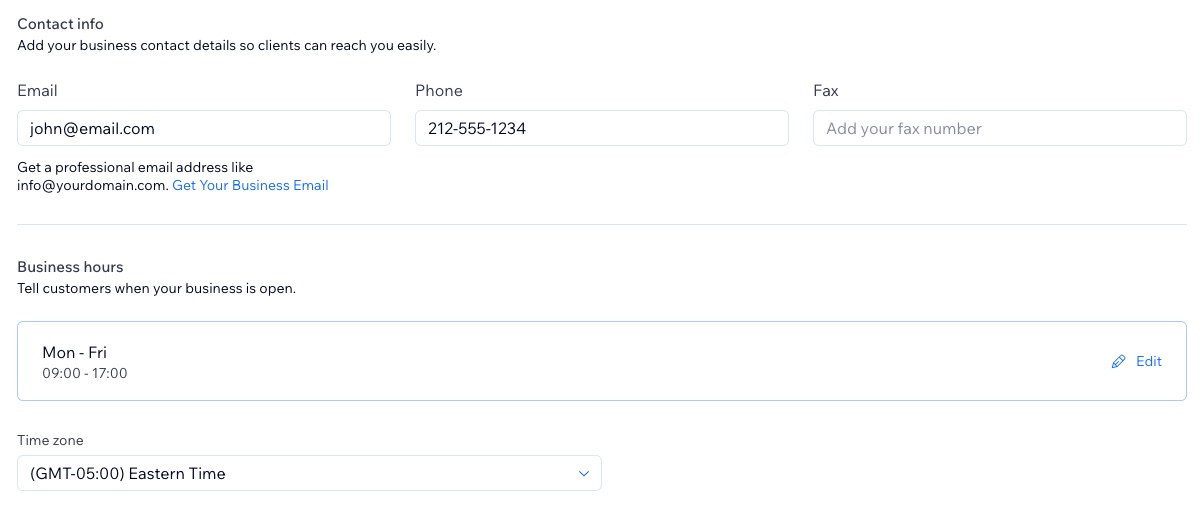
- Next, add your contact information in the Contact info section including:
- Email: Enter your email address.
- Phone: Enter a phone number.
- Fax: Enter a business fax number.
- Business Hours: To set your business hours, click Edit and choose one of the following options:
- Set 24/7 availability: Make sure the 24 hours checkbox is selected.
- Set specific open hours: Deselect the 24 hours checkbox, and set your schedule.
- Time zone: Set your business time zone.
Note:
The business hours option only appears if you have Wix Restaurants on your site.
- Click Save.
Is your business based in more than one location?
- If you use Wix Stores, Wix Bookings, or Wix Table Reservations, you can add multiple locations. Click + Add a Second Location to get started.
- You can select which location is your default. The details of the default location are used in Wix Chat, Wix Invoices, and more but can be edited.
- Learn more about:
