


Wix Restaurants: Setting up Multiple Locations for Wix Table Reservations
In this article
- Step 1 | Add a new restaurant location
- Step 2 | Set up Wix Table Reservations in your new location
- Step 3 | Enable your location to accept reservations
- FAQs
With Wix Table Reservations, you can manage online bookings for multiple locations, each with its own settings—such as hours, tables, online rules, and forms. On your live site, guests can choose the location they want to book a table for.
Step 1 | Add a new restaurant location
Start by setting up your restaurant location(s). Let customers know where to find your location(s) and make it easy for them to get in touch by adding your contact details.
To add a restaurant location:
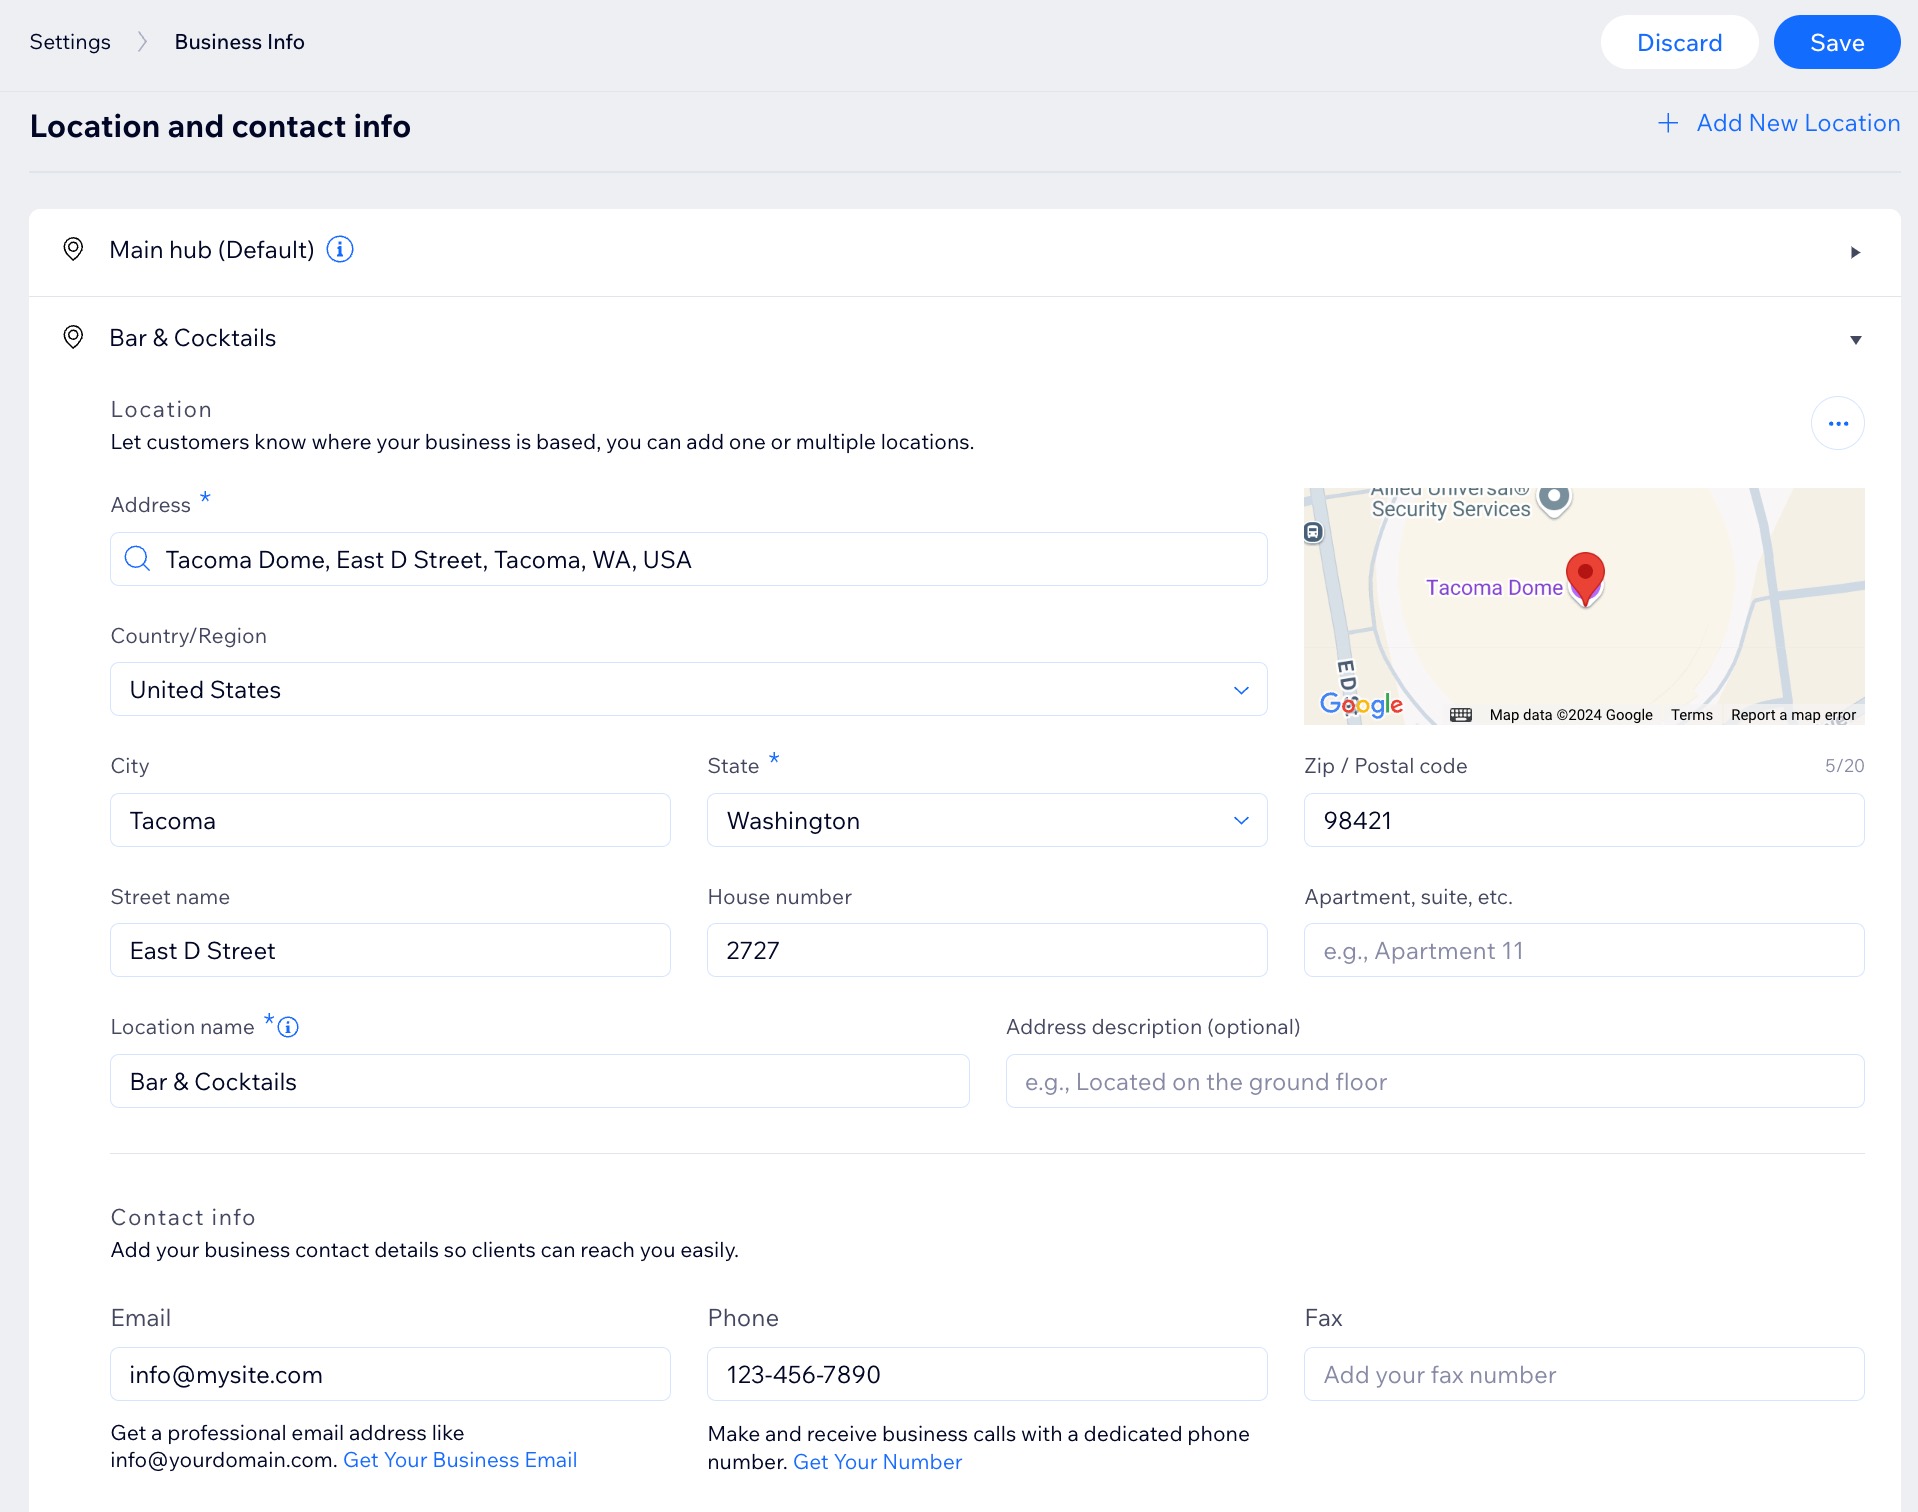
- Go to Business Info in your site's dashboard.
- Click + Add a Second Location next to Location and contact info.
Tip: If you've already added a second location, click + Add New Location. - Enter your location details:
- Address: Start typing your restaurant's street address and select it from the drop-down list.
- Location Name: Enter a name for this restaurant location.
- Address description (optional): Enter an address description to help customers find you (e.g. rear entrance).
- Enter your new location contact details (email, phone, fax).
- (Optional) Edit the Business hours and/or the Time zone.
- Click Save.
Step 2 | Set up Wix Table Reservations in your new location
Set up your location's reservation system by defining your schedule, table capacities, and online booking rules. Customize your reservation form with policies and messaging, then reduce cancellations with prepayment.
To set up reservations to a location:
- Go to Table Reservations in your site's dashboard.
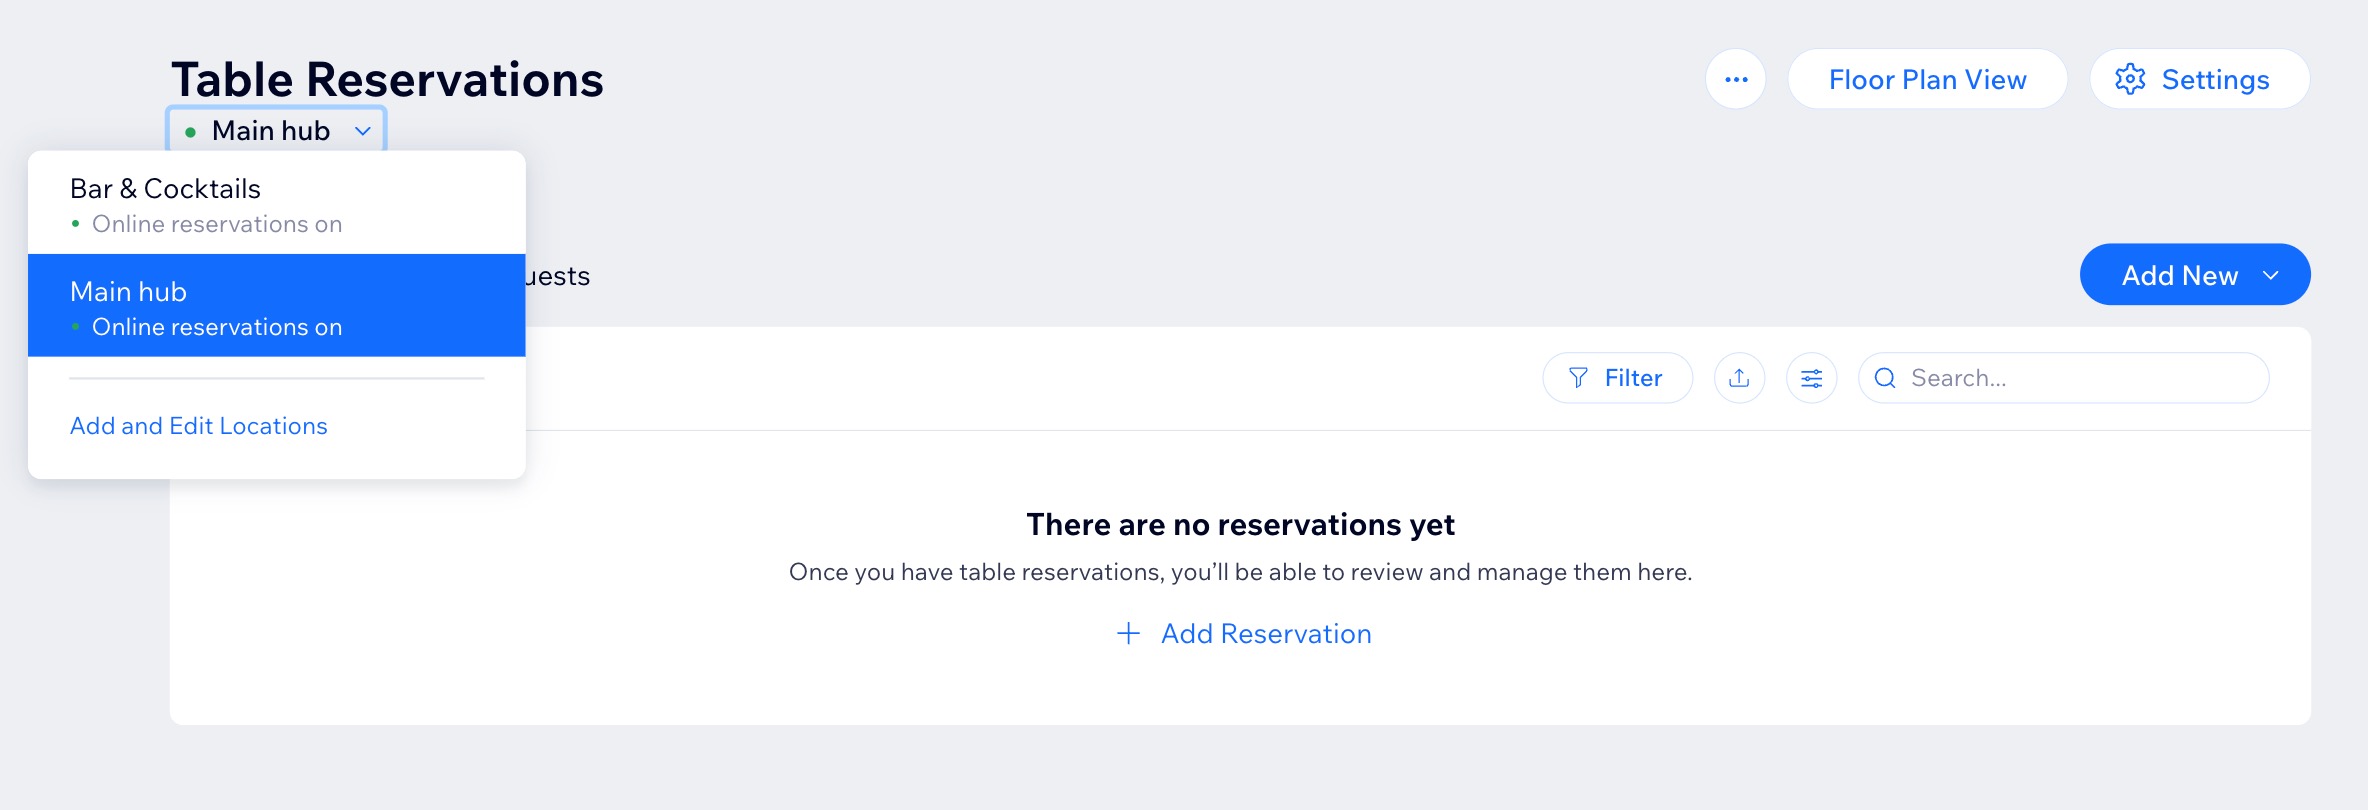
- Select the relevant location from the drop-down under Table Reservations at the top left.
- Click Settings at the top right.
- Set the following details:
Reservation schedule

Table management

Online reservations

Reservation form
Prepayment
Notifications
Tip:
The Wix Table Reservations app offers a range of
automated notifications to keep your guests informed about their reservations, including confirmations, updates, reminders, and cancellations. You can
customize the email notifications to match your restaurant's look and feel.
Step 3 | Enable your location to accept reservations
Once you're all set, enable your location to accept reservations and allow customers to start booking directly on your live site.
To enable reservations:
- Go to Table Reservations in your site's dashboard.
- Select the relevant location from the drop-down under Table Reservations at the top left.
- Click Settings at the top right.
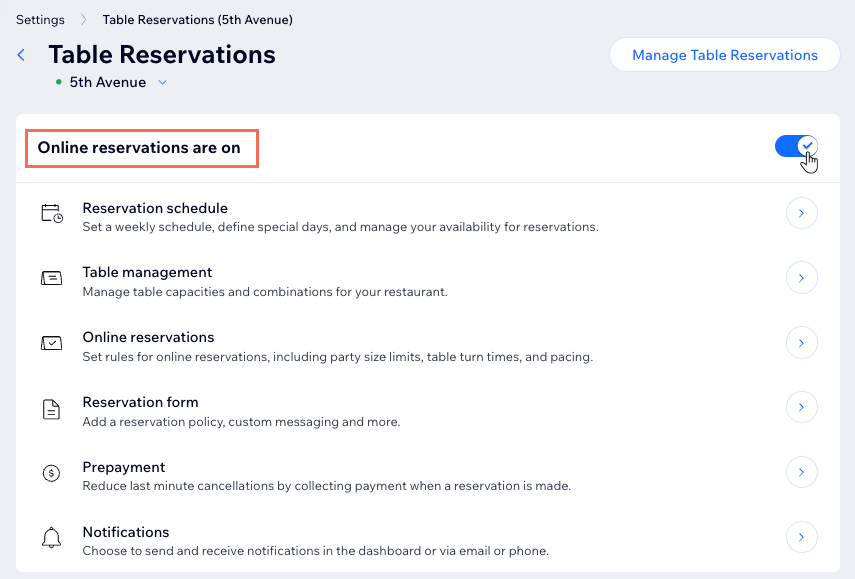
- Click the Online reservations are toggle to enable or disable online reservations for this location:
- Online reservations are on: Customers can book a table on your site.
- Online reservations are off: The reservations app appears on your site but customers won't be able to book a table.
What's next?
Invite people to manage your restaurant and assign them to specific locations.
FAQs
Click a question below to learn more about setting up multiple restaurant locations for table reservations.
What happens if I delete a location from my dashboard?

Can I restore a deleted location so it appears again on my live site?
Will existing reservations be deleted if I delete a location?
Can I set up notifications separately for each location?
