Invite people to help manage your restaurant by assigning them roles based on their responsibilities.
Using
Roles & Permissions, you can give staff access to handle tasks like managing menus, processing orders, and overseeing reservations. You can assign a predefined role or create custom roles to fit your team’s needs.
Inviting people to manage your restaurant
Invite people to help manage your restaurant by assigning them a predefined role or create a
custom role. Each role includes a set of permissions, allowing you to decide who can make changes to your site and dashboard.
For example, a Restaurant Manager can manage menus, orders, and reservations.
To invite people:
- Go to Roles & Permissions in your site's dashboard.
- Click the Invite Collaborators drop-down and select the relevant option:
Send an email inviting collaborators to help you manage your restaurant by assigning them a role based on their responsibilities.
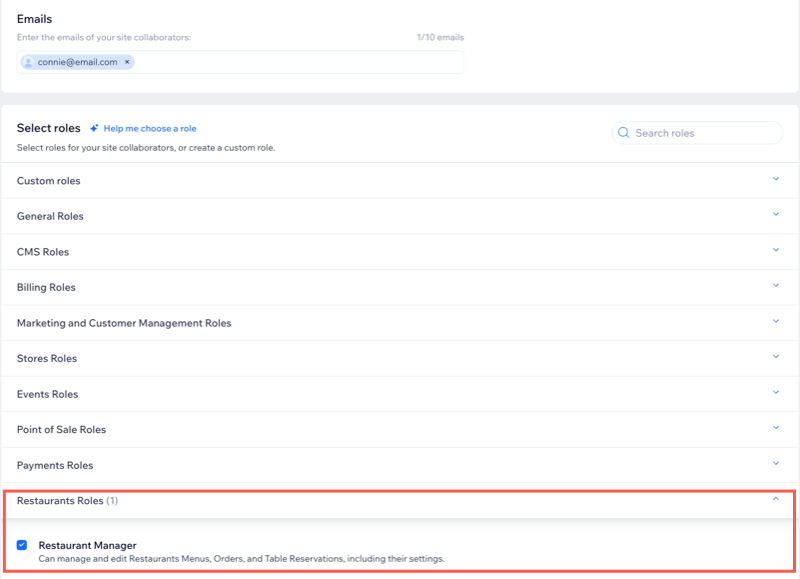
- Enter the collaborator’s email address.
- Scroll to Restaurant Roles and select the checkbox next to Restaurant Manager.
- (Optional) Click the checkbox(es) next to additional predefined or custom roles.
- (Optional) Click + Create Custom Role to define a new role with specific permissions.
- Click Send Invite.
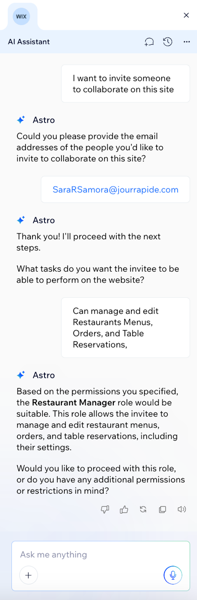
Use our AI assistant to invite collaborators to your site with tailored roles and permissions.
- Enter your answers to the questions provided (e.g. 'Could you please provide the email addresses of the people you'd like to invite to collaborate on this site?').
- When you’re ready, confirm the details to let the AI assistant send the invitations on your behalf.
Setting up roles & permissions
As a site owner, you can set up and manage the roles and permissions of your collaborators to match your restaurant’s needs. You can either duplicate and modify an existing role or build a new one from scratch.
To set up roles & permissions:
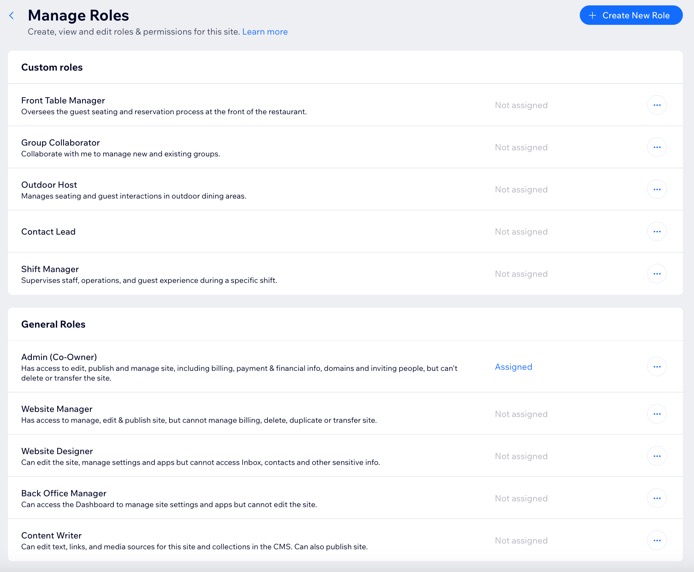
- Go to Roles & Permissions in your site's dashboard.
- Click Manage Roles.
- Choose what you want to do:
Modify an existing collaborator role by duplicating it and adjusting its permissions—such as access to restaurant menus, orders, and reservations—to fit your operational needs.
- Click the More Actions icon
 next to the relevant role.
 - Click Duplicate & edit.
- Scroll down to Restaurants and select / deselect the checkbox next to the relevant permissions:
- Manage Restaurant: Can manage and edit business info, marketing & settings, and menus, orders and reservations.
- Manage Table Reservation settings: Can edit table reservation settings.
Note: This permission depends on the Manage Table Reservations role and automatically adds it if Online Reservations are enabled in your Table Reservations settings. - Manage Table Reservations: Can manage and edit table reservations.
- (Optional) Make additional adjustments as needed to the role.
- Click Save.
Managing site collaborators
Manage your site collaborators’ access and responsibilities by assigning roles and locations tailored to your restaurant’s needs. Whether a collaborator manages multiple locations or handles specific tasks, you can:
- Change their role by selecting one or more predefined or custom roles.
- Assign them to one or more specific restaurant locations to control where they have access.
- Remove collaborators when they no longer need access.
To manage collaborators:
- Go to Roles & Permissions in your site's dashboard.
- Click the More Actions icon next to the relevant collaborator.
- Select the relevant option:
- Click Change Role.
- Select the checkbox(es) next to the relevant role(s).
- Click Save.
Tip: Restaurant roles support location-based management. Assigning them gives collaborators access and permissions for each location. Learn more about roles & permissions for site collaborators.
You can assign a collaborator to one or more specific locations. For example, if a manager oversees multiple branches, you can give them access to each one.
- Click Manage locations.
- Select which location(s) to assign this site collaborator:
- All locations: Assign access to all locations.
- Specific locations: Click the Select locations drop-down and select the relevant location.
- Click Save.

Remove a collaborator's access, so they can no longer log in or make any changes to your site and dashboard.
- Click Remove collaborator.
- Click Remove to confirm.
FAQs
Click a question below to learn more about roles and permissions for your restaurant.
Where can I find the permissions available for each role?
- Go to Roles & Permissions in your site's dashboard.
- Click Manage Roles.
- Click the More Actions icon next to the relevant role.
- Select View all permissions.
- When done, click Close.
What happens if I delete a location?
If you delete a location, users will still be able to access data tied to that location under certain conditions:
- All locations: Collaborators with permissions set to "All locations" will still see the data from the deleted location.
- Specific locations: Collaborators assigned to the deleted location will retain access to its data.
The deleted location will be labeled as 'Deleted' in all applicable product areas (e.g. orders, bookings, menus) to help you identify it clearly.
Who can add or remove access to specific locations?
The Site Admin (Co-Owner) can manage all locations, as well as invite and assign collaborators to any location.
Managers for specific locations can only add or remove locations that they are also assigned to. For example, a collaborator cannot add someone to a location that they do not already have access to.