

Wix Restaurants: Adding and Setting Up Wix Table Reservations
9 min
In this article
- Step 1 | Add the Wix Table Reservations app to your site
- Step 2 | Set up Wix Table Reservations in your dashboard
- Step 3 | Customize the pages on your site
- a | Customize your Reservations page
- b | Customize your Reservation Details page
- c | Customize your Reservation Confirmation page
- FAQs
Let guests book tables at your restaurant, through your site, using the Wix Table Reservations app.
Set up tables according to your restaurant's layout, manage the party sizes you accept, and customize booking times to fit your needs. For example, you can keep things organized by limiting the number of bookings every 15 minutes - It’s an easy way to ensure everything is running smoothly.

Before you begin:
- You need to upgrade your site to use Wix Table Reservations. Without a plan, customers won't be able to book a table on your site themselves – you'll only be able to add reservations manually.
- Make sure to add your business info, including your restaurant's name, location and contact info.
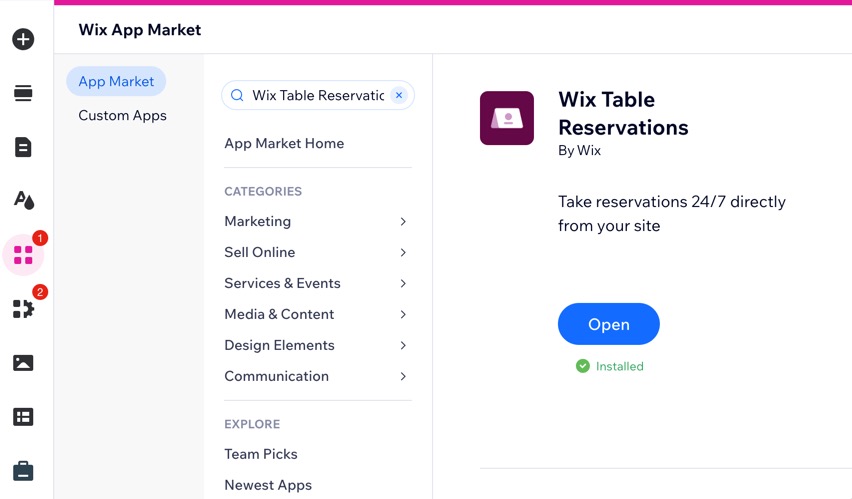
Step 1 | Add the Wix Table Reservations app to your site
Head over to the app market to add the Wix Table Reservations app to your site. This adds the Table Reservations tab to your site's dashboard, in addition to 3 customizable pages in your editor:
- Reservations: The page customers see when they fill out the reservation form.
- Reservation Details: The page where customers review and finalize their booking.
- Reservation Confirmation: The page where customers see the confirmation of their reservation. At this point they can add the reservation to their calendar, cancel it or return to the homepage.
To add Wix Table Reservations:
Wix Editor
Studio Editor
Wix app
Harmony Editor
- Go to your editor.
- Click Add Apps
 on the left side of the editor.
 - Use the search bar to find Wix Table Reservations.
- Click Add to Site.
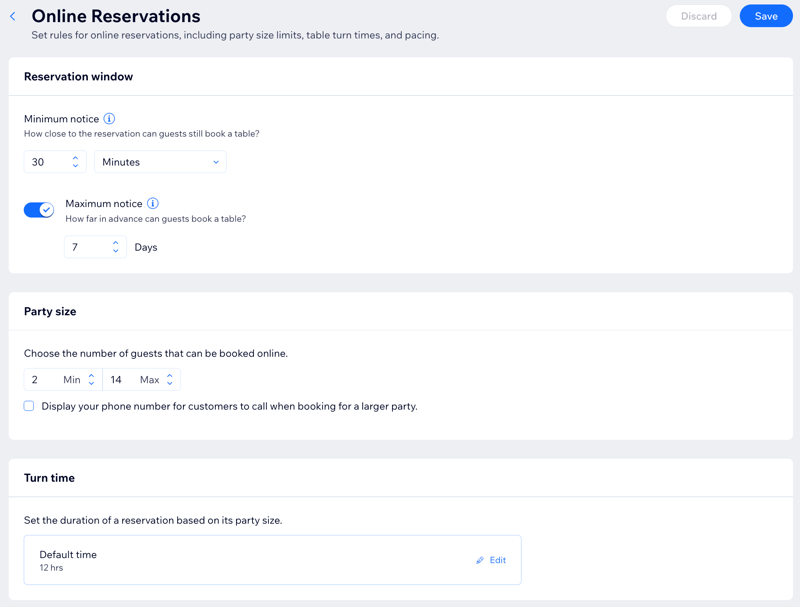
Step 2 | Set up Wix Table Reservations in your dashboard
Once you've added Wix Table Reservations, go to your site's dashboard to add your tables, availability hours, party sizes and turnover times. Set your reservation form, policies, and notifications, and connect Reserve with Google so guests can book directly from Google Search and Maps.
Tip:
Watch our Table Reservations webinar for expert tips and insights on efficiently setting up and managing your table reservations.
To set up Table Reservations in your site's dashboard:
- Go to Table Reservations in your site's dashboard.
- Click Settings at the top right.
- Click the Online reservations are toggle to enable or disable online reservations:
- Online reservations are on: Customers can book a table on your site.
- Online reservations are off: The reservations app appears on your site, but customers won't be able to book a table.
- Set the following details:
Reservation schedule

Table capacities and combinations

Availability for online reservations
Customize the reservation form
Collecting payment when a reservation is made
Reserve with Google
Manage the notifications I receive and send to customers
 and then Edit.
 Step 3 | Customize the pages on your site
The app includes 3 new pages on your site that you can customize in the Editor: Reservations, Reservations Details and Reservation Confirmation. Customers see these pages when reserving a table on your site.

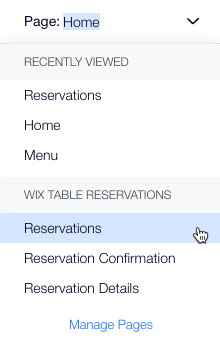
You can navigate between your app pages using the Switch Page drop-down menu at the top of your editor.
a | Customize your Reservations page
- Go to the Reservation page in your editor:
- Click the Switch Page drop-down menu at the top of the editor.
- Click Reservation under Wix Table Reservations.
- Click the Reservations app.
- Click Settings.
- Click Manage to manage reservations on your site's dashboard.
- Click Display to specify the locations to show on the reservation form.
- Click the Layout tab to choose text alignment, form layout and spacing.
- Click the Design tab to customize the general design of the reservation form, time slots and the button.
- Click the Texts tab to change the title, description and button label on your reservation form.
- Click the Add Ons tab to add the form or button to another page on your site.
b | Customize your Reservation Details page
- Go to the Reservation Details page in your editor:
- Click the Switch Page drop-down menu at the top of the editor.
- Click Reservation Details under Wix Table Reservations.
- Click the Reservations app.
- Click Settings.
- Click the Design tab to customize the general design of the Reservation Details page, details and timer, text fields and button.
- Click the Texts tab to change the title and button label.
- Click the Add Ons tab to add the form or button to another page on your site.
c | Customize your Reservation Confirmation page
- Go to the Reservation Confirmation page in your editor:
- Click the Switch Page drop-down menu at the top of the editor.
- Click Reservation Confirmation under Wix Table Reservations.
- Click the Reservations app.
- Click Settings.
- Click the Design tab to customize the general design of the Reservation Confirmation page and button.
- Click the Add Ons tab to add the form or button to another page on your site.
FAQs
Click a question below to learn more about the Wix Table Reservations app.
Can I manage table reservations with the Wix app?
How do I manually add a new table reservation?
Can I pause online reservations?
How can I select a certain location for the reservation form?
Can I set both a minimum and maximum notice for my reservation window?
