Wix Restaurants: Managing Table Reservations and Walk-ins
7 min
In this article
- Manually adding a table reservation or walk-in
- Managing your table reservations or walk-in
- FAQs
The Wix Table Reservations app allows guests to book tables online based on your restaurant's availability. You can manually add and update reservations for walk-in guests or phone-in requests using your site’s dashboard or the Wix app to keep your availability up to date.
Manually adding a table reservation or walk-in
You can manually add table reservations for guests who don’t book online, such as those who call your restaurant to book a table. Enter their details directly from your site’s dashboard or the Wix app on your mobile device.
You can also accommodate walk-in guests without prior reservations. There's no need to specify the date and time; simply enter the guest's details or skip that section if you prefer.
Have prepayment rules set up?
When creating a reservation that meets your prepayment rules, you'll be prompted to collect payment immediately or delay it.
To add a new reservation / walk-in:
Dashboard
Wix app
- Go to Table Reservations in your site's dashboard.
- Click the Add New drop-down at the top right.
- Choose the type of reservation you'd like to add:
Reservation
Walk-in

Tip:
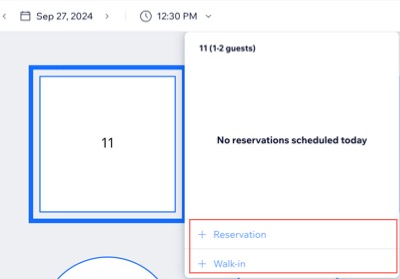
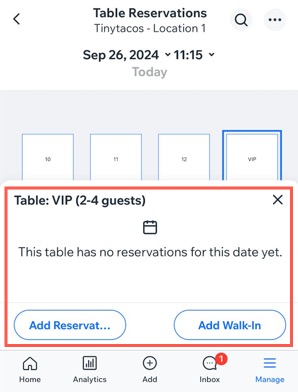
You can also use your floor plan to add a reservation / walk-in to a table from your site's dashboard or the Wix app.
Managing your table reservations or walk-in
You can manage reservations and walk-ins from your site’s dashboard or the Wix app. Edit existing bookings, view order details, message guests with updates, or archive reservations you no longer need in your active list to keep your table management organized.
To manage your reservation / walk-in:
Dashboard
Wix app
- Go to Table Reservations in your site's dashboard.
- Click the More Actions icon
 next to the relevant reservation.
 - Choose what you want to do:
- Edit reservation: Modify or update an existing reservation.
- Message guest: Send a message directly to the guest for reservation-related communication.
- View order: Review the details of a placed order.
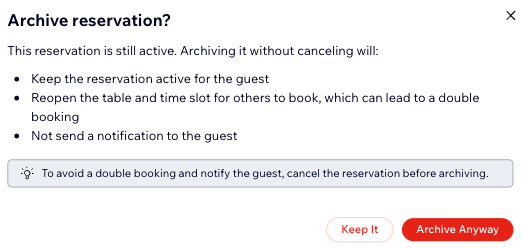
- Archive: Remove the reservation from your active list without deleting it.
Note: Guests aren't notified when you archive reservation requests. To avoid double bookings and ensure the guest is informed, it's best to cancel the reservation first, then archive it.
- Make the necessary changes then click Save Changes.

FAQs
Click a question to learn more about managing your table reservations.
Should I cancel an active reservation before archiving it?
What happens if I archive a future reservation?
Can I add reservations using my restaurant’s floor plan?


 at the bottom.
