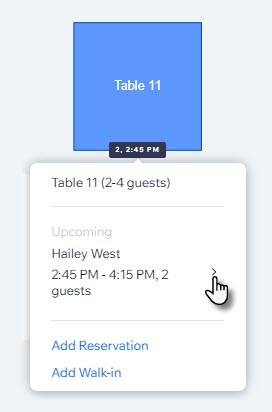
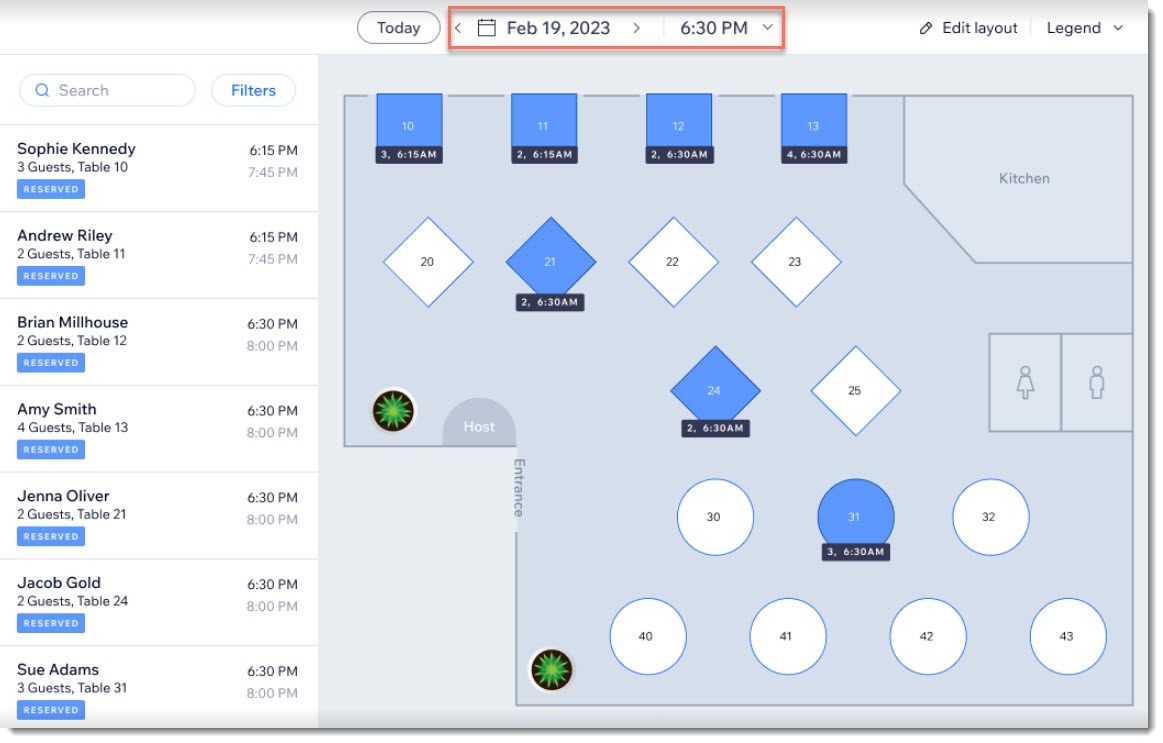
Create a floor plan for your restaurant to make it easy to check your availability at a glance. You can select a date and time and see which tables are available. Customers' reservations will appear on your dashboard under Floor Plan and on the My Reservations page.
Creating a restaurant floor plan
Start by adding your first round or rectangular table and then customize it. Then duplicate it to add other similar tables or create other ones from scratch.
To create your floor plan:
- Go to Table Reservations (New) in your site's dashboard.
- Click Floor Plan View.
- Click Edit layout.
- Choose what you want to do next:
Add a 4-sided table and change the shape to give it the right proportions.
To add and customize a rectangular table:
- Click a Round or Rectangular table on the left.
Tip: You can always change the shape of the table later by clicking the table selecting a shape in the right panel. - Click the map to add the table.
- (Optional) Drag the resize handles to change the table size.
- Edit the Table Properties on the right:
- Table Name: Edit the default table label.
- Min & Max Seats: Specify the minimum and maximum number of people who can book this table.
- Enable or disable the Let guests reserve this table online toggle.
- Edit the table layout on the right:
- Width: Enter a value to resize the table width.
- Height: Enter a value to resize the table height.
- Rotate: Enter a value to rotate the table.
Add text anywhere on your map to add helpful information. For example, you can mark where the kitchen, bar, or entrance is.
Tip: To make your text stand out more, you can place it over a rectangle.
To add text to the map:
- Click Text on the left.
- Click the map to place the text.
- Under Layout on the right, adjust the text settings:
- Text: Edit the text.
- Text size: Enter a value to customize the text size.
- Text color: Select a text color.
- Rotate: Enter a value to rotate the text.
Add and customize rectangles or circles
You can add a rectangular or circular shape to your map to represent parts of your restaurant, even if you don't seat customers there. For example, you can use a rectangular shape to represent a stage or bar and optionally label it.
To add a shape to the map:
- Click Rectangle or Circle on the left.
- Click the map to place the shape and drag to it resize.
- Under Layout on the right, adjust the text settings:
- Width: Enter a value to resize the shape width.
- Height: Enter a value to resize the shape height.
- Border size: Enter a value in pixels.
- Rotate: Enter a value to rotate the shape.
- Shape color: Select a color and click the Checkmark icon
 .
. - Border color: Select a color and click the Checkmark icon
 .
.
Add divider lines anywhere on your map to define separate areas.
To add a line:
- Click Line on the left.
- Click the map and drag it to change the length of the line.
- Under Layout on the right, customize the line:
- Length: Enter a value to resize the line length.
- Width: Enter a value to resize the line width.
- Rotate: Enter a value to rotate the line.
- Color: Select a color and click the Checkmark icon
 .
.
Add icons to represent different parts of your restaurant, such as exits and restrooms.
Tip: Add an icon on top of a shape to make it stand out.
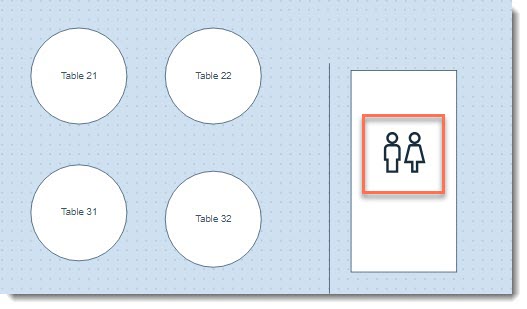
To add an icon:
- Click Icons on the left.
- Click the map to add an icon.
Note: The microphone icon is added by default. You can replace it with another icon type. - Under Layout on the right, customize the icon:
- Size: Enter a value to resize the icon.
- Rotate: Enter a value to rotate the icon.
- Select icon: Select the icon you want to display.
- Color: Select a color and click the Checkmark icon
 .
.
You can upload an image to your floor plan. This can be used, for example, to upload your company's logo.
To add an image:
- Click Add Image on the left.
- Select an image and click Apply.
- Drag the image to position it.
- Under Layout on the right, adjust the settings:
- Width: Enter a value to resize the image width.
- Height: Enter a value to resize the image height.
- Rotate: Enter a value to rotate the image.
Using floor plan to combine tables
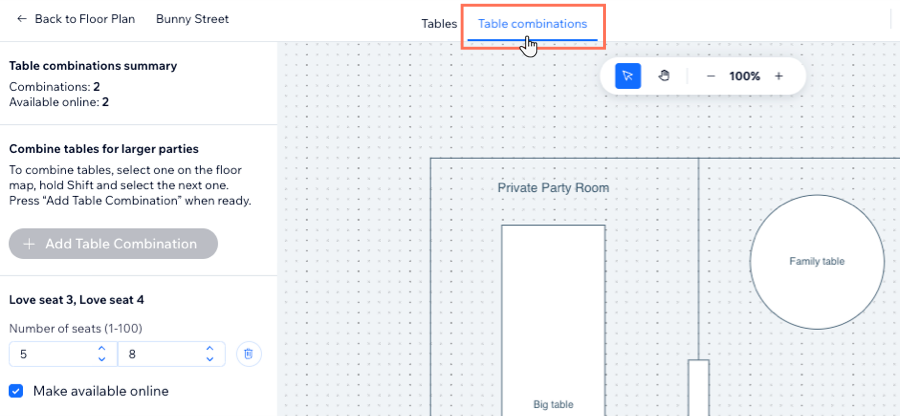
The Wix Table Reservations app allows you to combine multiple tables together, making it easier to accommodate larger parties and maximize your restaurant’s seating capacity. You can also select whether or not each table combination is available for guests to book online.
To combine tables:
- Go to Table Reservations in your site's dashboard.
- Click Floor Plan View.
- Click Edit Layout.
- Click Table Combinations on top.
- Select two tables while holding the shift key.
- Click + Add Table Combination on the left.
- (Optional) Select Make available online.
- Click Save.
FAQs
Click below for answers to the most common questions about creating a floor plan.
Can I use my floor plan to add a reservation?
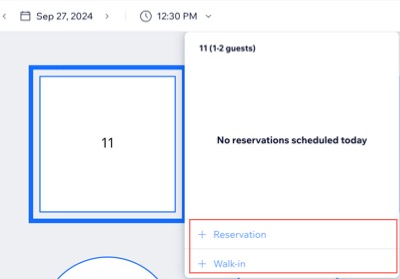
Yes. You can add table reservations or walk-ins from your site's dashboard:
- Go to Table Reservations (New) in your site's dashboard.
- Click Floor Plan View.
- Click on the relevant table and select + Reservation / + Walk-in.
- Enter the reservation details.
- Click Create Reservation / Seat Walk-in.
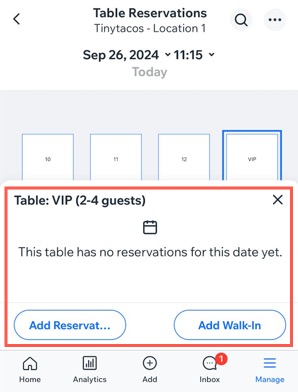
...Or from the Wix app on your phone:
- Go to your site in the Wix app.
- Tap Manage
 at the bottom.
 - Tap Table Reservations then tap Floor Plan.
- Tap on the relevant table and select Add Reservation / Add Walk-in.
- Enter the reservation details then tap Save.
I added tables in the reservation list view. How do I make changes to them?
Any tables you add in the Table Management page are automatically added to your floor plan as rectangular tables. You can move and resize them as needed.
You can also delete the table and replace it with a round table using the instructions below.
Important: If this table already has reservations, they won't be lost, but may no longer be connected to the same table.
To change a rectangular table to a round table:
- Delete the rectangular table that was automatically added.
Tip: Don't click Save after deleting. - Create a new round table.
- Give the table the same name as it has in the Table Management page.
Note: For these tables to sync, they must have the exact same name. - Edit the table properties, including the minimum and maximum number of seats.
- Click Save.
How can I change the floor plan's background color?
- Click Background on the left.
- Click Change Color on the right.
- Select a color and click the Checkmark icon
 .
. - (Optional) Drag the slider to change the opacity.
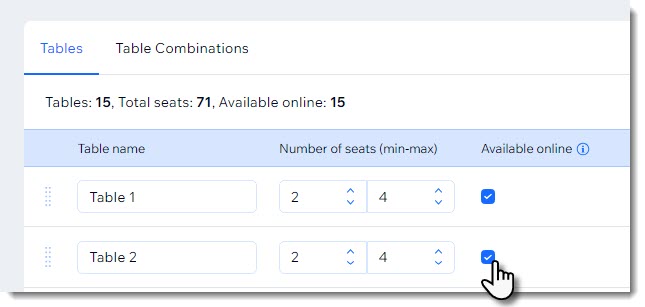
How do I set some tables so that they can't be booked online?
- Go to Table Reservations in your site's dashboard.
- Click the More Actions icon
 at the top right.
 - Select Settings.
- Click Table management.
- Click the Available online checkbox next to the relevant table to deselect it.
How can I keep track of how long guests have been seated?
In your reservation settings, you decide how long guests can stay, for example an hour and a half. To manage turnover time effectively, you can set rules for the duration of table reservations. When guests get close to the end of their allotted stay, their table turns orange. Once they are overtime, the table turns red.
Learn more about seating availability.
 at the top, then click and drag the map.


 .
.


 at the bottom.
 at the top right.

 to view more details or make changes to an existing reservation.