
Wix Stores: Creating Product Categories
In this article
- Step 1 | Add the category details
- Step 2 | Set the category as active or inactive
- Step 3 | Add products
- Step 4 | (Optional) Create subcategories
- FAQs
Important:
This article is about the new version of product categories. If you click
+New Category and your page doesn't look like the image in Step 1 below, you have the original version. If so, click
this link to learn how to add and display categories.
Product categories are essential building blocks of your online store. They help you organize your products into groups, making it easier for customers to browse and find exactly what they need. Managing a large number of products? Create subcategories to keep everything structured and accessible.
Once you've set up a category or subcategory, you can display it on your site, use it as a store filter, or apply discounts and coupons to it.
Step 1 | Add the category details
To create a new category, click
+ New Category and add the category details. The image and description appear in search engine results, when a category is shared in social media, and can optionally appear on the
Category page.
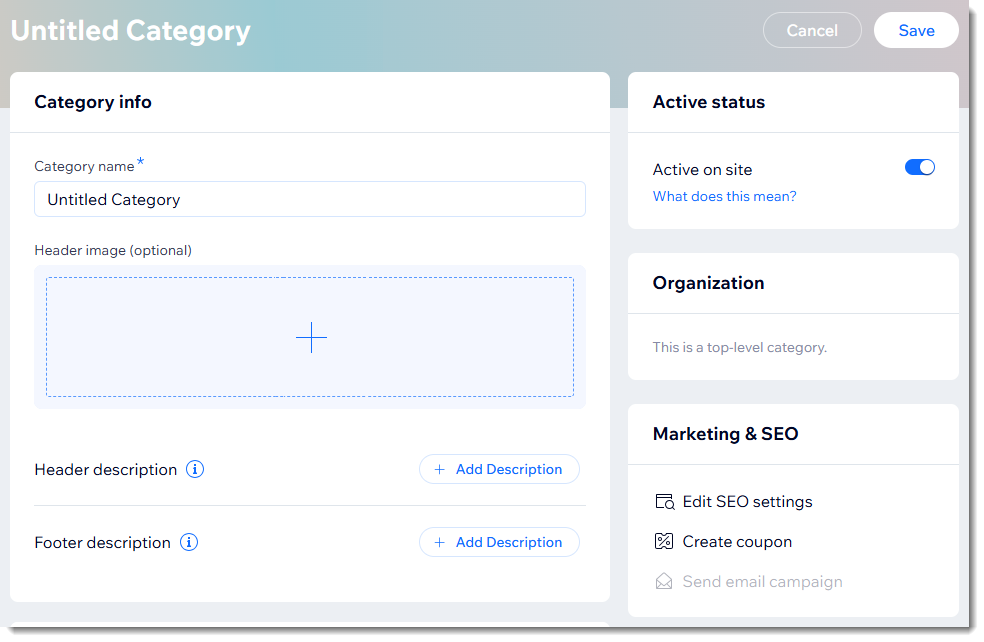
To create a category:
- Go to Categories in your site's dashboard.
- Click + New Category at the top right.
- Enter a category name (e.g. Men).
- Add a header image.
- Click the Add icon
 .
- Select an image from your media manager or click Upload Media to upload an image.
- Click Add Image.
- Click the Add icon
- Enter a header description.
Learn more about effective header images and descriptions.
Step 2 | Set the category as active or inactive
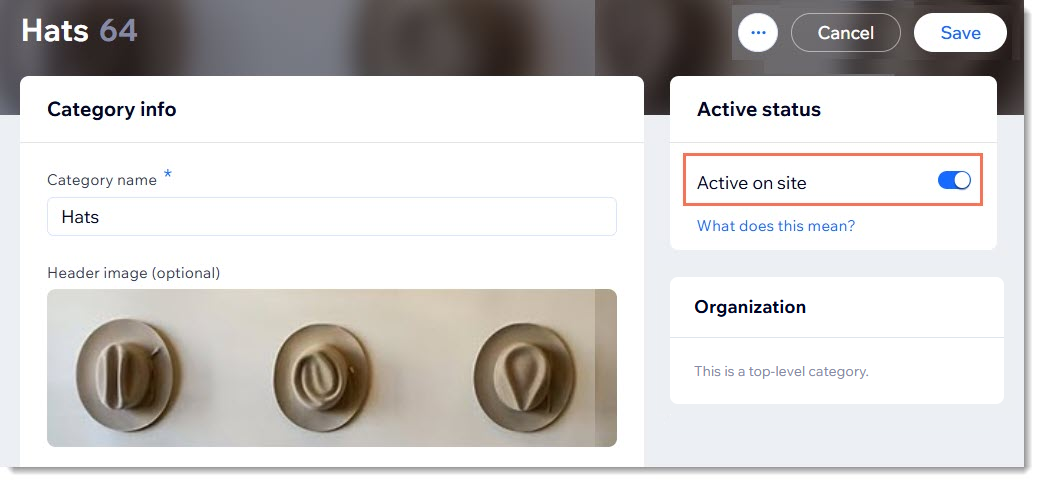
A category's status can be either active or inactive. While setting up your category, you may want to make it inactive until you are ready to display it.
Click below to learn the difference between active and inactive categories:
Active categories
Inactive categories
To set the category status, click the
Active on site toggle to enable or disable it.
Step 3 | Add products
If your category is active, it's a good idea to add at least a couple products right away to avoid displaying a blank category. You can add or remove products at any time.
To add products to a category:
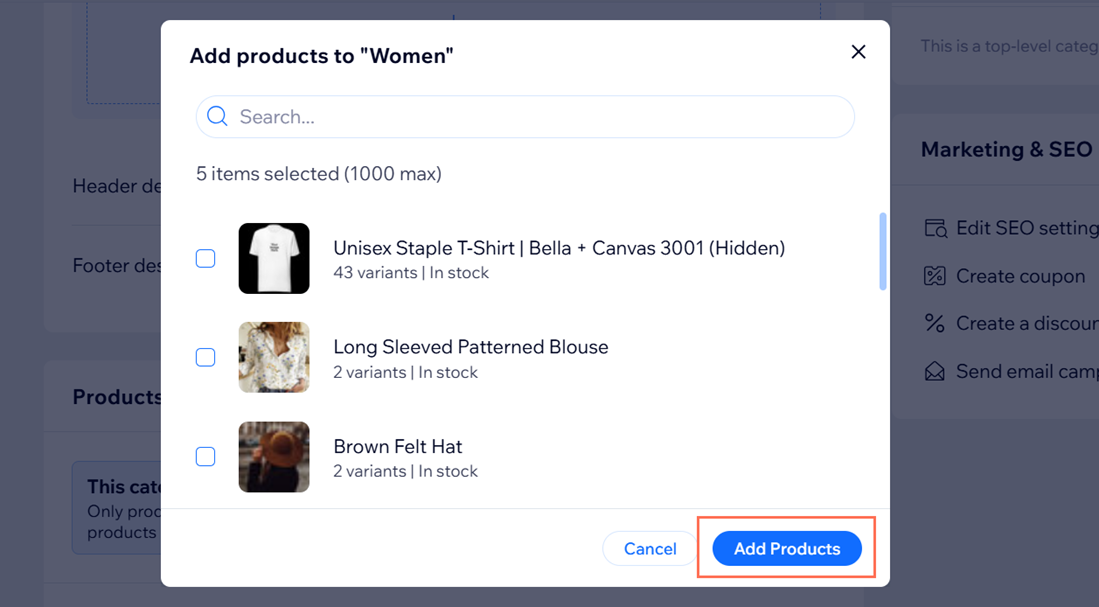
Click + Add Products.
Select the products you want to add.
Click Add Products.
Step 4 | (Optional) Create subcategories
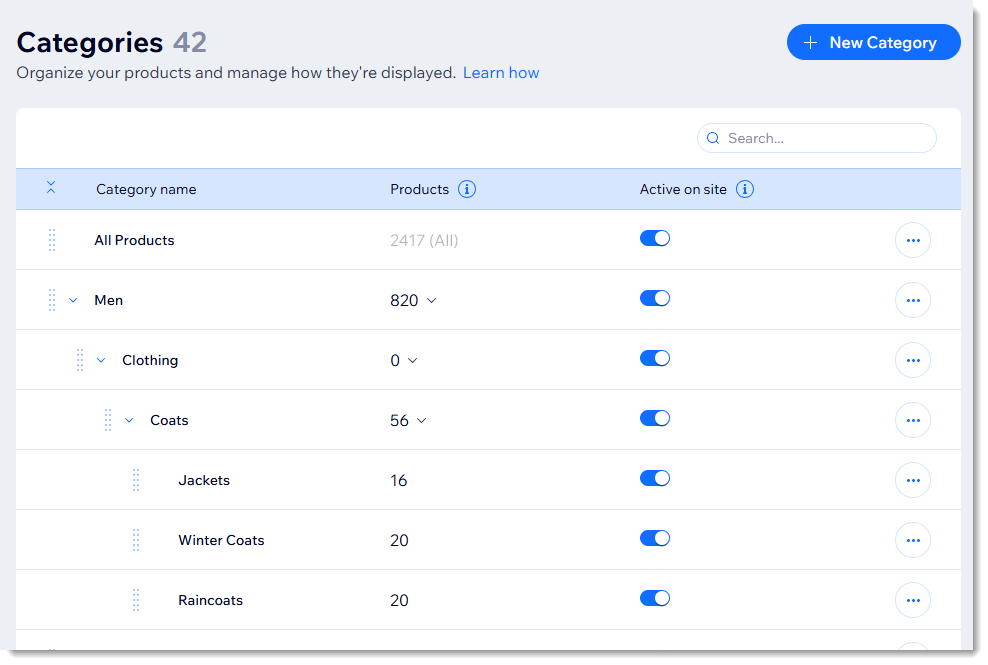
Now that you've created a category (e.g. Men), you can create subcategories (e.g. Shirts, Shoes). In total, you can create 5 levels of subcategories, including the 'All Products' category.
For best performance, it's recommended that you create no more than 1000 categories/subcategories in total.
Notes:
- A category can act as a container which holds only subcategories.
- The same subcategory cannot exist in 2 places, however, you can create different subcategories with the same name (e.g. a 'Shoes' subcategory under 'Men' and under 'Women').
To create a subcategory:
- Go to Categories in your site's dashboard.
- Select an option:
- Create a new subcategory under a particular category:
- Click the More Actions icon
 next to the category under which you want to create a new subcategory.
- Select + New subcategory.
- Create the subcategory just as you would a new category.
- Click the More Actions icon
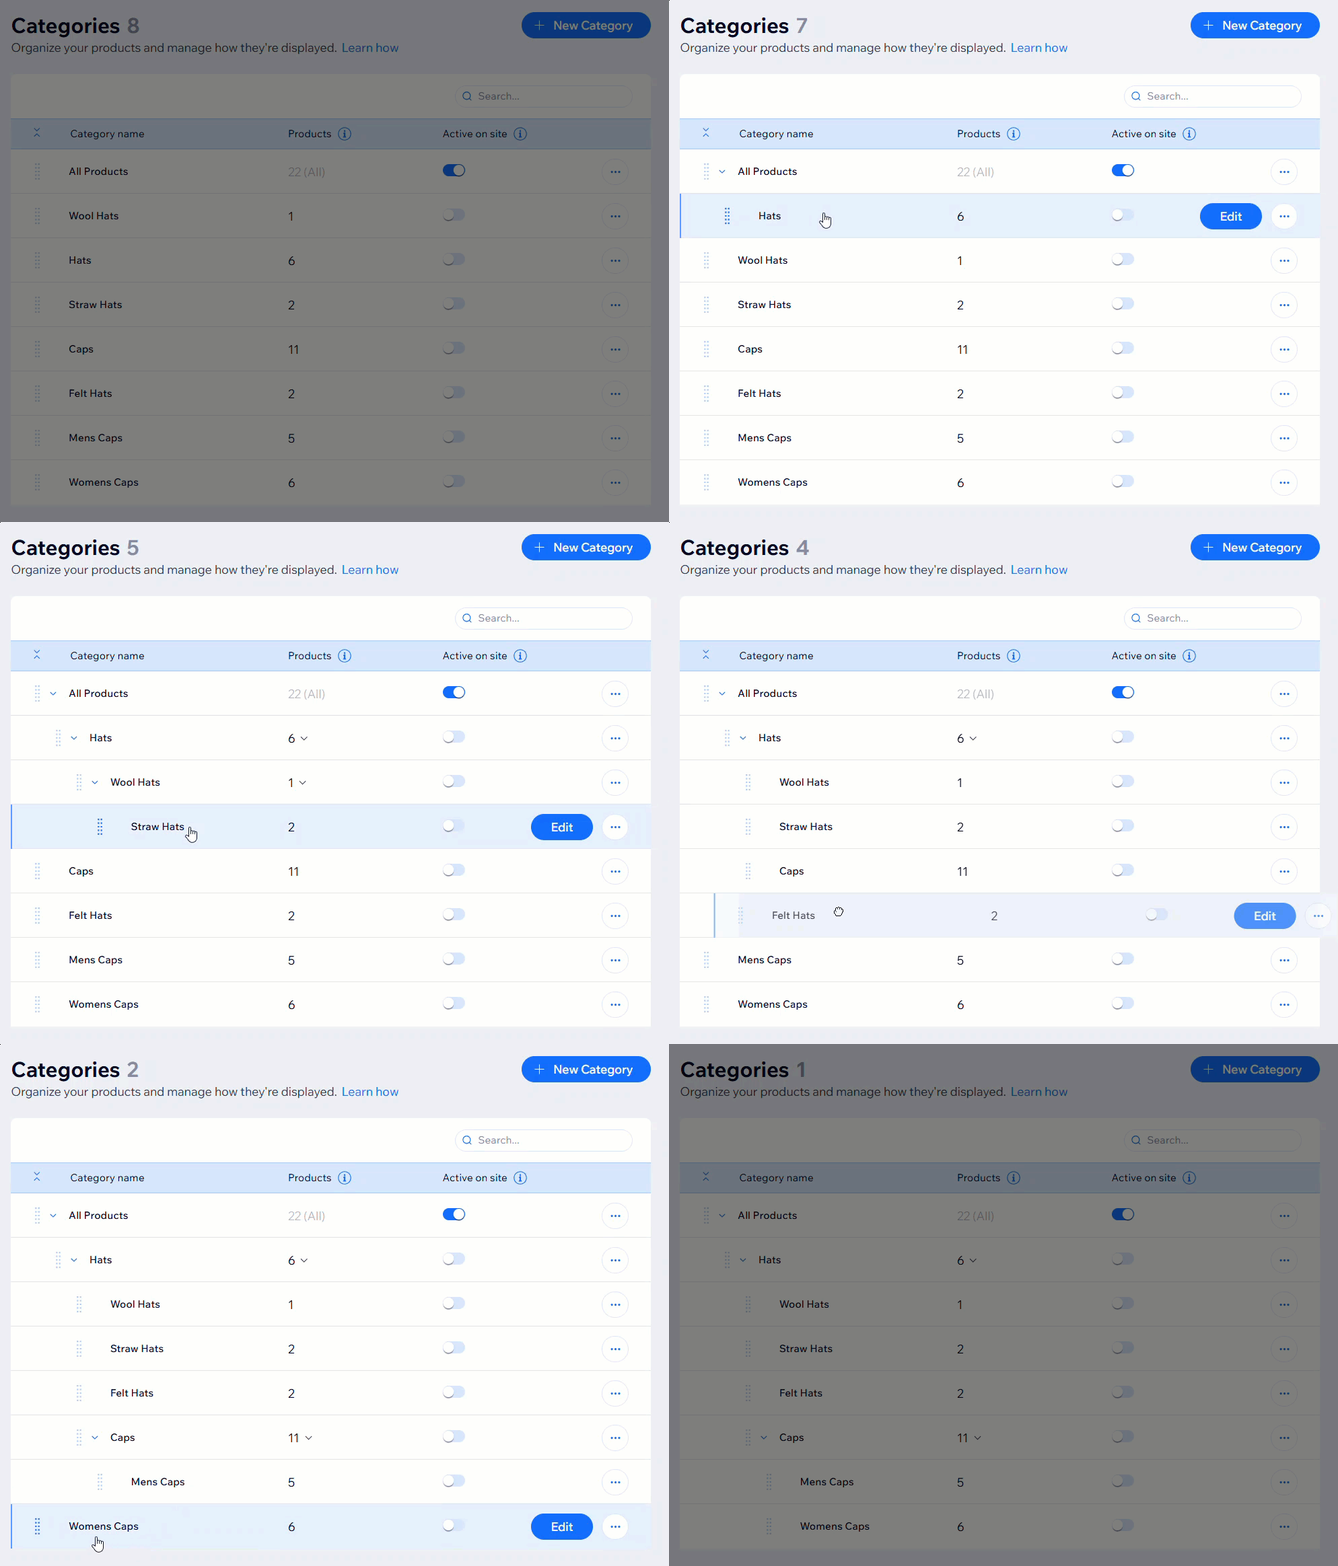
- Turn an existing category into a subcategory:
- Click and drag the Reorder icon
 on the category to move it under and slighlty to the right the relevant parent category.
- Click and drag the Reorder icon
- Create a new subcategory under a particular category:
FAQs
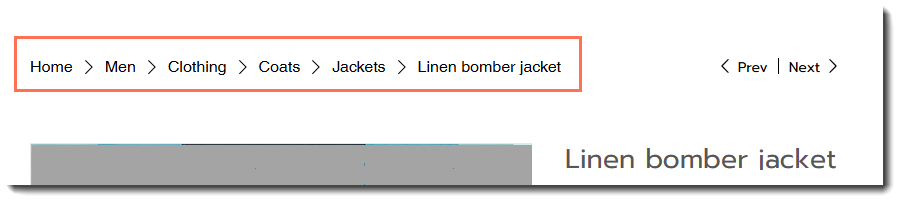
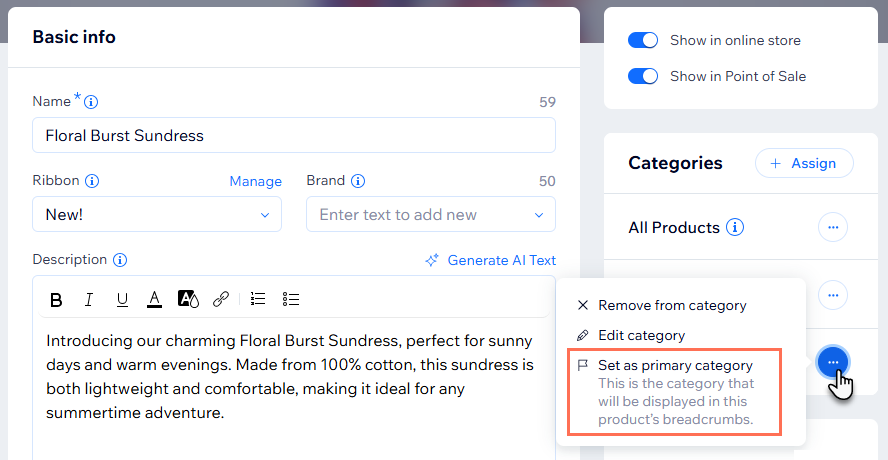
What is a product's primary category and how does it affect the product?
How can I display categories?
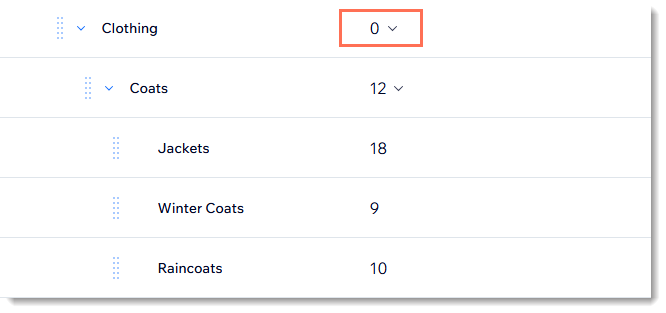
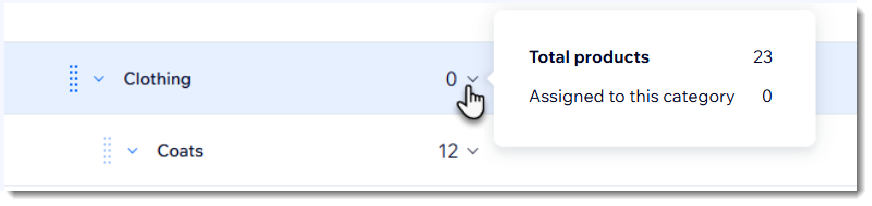
Why does my category show 0 products when there are products in its subcategories?