

Wix Events: Customizing Your Event Emails
8 min
In this article
- Managing and customizing automated emails for a specific event
- Customizing automated emails for all events
- FAQs
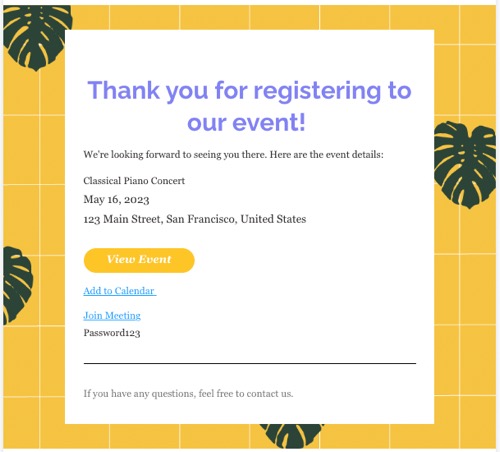
Customize the automated emails sent to your guests to make them your own. Edit event-specific text from your site's dashboard and use a unified design template for all events.
With the Automation Builder, you can create branded templates with customizable backgrounds, fonts, logos, and images. Event details are automatically pulled from your settings, ensuring consistent branding while allowing text adjustments for individual events.
Managing and customizing automated emails for a specific event
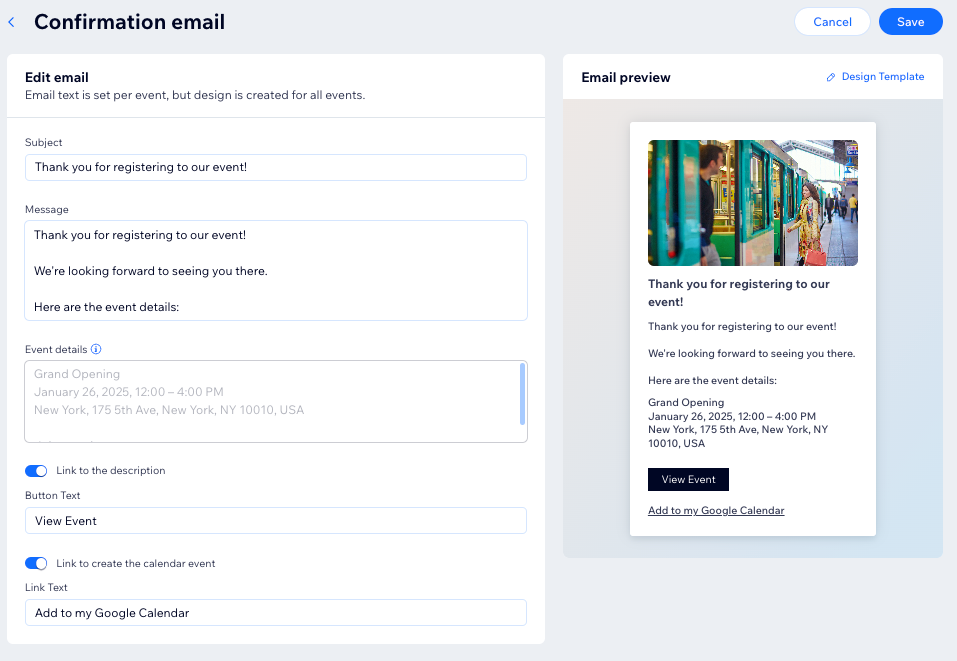
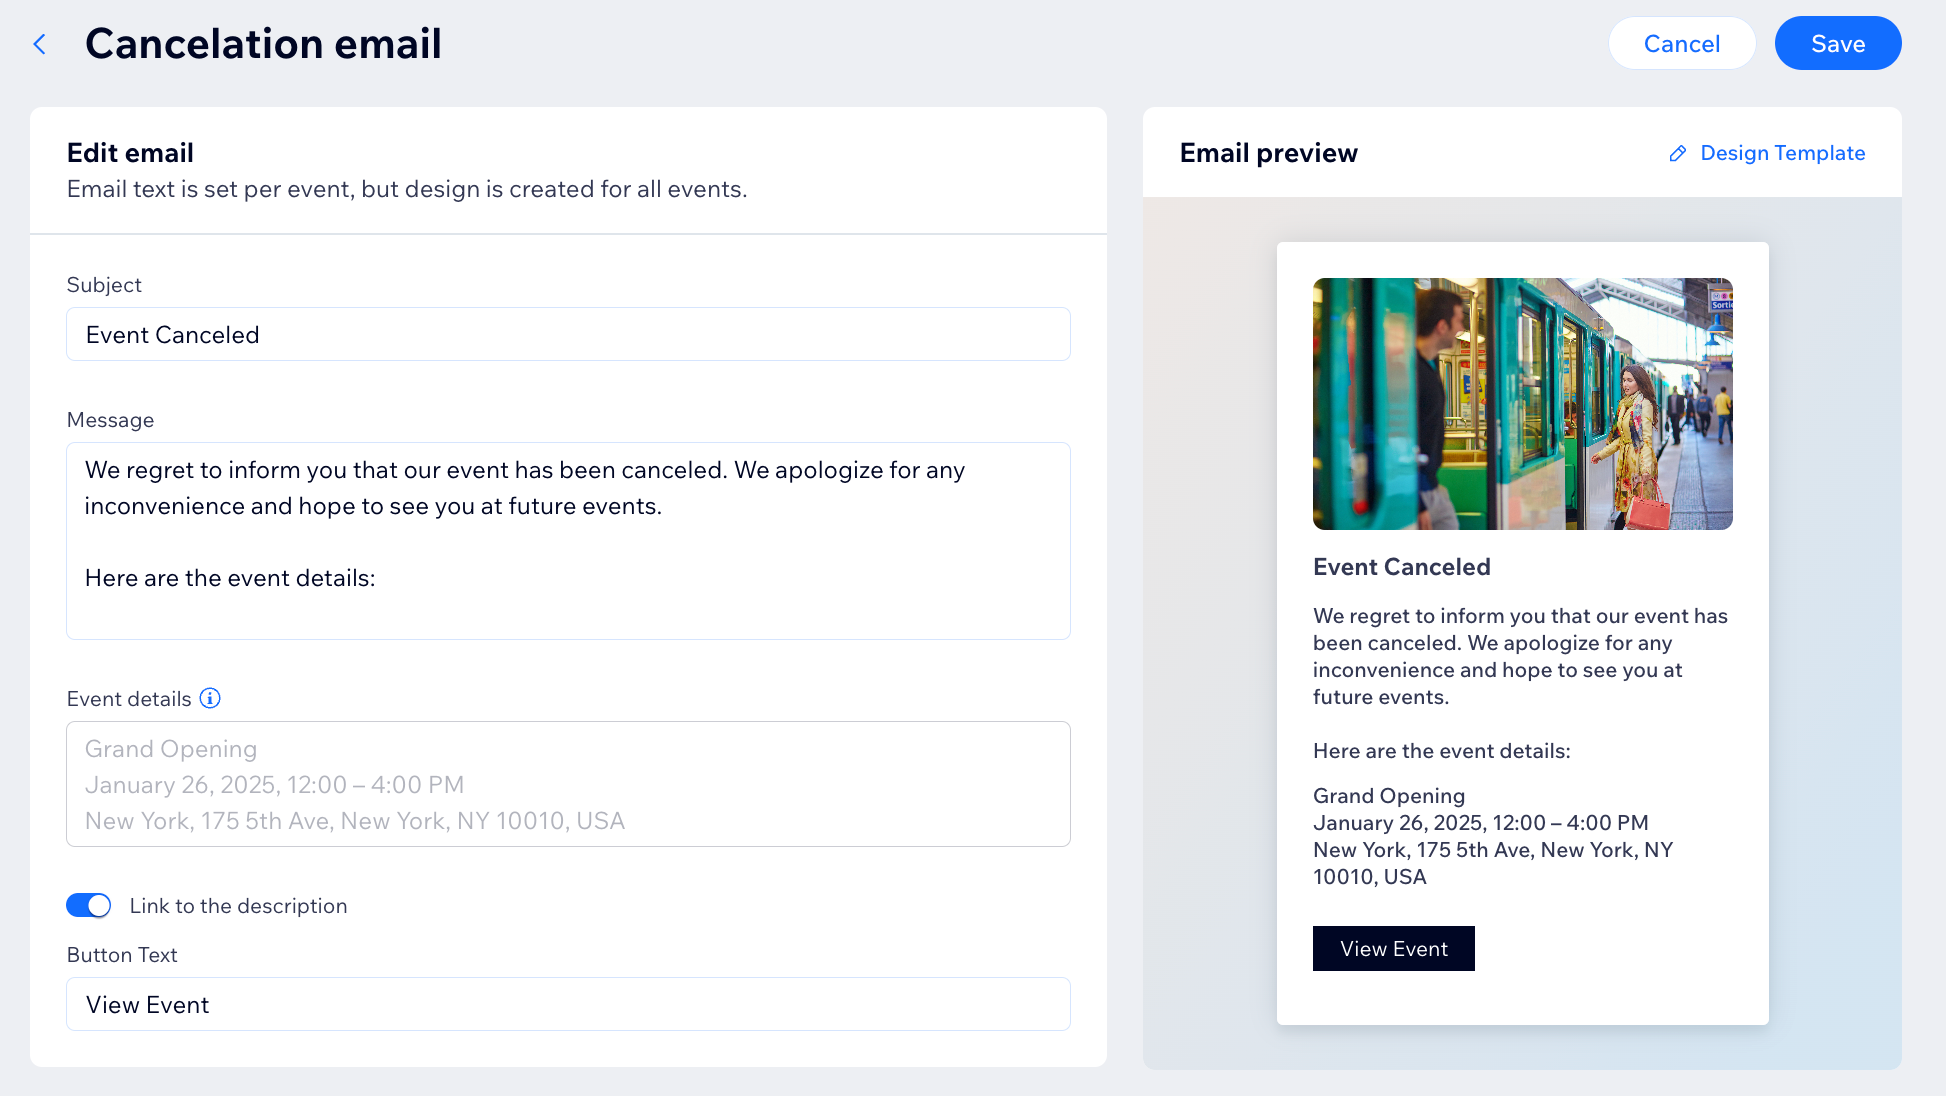
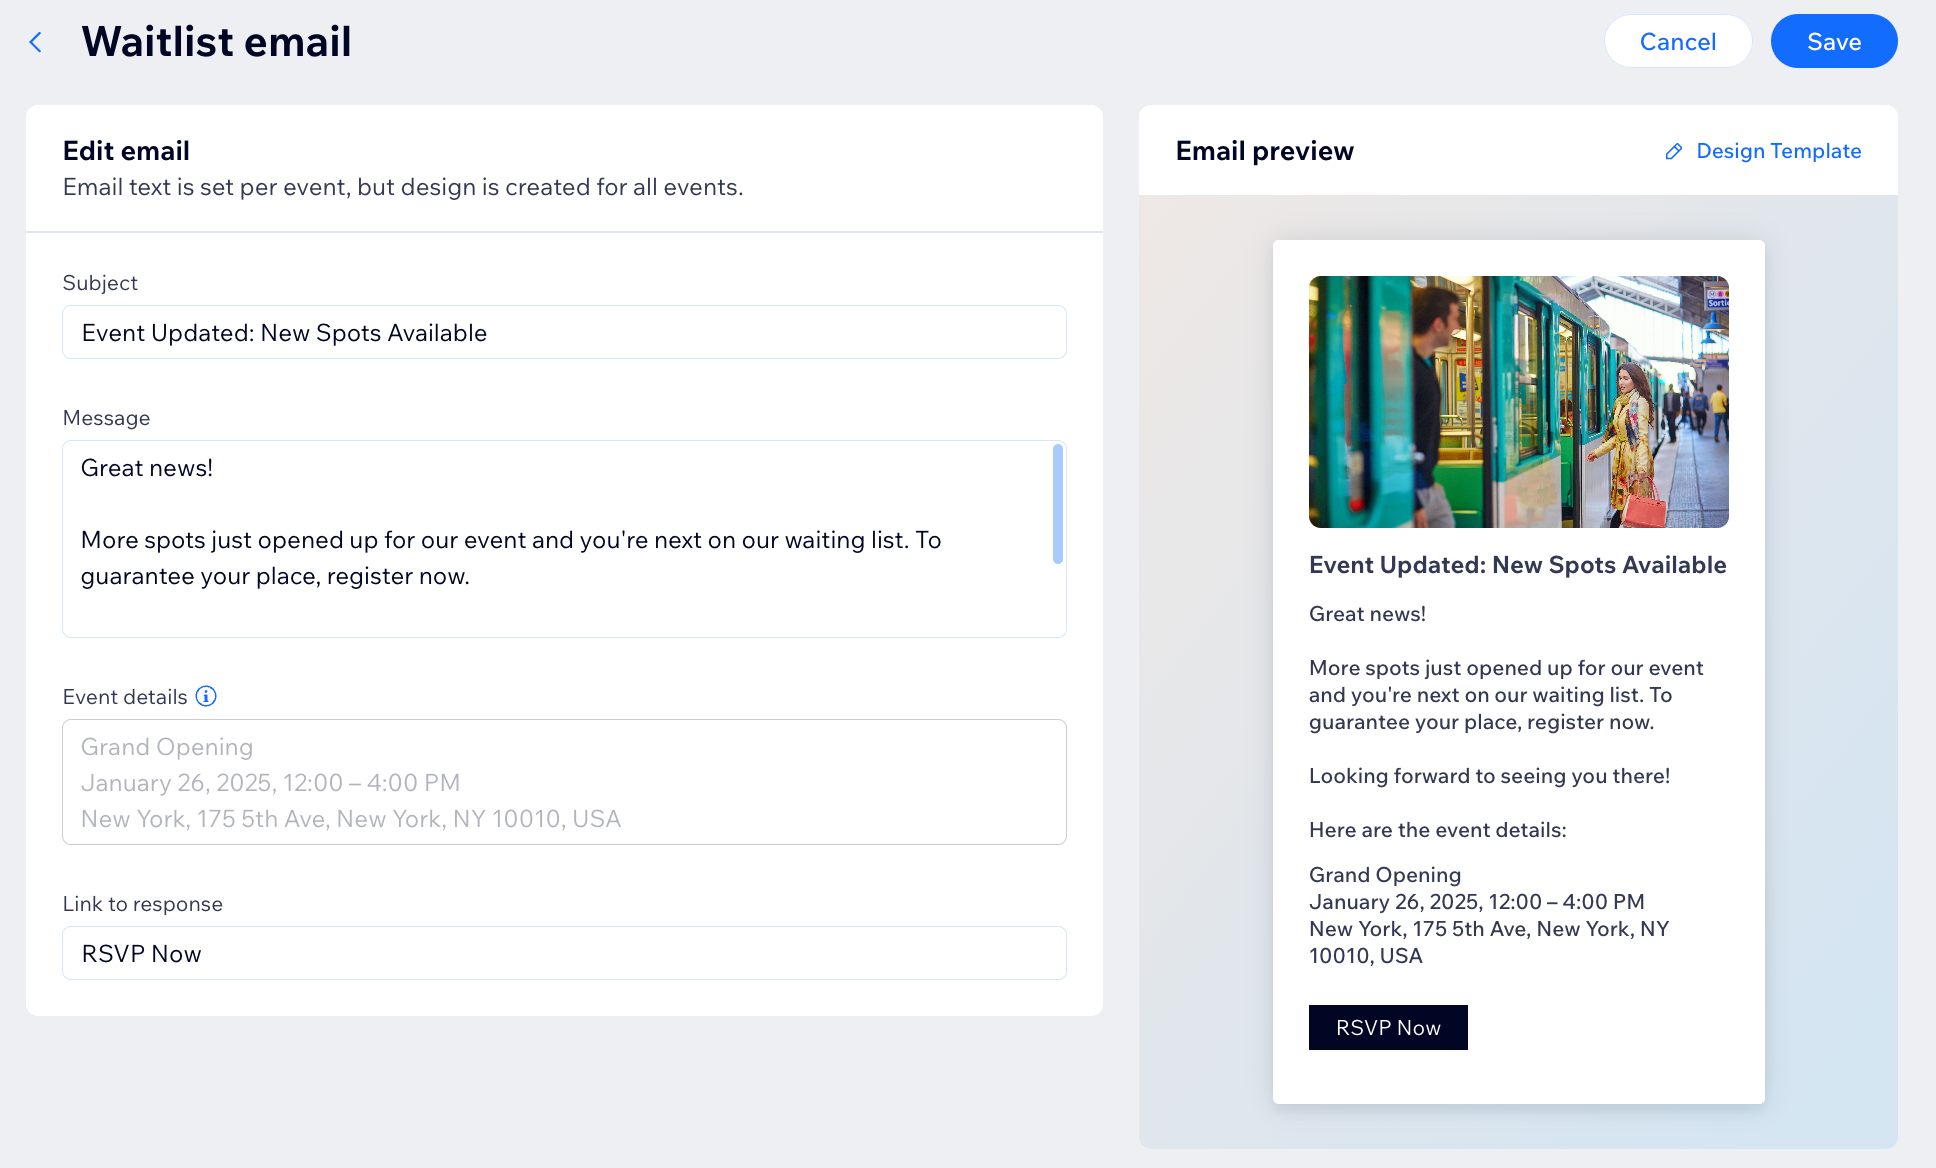
From the Settings tab for each event, you can decide which automated emails should be sent to your guests. For example, you can choose to not send a reminder email before your event. In addition, you can customize the content of the emails going out to guests (e.g. subject line, message).
To manage and customize automated emails for a specific event:
- Go to Events in your site's dashboard.
- Hover over the relevant event and click Manage.
- Click the Settings tab.
- Scroll down to Emails you send to event guests and choose the relevant option:
Confirmation email (Ticketed / RSVP)
Reminder emails (Ticketed / RSVP)

Cancelation emails (Ticketed / RSVP)
Waitlist emails (RSVP)
Tip:
To personalize the automated email, we use placeholders (i.e. dynamic fields) to show the guest's actual details, as well as the event info. For example, a placeholder for {Subject} in the email might be replaced with the specific event name, like "Annual Gala 2025 Reminder."
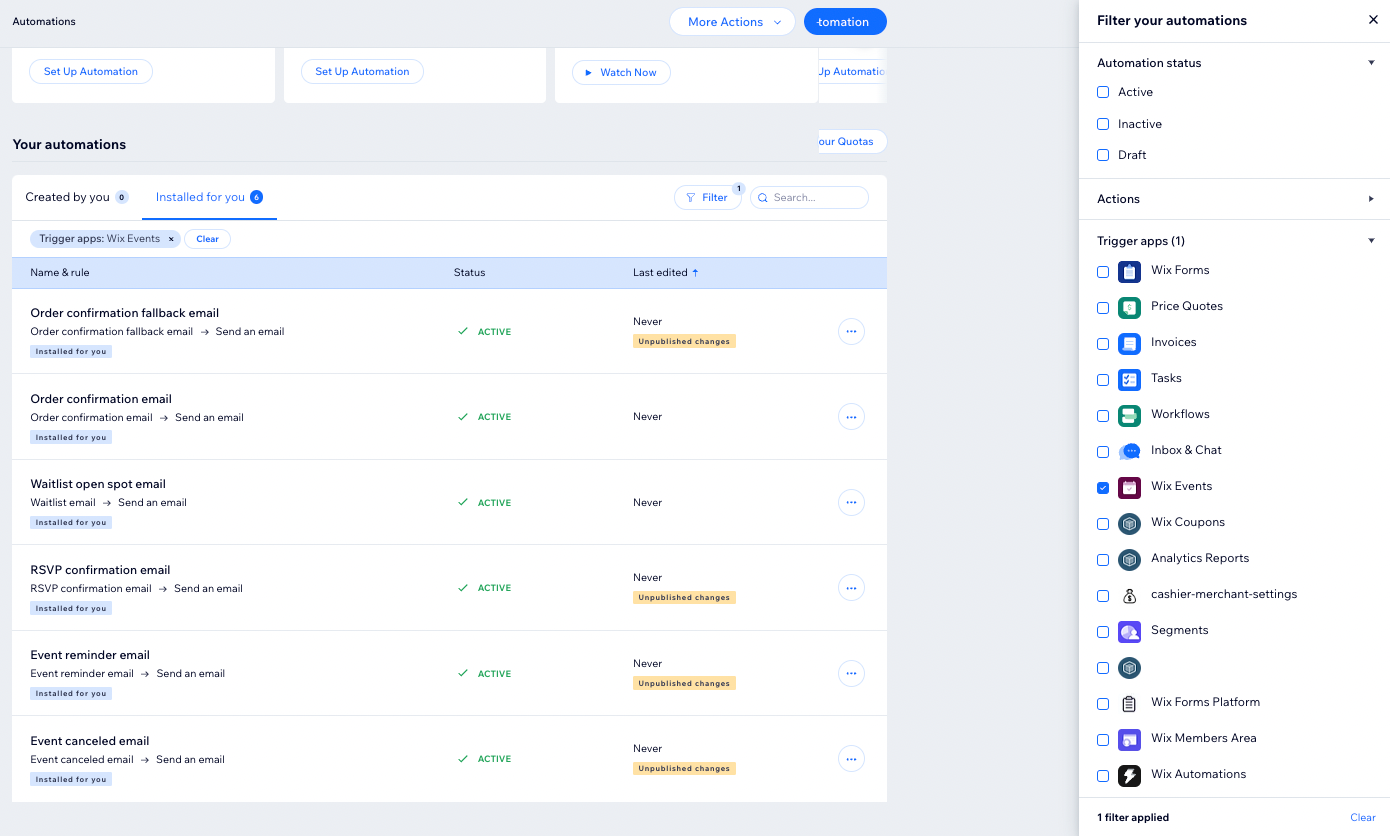
Customizing automated emails for all events
The automated emails related to Wix Events are built on Wix Automations. You can edit these automations to your needs so your changes apply to all of your events, not just a specific one. For example, you can edit the automation that controls your event reminder emails.
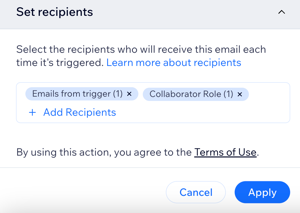
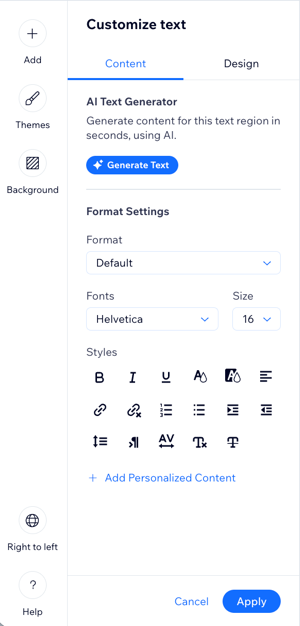
Fine-tune every aspect of your event emails, from the content and design to the sender details, including personalizing the sender's name and reply-to email. Additionally, you can customize the recipient list to choose exactly who will receive your message when it's triggered.
Notes:
- When you customize an email template (e.g. reminder email), the changes apply across all events.
- When editing the design of your event email, you'll be directed to Automations in your site's dashboard.
To customize event emails:
- Go to Events in your site's dashboard.
- Click Manage next to the relevant event.
- Click the Settings tab.
- Scroll down to Emails you send to event guests and click Edit next to the relevant email.
- Click Design / Edit Template next to Email preview.
- Click the Send an email action to open the panel on the left.
- Manage the relevant options:
Sender details
 next to Default.
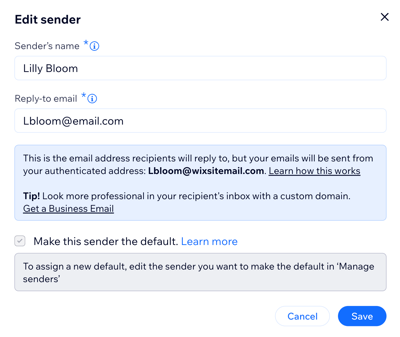
Email template
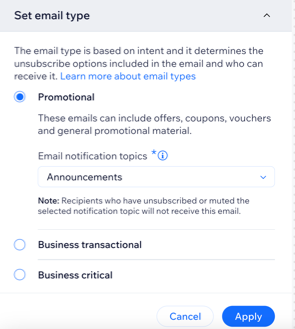
Email type
Email recipients
FAQs
Click a question below to learn more about customizing event emails and the automation builder.
What is an App automation?
Where can I find App automations for Wix Events?
How can I tell if an automation is an App automation?
What happens if an automation is inactive?
What is the order confirmation fallback email?
What happens if I delete a dynamic value from an email template?
How can I add back a dynamic value that I deleted from an event email?
Can I add attachments to my email?

