

Wix Online Programs: Editing Your Program Settings
14 min
In this article
- Editing your program's basic info
- Managing your program's schedule
- Updating your program's enrollment and payment
- Customizing your program's content settings
- Adding engagement options to your program
- Assigning instructors to your program
- Editing your program's SEO settings
- Setting notifications for your program
After creating an online program, you can update it at any time to keep it fresh. Change your program's name, describe what your program is about, set your prices and schedules, or decide whether to assign groups and badges to your participants.
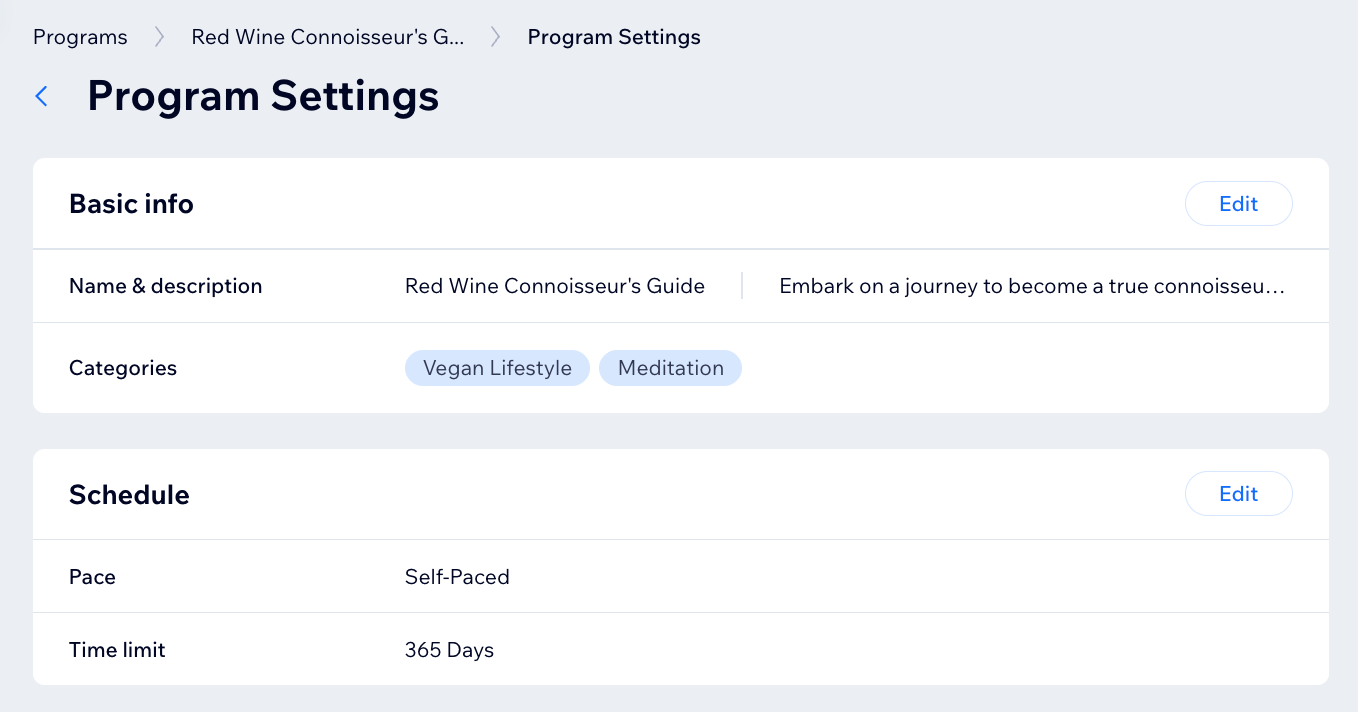
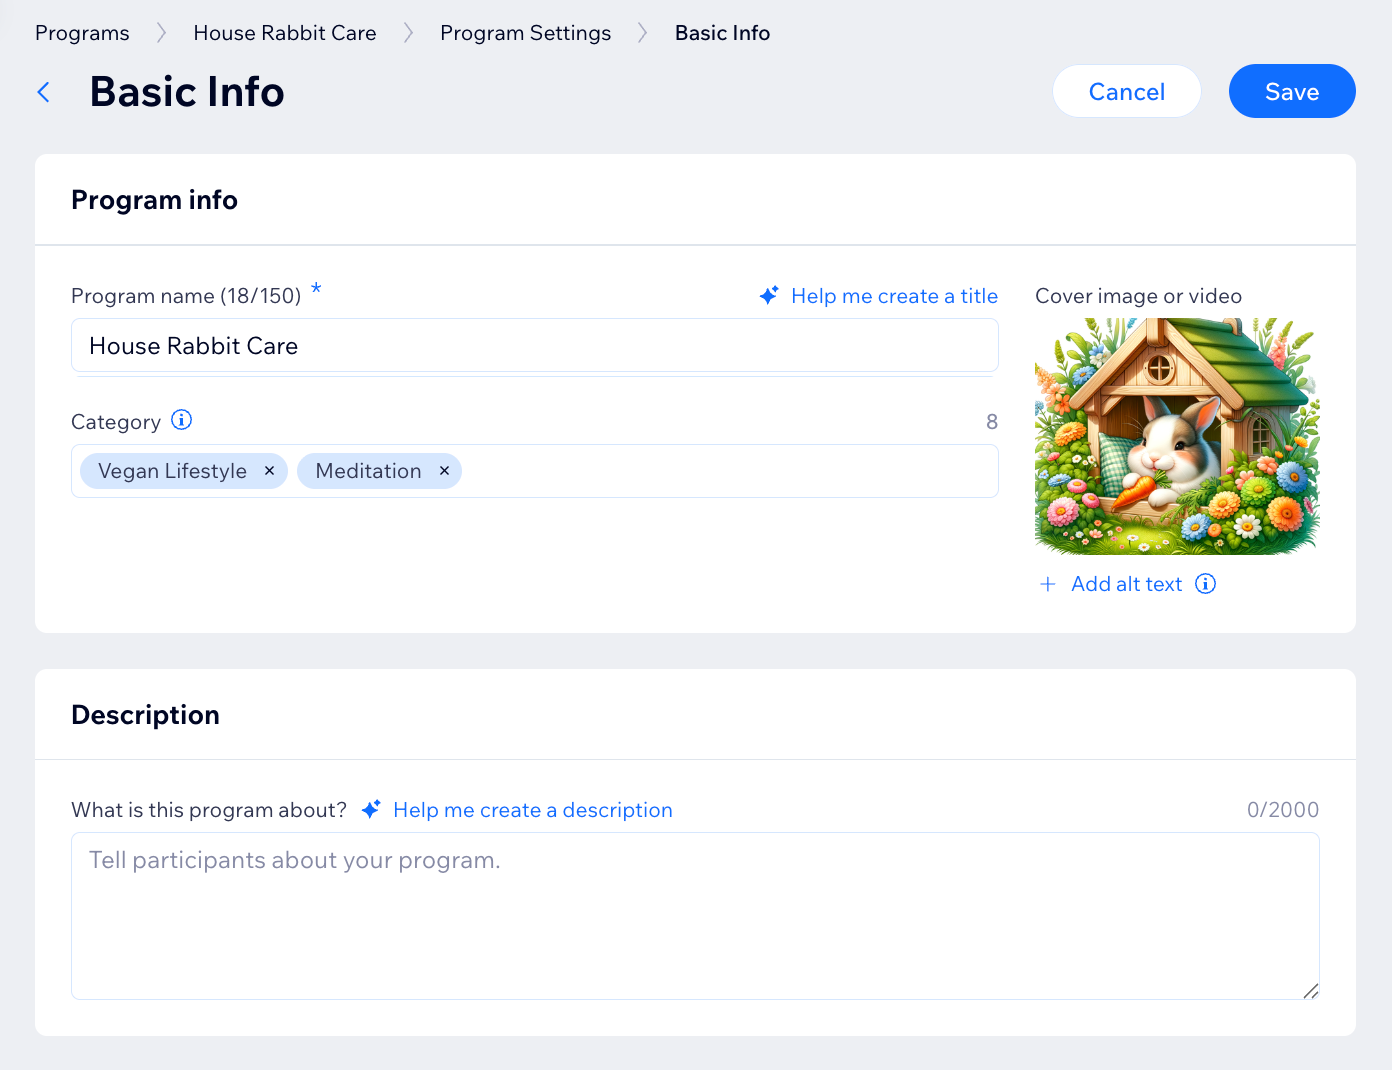
Editing your program's basic info
Give your program a name and an image that tells your participants what they can expect. Create a description that encourages participants to join and add categories to allow participants to filter programs by category.
Dashboard
Wix app
- Go to Online Programs in your site's dashboard.
- Click the relevant program.
- Click the Settings tab.
- Click Edit next to Basic info.
- Customize the settings based on the following options:
- Program name: Enter a new name or edit the existing one.
- Category: Add category labels to appear in your program list to help organize your list to make it easier to find.
- Cover Image: Customize your cover image:
- Add a new image: Click the Add Image icon
 to add a new cover image.
 - Replace the image: Hover over it and click the Update icon
 .
. - Add alt text: Click + Add alt text for better SEO and accessibility.
- Delete the image: Hover over the image and click the Remove icon
 .
.
- Add a new image: Click the Add Image icon
- Description: Update your program description or enter a new one.
- Click Save.
Managing your program's schedule
Decide if your program is self-paced or set a schedule and choose its duration.
Important:
- Ongoing programs are no longer available. If you already have an ongoing program set up, you cannot duplicate it.
- You cannot change the pace of the program once participants join it.
Dashboard
Wix app
- Go to Online Programs in your site's dashboard.
- Click the relevant program.
- Click the Settings tab.
- Click Edit next to Schedule.
- Set your program to be self-paced or to run according to your schedule:
Self-Paced
Scheduled
6. Click Save.
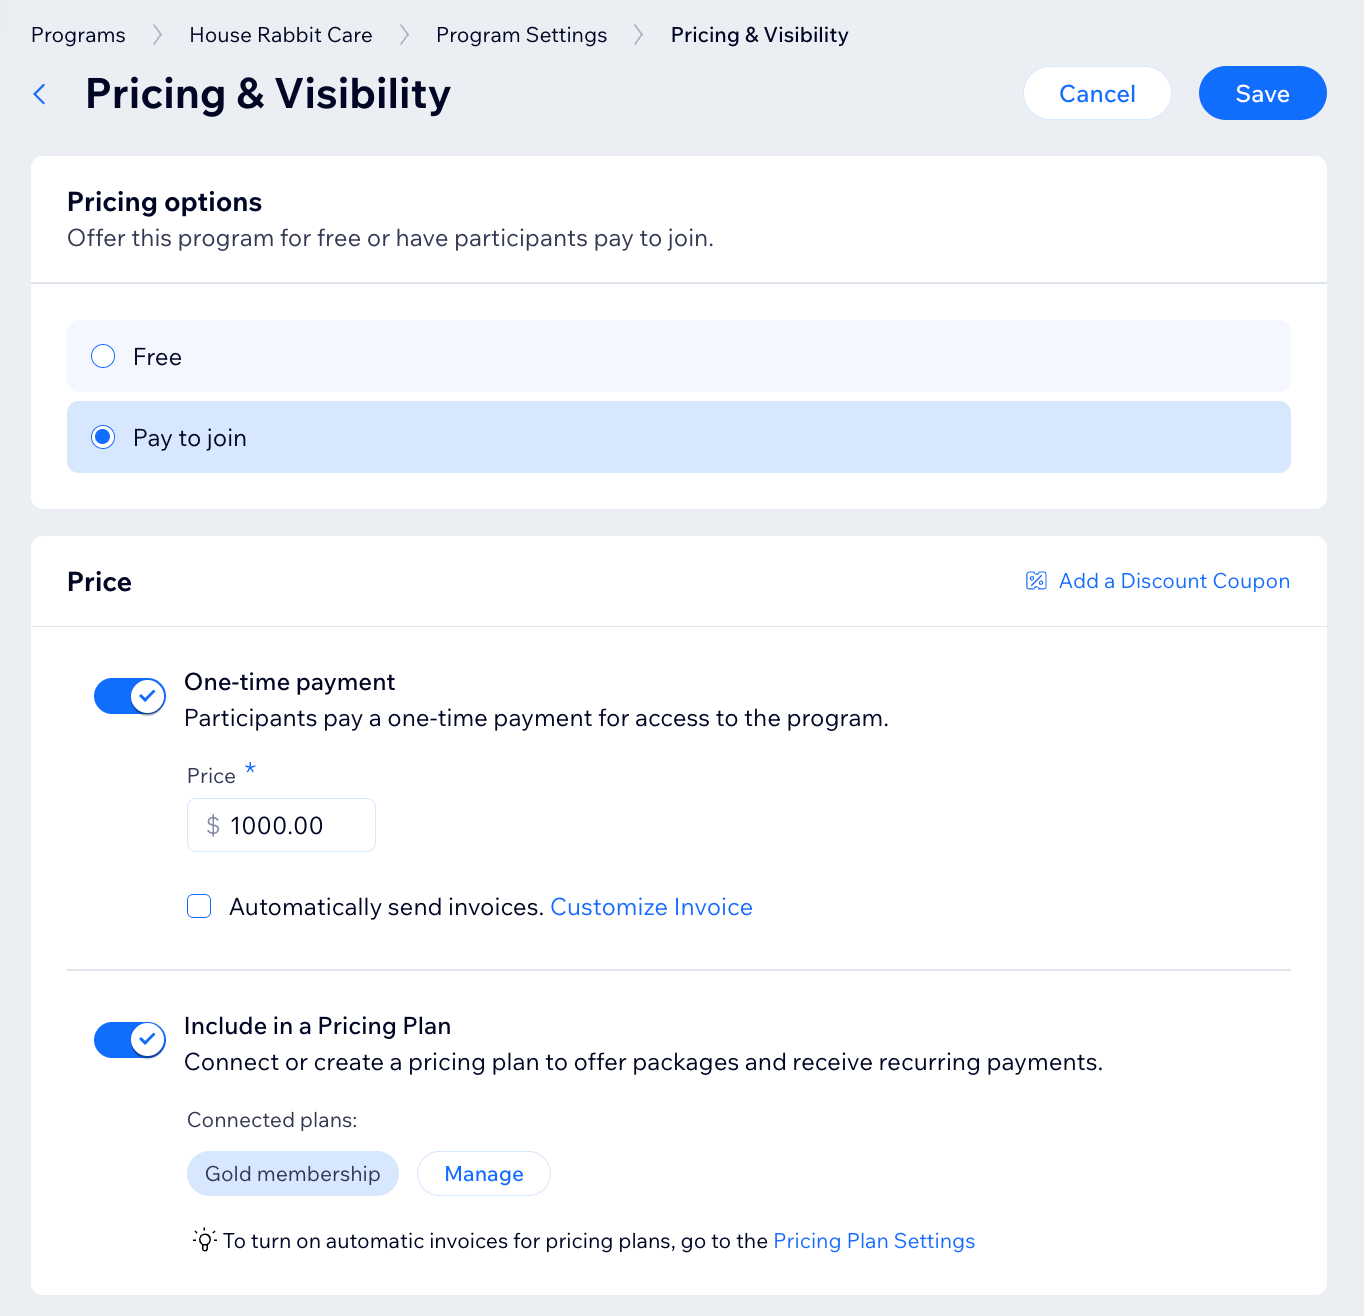
Updating your program's enrollment and payment
Customize the audience, participant capacity, and payment options for your program. Then, automatically generate invoices upon purchase.
Important:
Upgrade your site so people can start joining your program.
Dashboard
Wix app
- Go to Online Programs in your site's dashboard.
- Click the relevant program.
- Click the Settings tab.
- Click Edit next to Enrollment & payment.
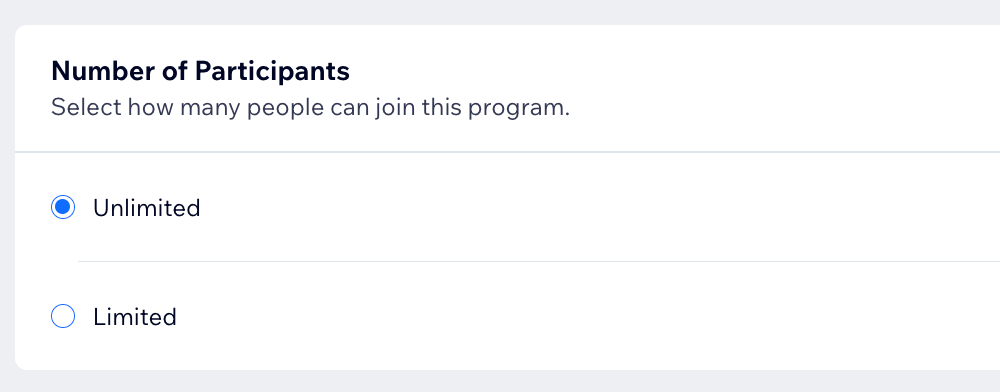
- Customize the settings based on the following options:
Price
Visibility

Number of Participants
5. Click Save.
Tip:
You can add steps to a published program that is live and has participants.
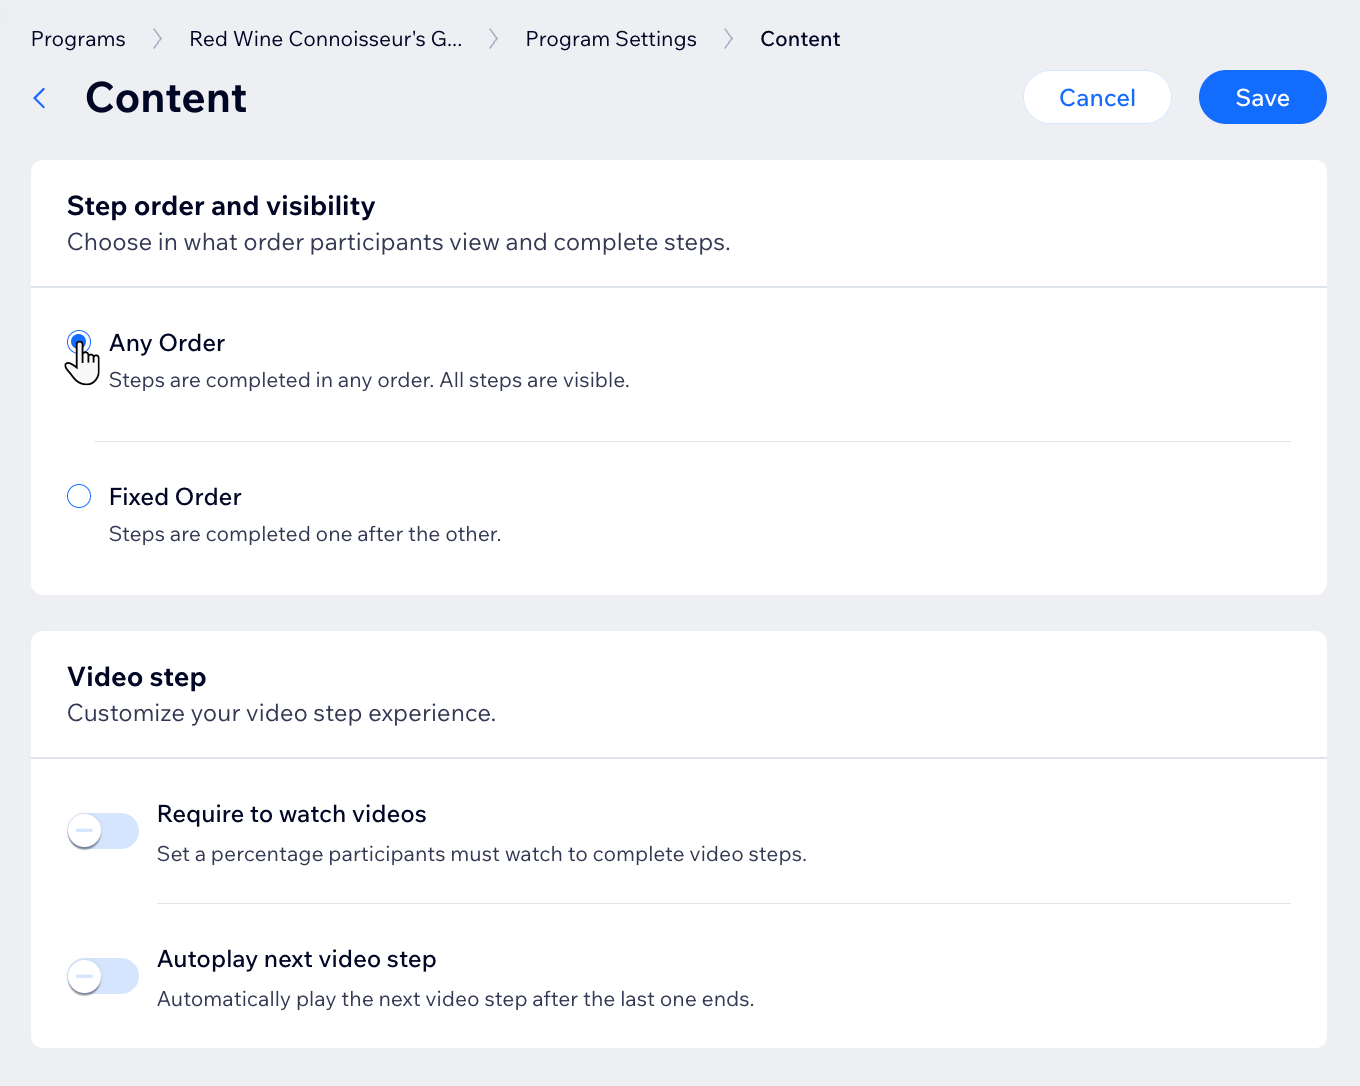
Customizing your program's content settings
Customize how participants engage with and progress through the program. For example, you can set the sequence of steps your participants should follow.
Dashboard
Wix app
- Go to Online Programs in your site's dashboard.
- Click the relevant program.
- Click the Settings tab.
- Click Edit next to Content settings.
- Choose in what order participants view and complete steps:
- For a scheduled program: Click the Hide future steps toggle to hide the content of future steps until a current step is completed.
- For a self-paced program: Set the sequence of steps your participants should follow:
- Any Order: Participants can complete steps in the order they want.
- Fixed Order: Participants can complete steps in the order you set for them. Choose whether you want to Show future step content or Hide future step content until current steps are completed.
- Enable the relevant toggles to customize your video step experience:
- Require to watch videos: Set a required percentage participants must watch to complete the step.
- Autoplay next video step: Automatically play the next video after the current one ends. Note: These settings apply to all video steps in your program.
- Click Save.
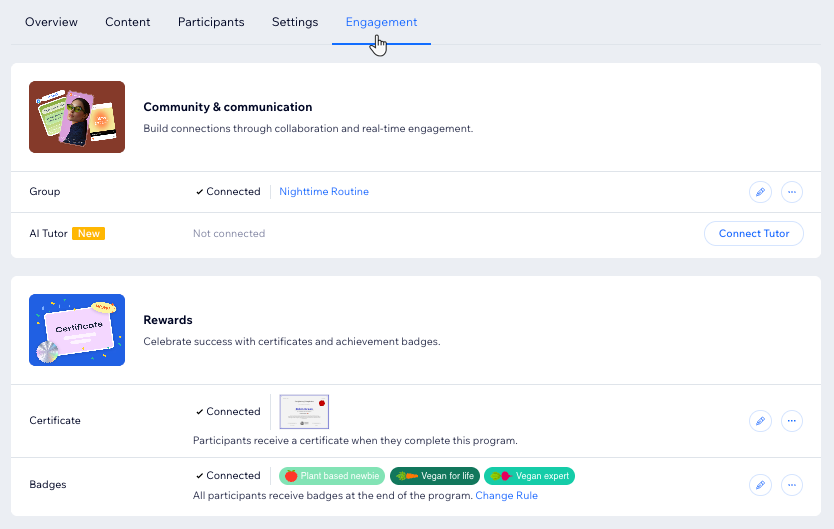
Adding engagement options to your program
There are various different ways to make your participants feel more engaged. You can connect a group to your program to encourage ongoing discussions and progress sharing, with polls, posts, comments, and updates.
You can also acknowledge participants' achievements with customized badges, reflecting their accomplishments in the program. Additionally, boost motivation by designing and sharing certificates upon program completion.
Dashboard
Wix app
- Go to Online Programs in your site's dashboard.
- Click the relevant program.
- Click the Engagement tab.
- Choose what you want to add to your program:
Group
AI tutor
Certificate
Badges
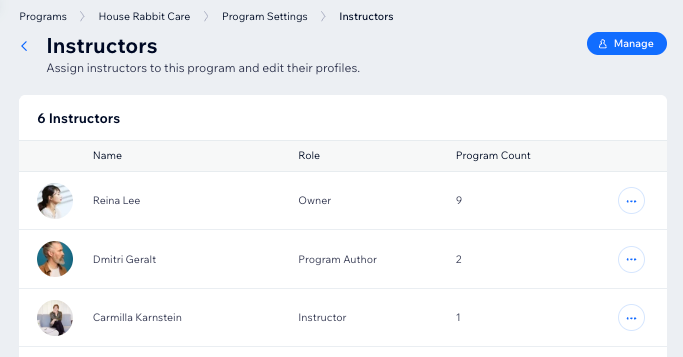
Assigning instructors to your program
To run online programs, assign skilled collaborators to your program team. Choose from Program Author, Program Manager, or Program Instructor—each with specific permissions and no full site access.
Dashboard
Wix app
- Go to Online Programs in your site's dashboard.
- Click the relevant program.
- Click the Settings tab.
- Click Manage next to Instructors.
- Add instructors and assign them to your program.
Editing your program's SEO settings
Optimize your program's SEO settings to include features such as title tags, meta descriptions and more. Tailor your program for social media sites, and access advanced SEO options.
To edit the SEO settings:
- Go to Online Programs in your site's dashboard.
- Click the relevant program.
- Click the Settings tab.
- Click Edit next to SEO.
- Customize SEO for your online program using the SEO assistant.
- Customize SEO basics for your online program.
Tip:
We recommend not changing the advanced SEO settings and the Social Share pages. Relying on the default settings is often more effective. Especially for those who may not have extensive expertise in these areas.
Learn what you can do to help your programs' visibility in search results:
Setting notifications for your program
Manage and automatically send all of your member notifications through Wix Automations. Use different triggers to customize messages, such as welcoming new members, sending reminders, and sharing other types of useful info.
To set notifications for your program:
- Go to Online Programs in your site's dashboard.
- Click the relevant program.
- Click the Settings tab.
- Click Go to Automations under Automations control all notifications.
- Create the relevant automation.
