

AI Tools: Managing the AI Marketing Agent
10 min
In this article
- Managing your tasks
- Managing your marketing settings
- Managing your notifications
- FAQs
Manage your site's marketing efficiently in the AI Marketing Agent dashboard. Leverage AI to generate personalized content and suggest ways to optimize your site, saving you time and resources while helping grow your business.
While AI does the heavy lifting, you still have control over your marketing efforts. Edit and approve content for social media posts, email campaigns, and more, ensuring they align with your goals and brand messaging.
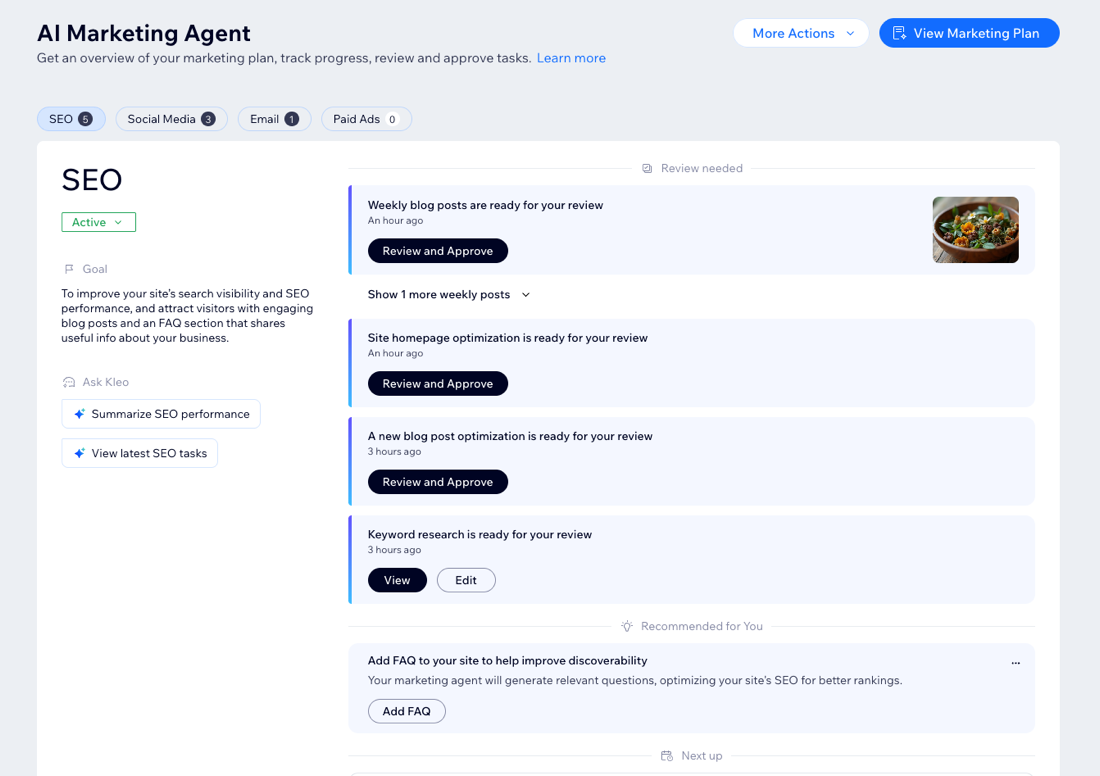
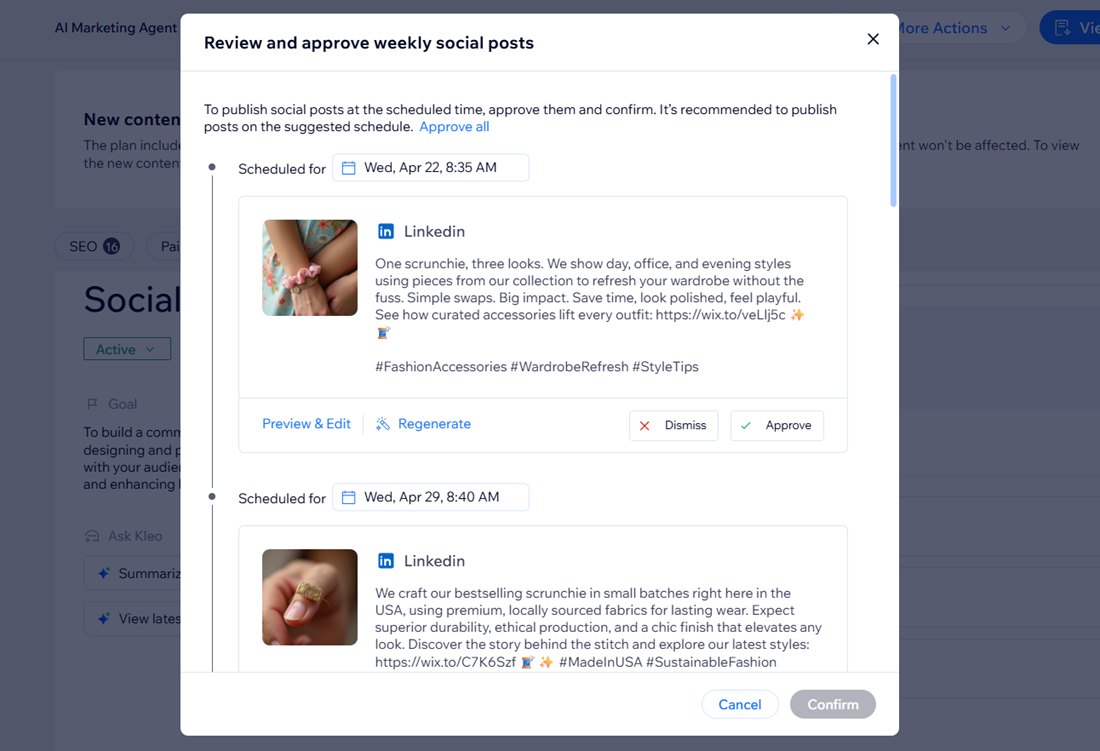
Managing your tasks
The tasks in your dashboard are the action items that you need to review and approve, so that the agent can work on your behalf to implement changes, post content, or send out campaigns. The tabs at the top show you the number of pending approvals in each marketing service.
The agent works for you and only notifies you when necessary, which is to review and approve tasks. This keeps you in the loop and allows you to make necessary adjustments before anything gets published.
To manage your tasks:
- Go to the AI Marketing Agent in your site's dashboard.
- Scroll down to the relevant marketing service.
- Choose what you want to do:
Review and approve a task
Edit a task
 next to a task.
Run a task

Deactivate a task

Tip:
Use the prompts on the left of every section to chat with Kleo, the site's AI Marketing agent, to get information about the marketing efforts. For example, get an update on social media tasks or summarize the site's paid ads performance.
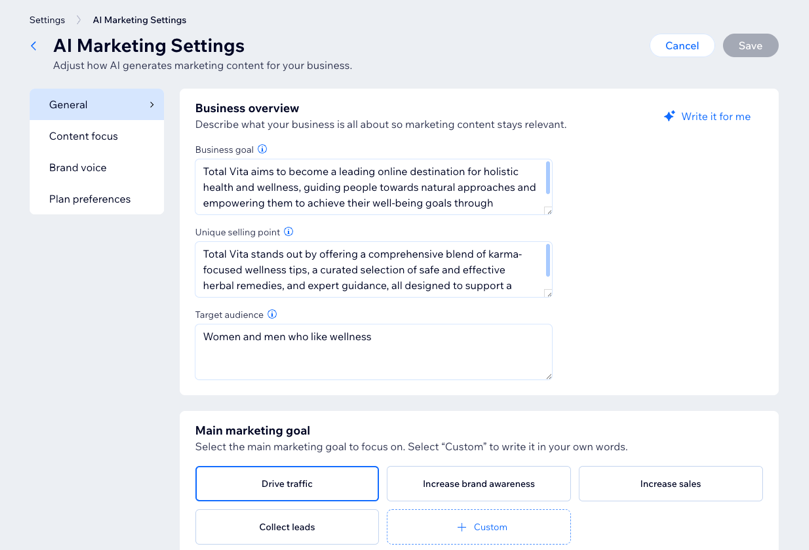
Managing your marketing settings
Your AI Marketing Agent tailors marketing content based on the information and preferences you provide. You can update details like your business goals, marketing focus, tone of voice, and where you want to publish content. Adjust these settings whenever your strategy changes to keep your marketing plan relevant and effective.
To manage your settings:
- Go to the AI Marketing Agent in your site's dashboard.
- Click More Actions at the top and select Manage settings.
- Choose what to update:
Tip: Use the AI option next to a text box to help describe your vision and guidelines.
General
Content focus
Brand voice
Plan preferences
Editing keywords:
Update keywords based on changes to your business goals, market trends, competitor analysis, or insights from other keyword research tools.
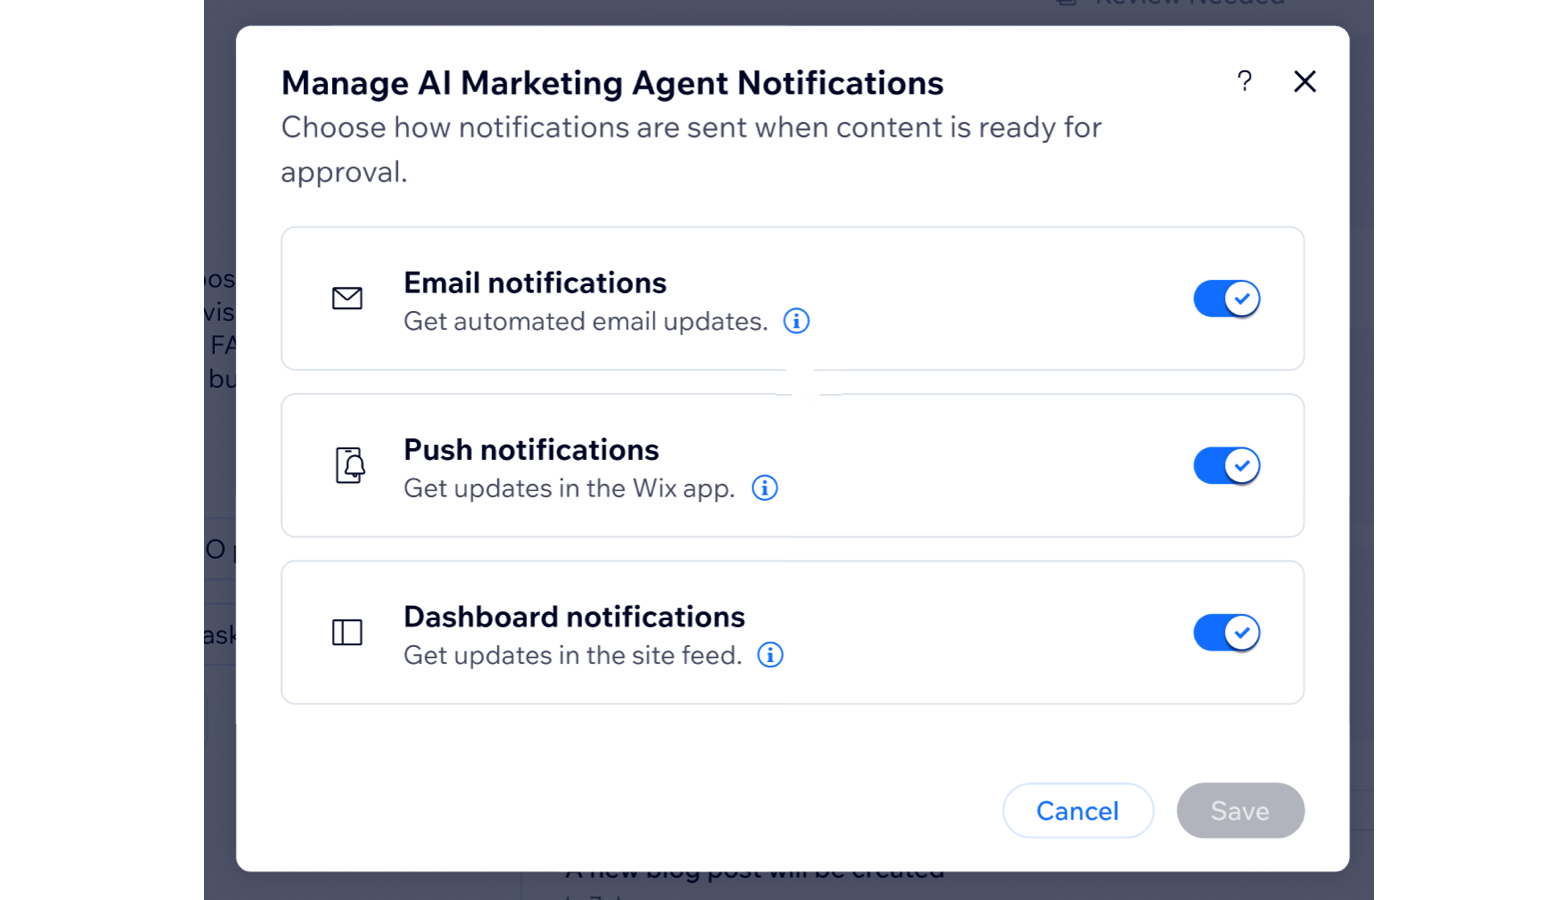
Managing your notifications
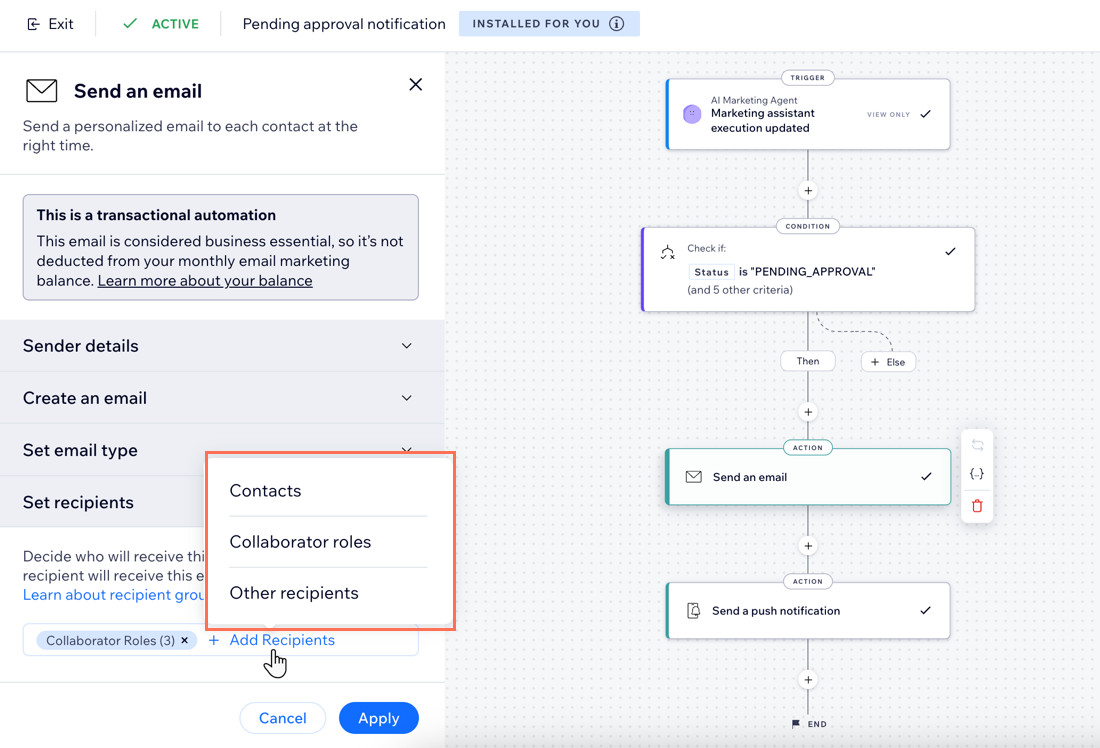
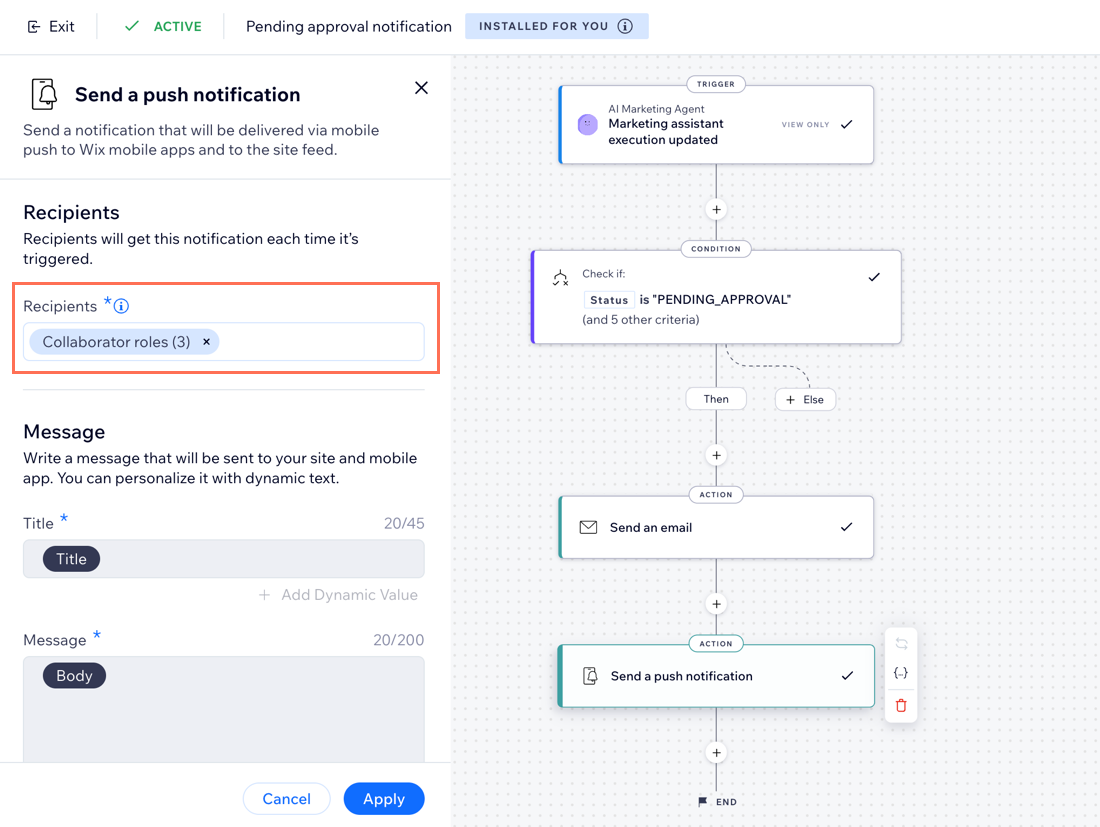
The AI Marketing Agent notifies you when new content is created and require your approval. You can manage how you receive these notifications and choose which roles or contacts should get them, so the right people are always in the loop for pending content approvals.
Note:
When editing your notification, you'll be directed to Wix Automations in your site's dashboard. This automation is automatically installed for you and cannot be deleted.
To manage your notifications:
- Go to the AI Marketing Agent in your site's dashboard.
- Click More Actions at the top and select Manage notifications.
- Choose what to do:
Enable or disable notifications
Edit email notification recipients
Edit mobile and dashboard notification recipients
Reset notifications to default
 next to Pending approval notification.
FAQs
Click a question below to learn more about the AI Marketing Agent dashboard.
What tasks can the AI Marketing Agent help with?
What's the difference between the types of social media marketing tasks and email marketing tasks?
How do I know when there's a task ready for my approval?
Who can access the AI Marketing Agent dashboard?
Do I need to upgrade my social media marketing and email marketing plans to use this feature?
How do I activate or deactivate a marketing service?

What happens if I run out of AI credits?
