Editor X: Editing and Customizing Images
8 min read
In this article
- Adjusting your image sizing
- Stretching your image to fill a section, container or grid cell
- Choosing your image's fit mode
- Cropping your image
- Setting the image focal point
- Choosing the scroll behavior
- Editing an image with Wix Photo Studio
- Adding a watermark for copyright protection
Editor X is transitioning to Wix Studio, our new platform for agencies and freelancers.Learn more about Wix Studio
Once you add images to your site, you can use a wide range of options to customize and edit them. Adjust image sizes, crop them and set their focal points so the relevant areas are always displayed, regardless of the screen size.
You can also change scroll behaviors, edit with Photo Studio, and add watermarks for copyright protection.
In this article, learn how to:
Adjusting your image sizing
You can adjust the sizing of your image with the Inspection tool. Choose between fixed or fluid measurements to suit your design needs. Fixed images stay the same in each viewport, and fluid images are responsive, and adjust to different breakpoints.
To adjust the image sizing:
- Click the image in your Editor.
- Click the Inspector panel icon
 at the top right.
 - Choose an option under Size:
- Fixed: Set the width and height of your element in px.
- Fluid: Use relative units of measure (% or Auto) to define your element's width and height.
Tip: Select the Scale proportionally checkbox to automatically adjust the height according to the width.
Note:
It is not possible to adjust the sizing of an image that's stretched to a grid cell, container or section. The height and width of a stretched image are set to auto, so it resizes automatically, according to the dimensions of the parent element.
Stretching your image to fill a section, container or grid cell
Using the stretch tool, you can set your image to fill a section, container, or grid cell on your site. Stretching your image means it automatically resizes to the dimensions of the parent element, so you don't need to worry about manually adjusting the sizing.
To add and stretch an image:
- Click Add on the top of the top bar of the Editor.
- Click Media.
- Drag an image on to your section.
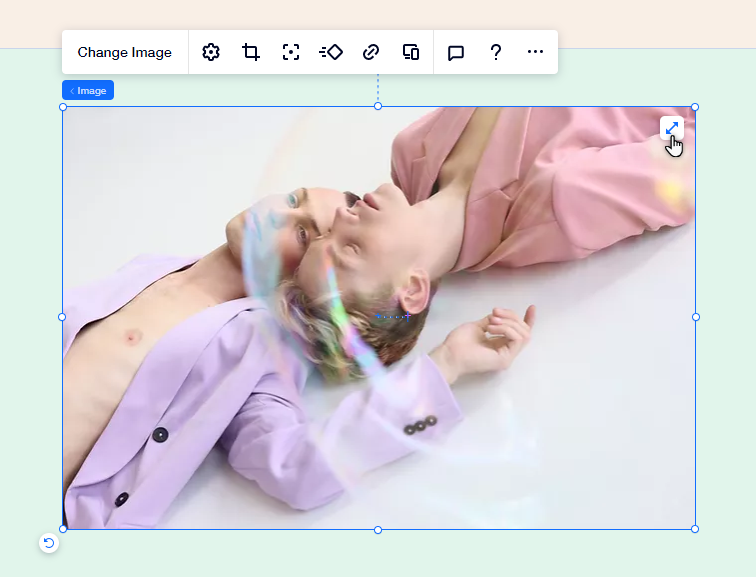
- Click the Stretch icon
 on the top right of the image to fill the whole space.
Tip:
When stretching an image over a section, the background color loads first and then the image. In most cases, the image loads fast enough that you don't see the color at all, but some visitors might see a flash of color. It's therefore important to set the section's background color, even if it's not always visible.
Tip:
You can set an image as the section's background from the Inspector panel, adding color and/or pattern overlays.
Choosing your image's fit mode
In Editor X, every image has a bounding box that acts like a responsive container. These are the blue edges that you see around your image. You can choose how your image is displayed within the bounding box (e.g. Fill, Fit).
To choose your image's fit mode:
- Click the image in your Editor.
- Click the Settings icon
.
- Select an option from the Display mode drop-down:
Fill bounding box

Fit to bounding box

Keep image ratio

Working with breakpoints:
The display mode you choose for your image applies to all breakpoints.
Cropping your image
With Editor X, you can choose how an image is cropped for each breakpoint. This allows you to further customize the site to suit your specifications, as well as provide an ideal experience for visitors on all devices.
To crop an image:
- Select the breakpoint you want to customize the image for.
- Click the image in your Editor.
- Click the Crop icon
.
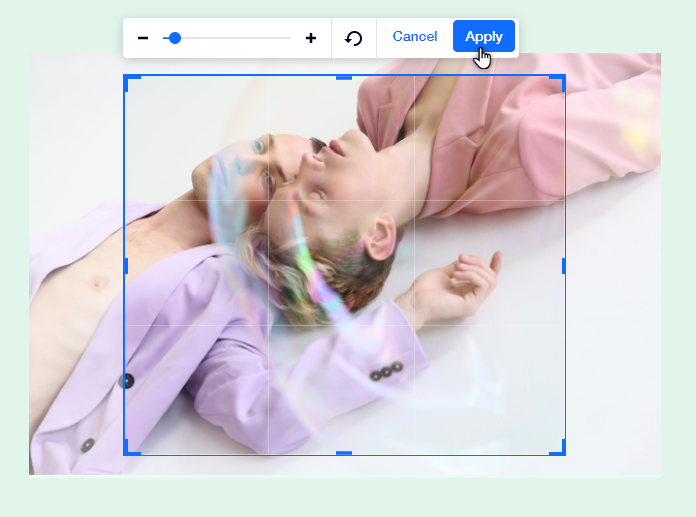
- Customize the crop to your needs.
- Click Apply.
Setting the image focal point
You can choose the image focal point for each breakpoint. This allows you to select which part of the image is visible when it's resized for different breakpoints on different screen sizes.
To set the image focal point:
- Select the breakpoint you want to customize the image for.
- Click the image in your Editor.
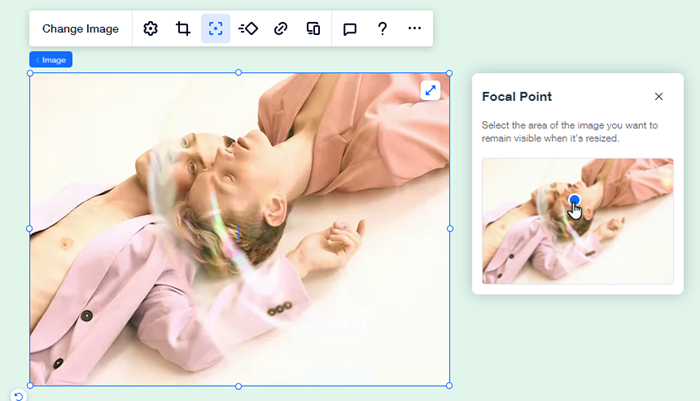
- Click the Focal Point icon
.
- Select the area of the image that you want to remain visible when it's resized.
Tip:
Whenever a dominant face is detected, we automatically set it as the focal point of your image, however, you can change or adjust the focal point as needed.
Choosing the scroll behavior
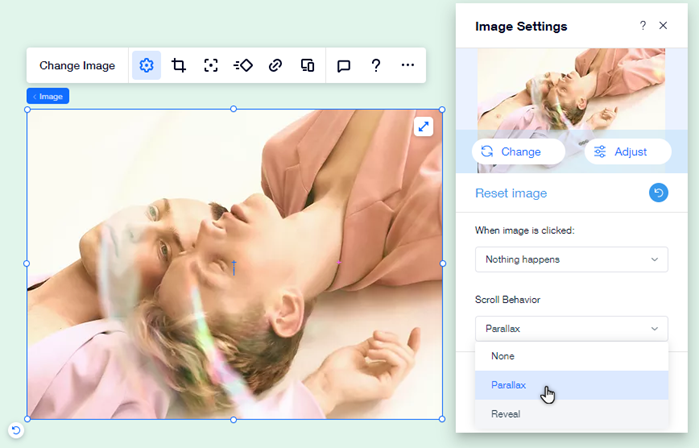
Select how your image behaves when visitors scroll through your site. You can either choose a scroll effect (Parallax or Reveal) so the image is more dynamic and attention-grabbing, or leave that drop-down blank for a more direct, minimalistic look.
To choose a scroll effect for your image:
- Click the image in your Editor.
- Click the Settings icon
- Click the Scroll Behavior drop-down and choose an option:
- None: There is no scroll effect on your image.
- Parallax: The image moves at a different speed as the other elements, giving a 3D effect.
- Reveal: The image is revealed as you scroll down your site.
Image zoomed on parallax?
When choosing the Parallax scroll behavior, it's likely that the image will appear zoomed-in inside the Editor. This change doesn't reflect what visitors see on your live site. To see this effect in action, preview your site.
Tip:
Keep your image visible as visitors scroll up and down the page by setting its position to Pinned or Sticky.
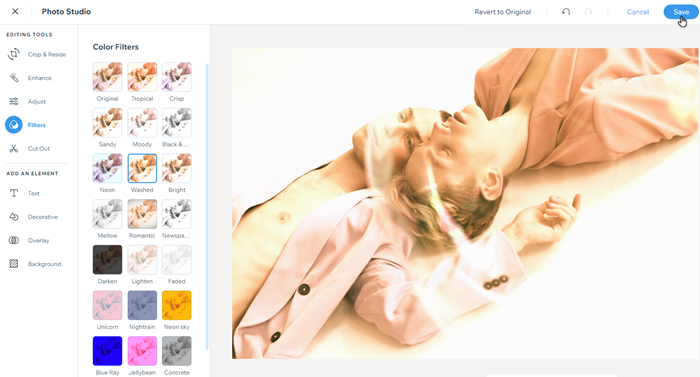
Editing an image with Wix Photo Studio
Use the Wix Photo Studio to create beautiful images without leaving Editor X. The Photo Studio allows you to customize images that you've already uploaded and saves the newly edited version to your Media Manager.
There are a variety of editing options available, such as filters, rotation, and overlays, so you can create an impressive image to accentuate your site and interest your visitors.
Note:
The Wix Photo Studio makes changes to the image source, whereas changes done on the canvas (to the image design or crop) makes changes per breakpoint.
To edit an image:
- Click the image in your Editor.
- Click the Settings icon
- Click Adjust.
- (In the Photo Studio) Edit the image using the available options.
- Click Save.
In the Media Manager?
You can also edit images directly from the Media Manager by clicking Crop & Edit under the thumbnail image.
Adding a watermark for copyright protection
Protect your images by adding watermark text in the Photo Studio. The text can be designed and customized to suit your brand, and cannot be removed from the file if downloaded.
To add a watermark to an image:
- Click the image in your Editor.
- Click the Settings icon
- Click Adjust.
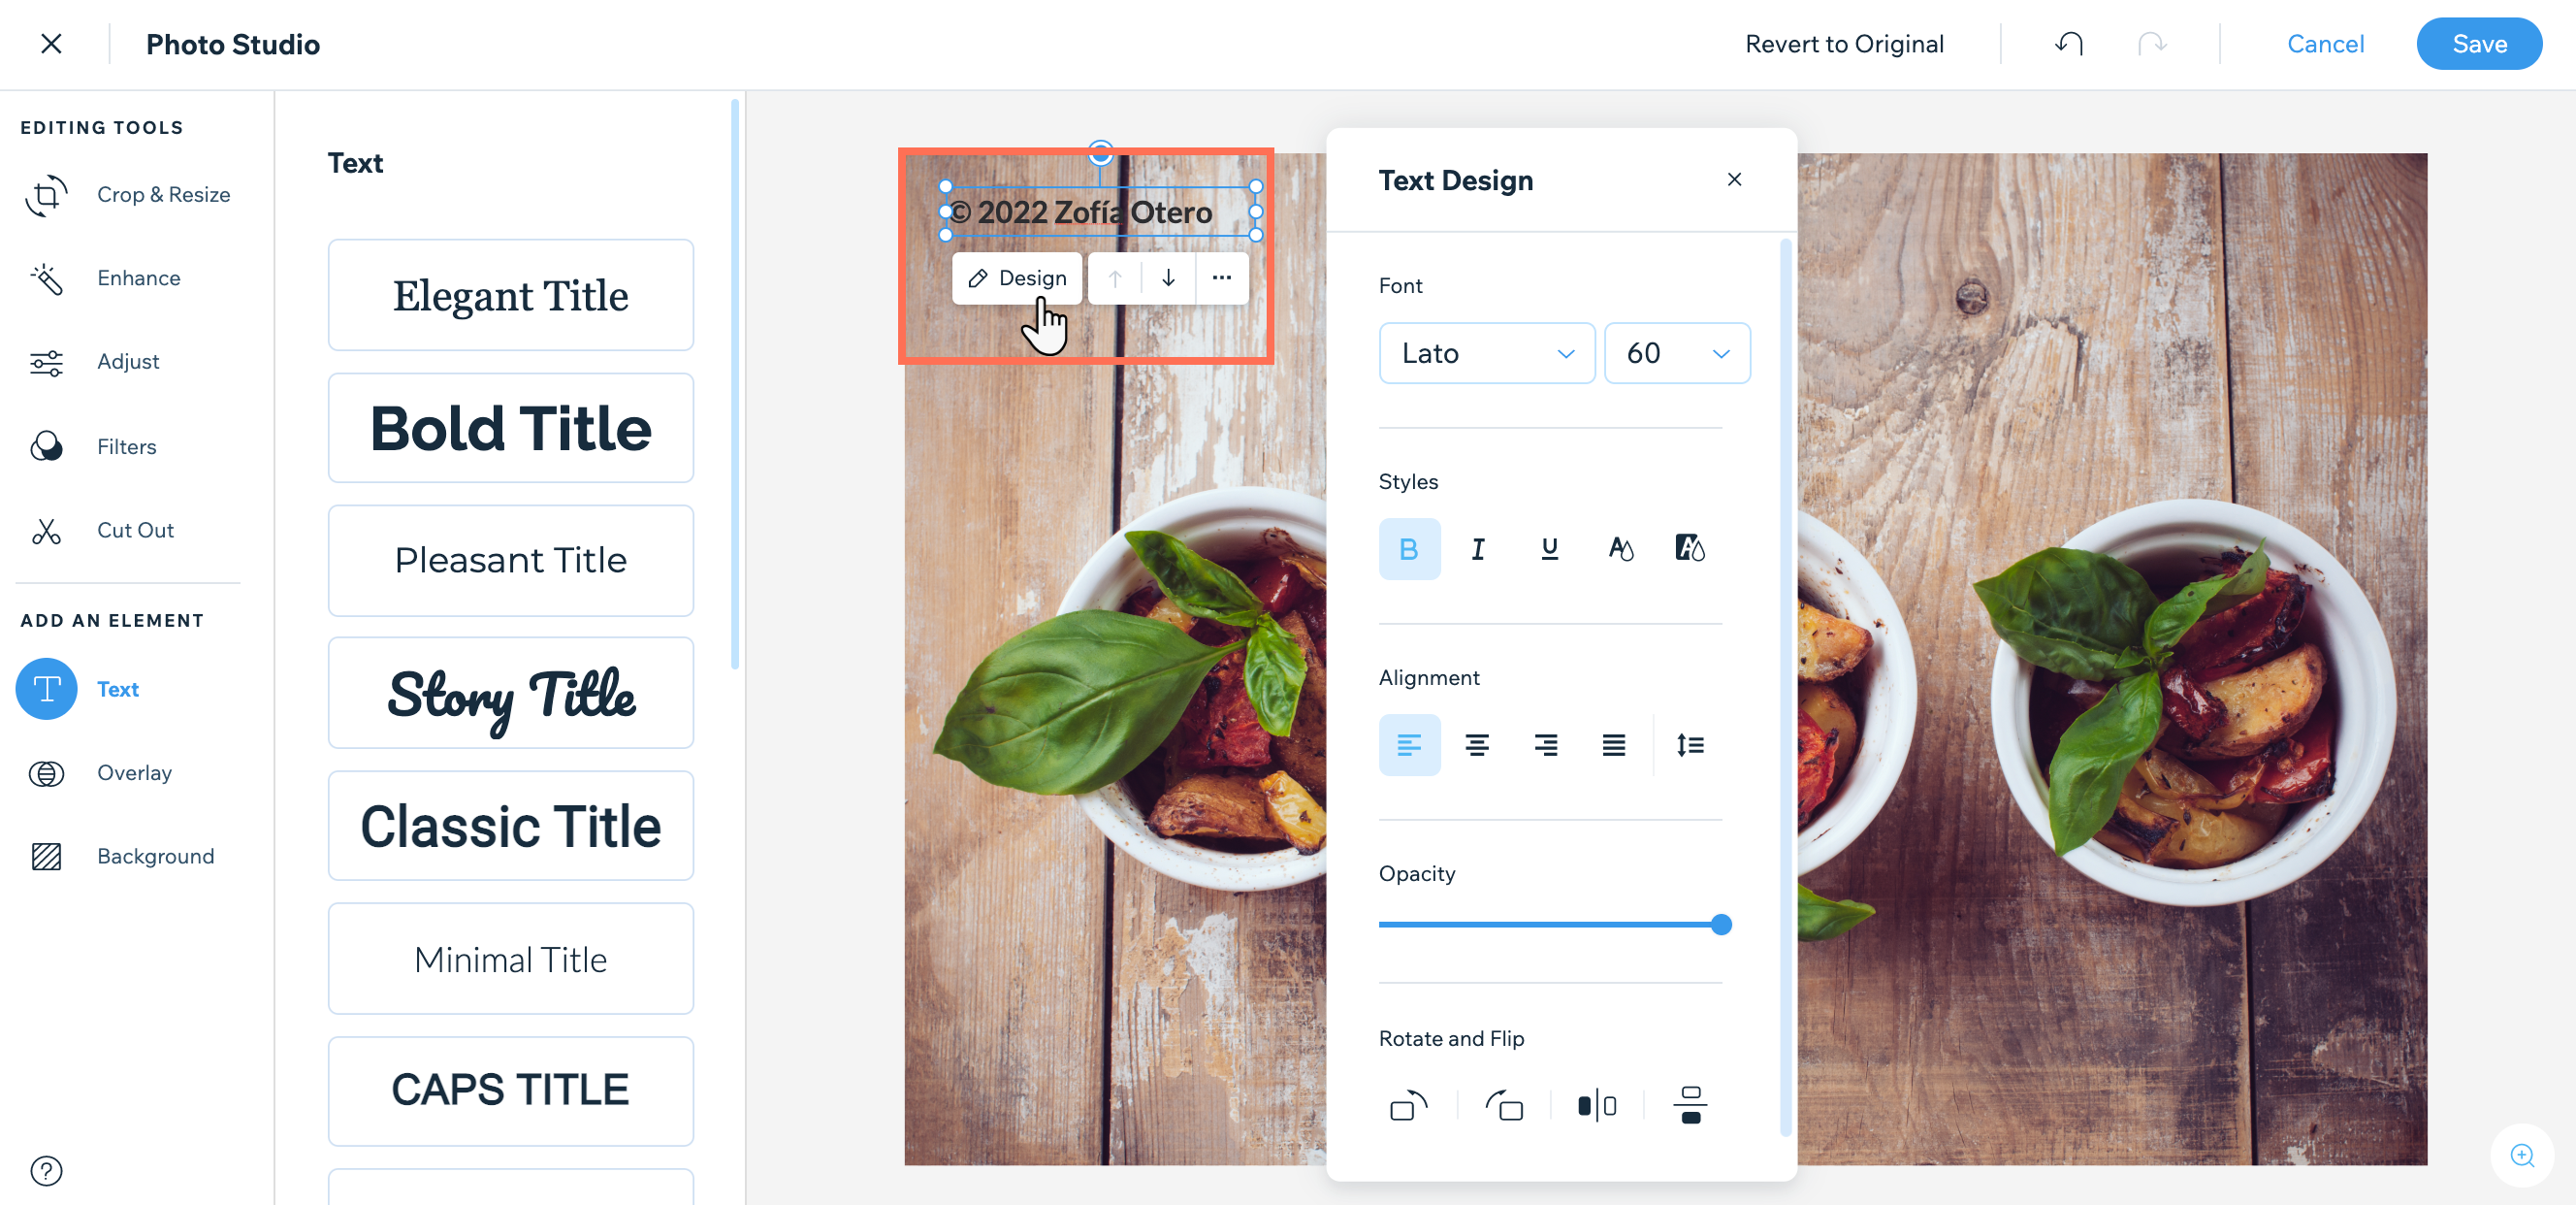
- (In the Photo Studio) Click Text under Add An Element.
- Browse the text styles and click to add one to your image.
- Type your watermark message.
- (Optional) Click Design to customize the text.
- Click Save.