Site Members: Creating and Managing Member Badges
8 min
In this article
- Creating member badges
- Managing member badges
- Managing member badges from your live site
Badges encourage member participation by rewarding milestones. You can create badges like "Coach" for those sharing insights or "Organizer" for group managers, helping members stand out. Badges can also grant access to restricted pages reserved for specific roles.

Before you begin:
Creating member badges
Recognize your members with custom badges. For example, award badges to blog writers, or to people who help other members. Badges help members stand out and grant them access to exclusive content on your site. It's a great way to reward valuable contributions and create a tiered membership experience.
Dashboard
Wix app
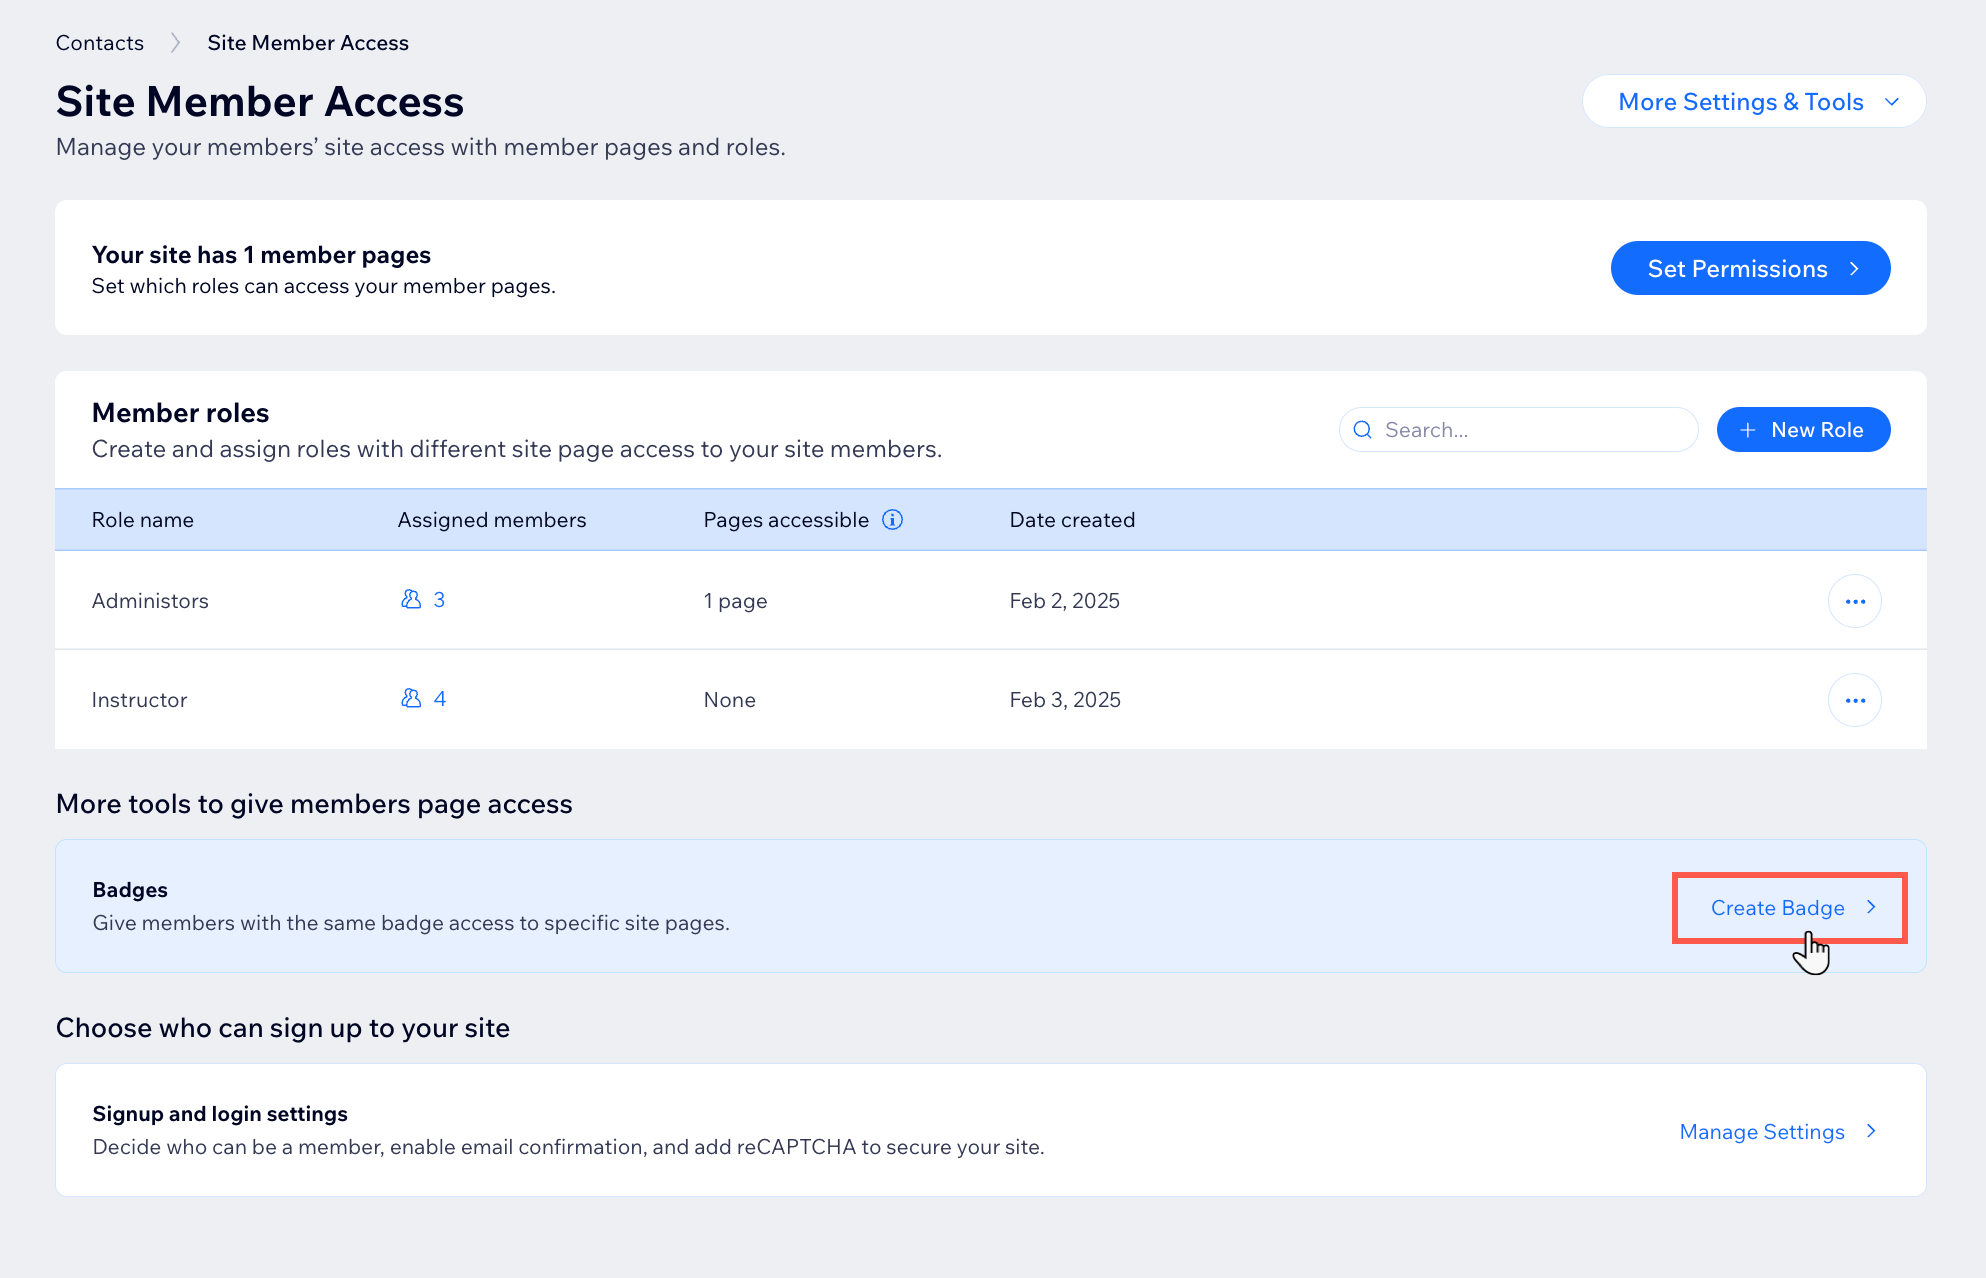
- Go to Contacts in your site's dashboard.
- Click Manage Member Access.
- Click Create Badge.
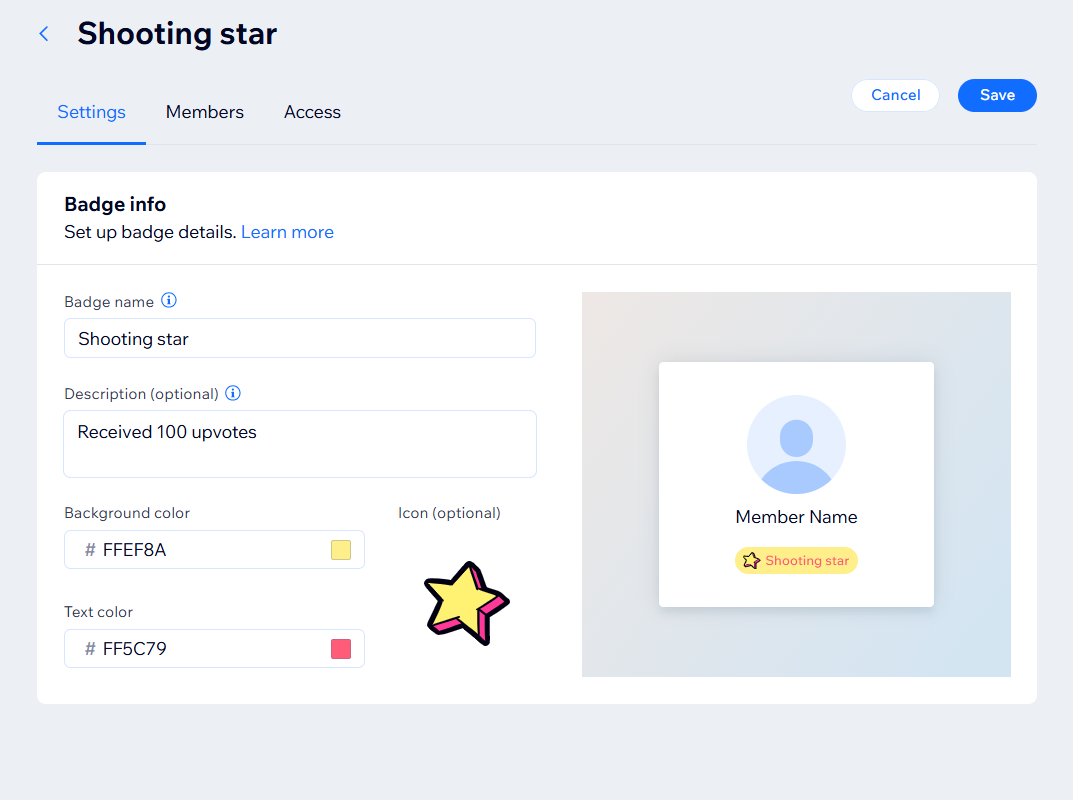
- Enter the badge info:
- Badge name and Description: Enter a unique name and description to let everyone know what the badge is about.
- Background color: Click the field and select a color for the badge background.
- Text color: Click the field and select a color for the badge text.
- Icon: Click Add Image under Icon and select an icon for your badge from the free vector art in the media manager or upload your own .svg file.
Note: You can upload .svg files up to 250KB for member badges. We recommend that you use a simple icon with minimal details and colors so that it looks good at a size of 12px.
- (Optional) Assign your badge to site members:
- Click the Members tab.
- Click Save in the pop up.
- Click + Assign Badge.
- Select the relevant site members.
- Click Assign.
- (Optional) Set badge permissions:
- Click the Access tab.
- Enable the Badge access toggle.
- Click Manage Access to choose which member-only pages this badge grants access to.
- Select the checkboxes next to the relevant pages and badges.
- Click Save.
Tip:
You can automatically assign badges to your members using Wix Automations. These automations help you focus on the bigger picture by managing smaller tasks for you. For example, you could automatically grant a "Certified Superstar" badge to a member who completes an online program when specific events occur.
Managing member badges
Update and customize your member badges. Edit existing badges, change their design, and remove old badges. Plus, adjust what site permissions these badges unlock, and grant access to new pages.
Dashboard
Wix app
Wix Editor
Studio Editor
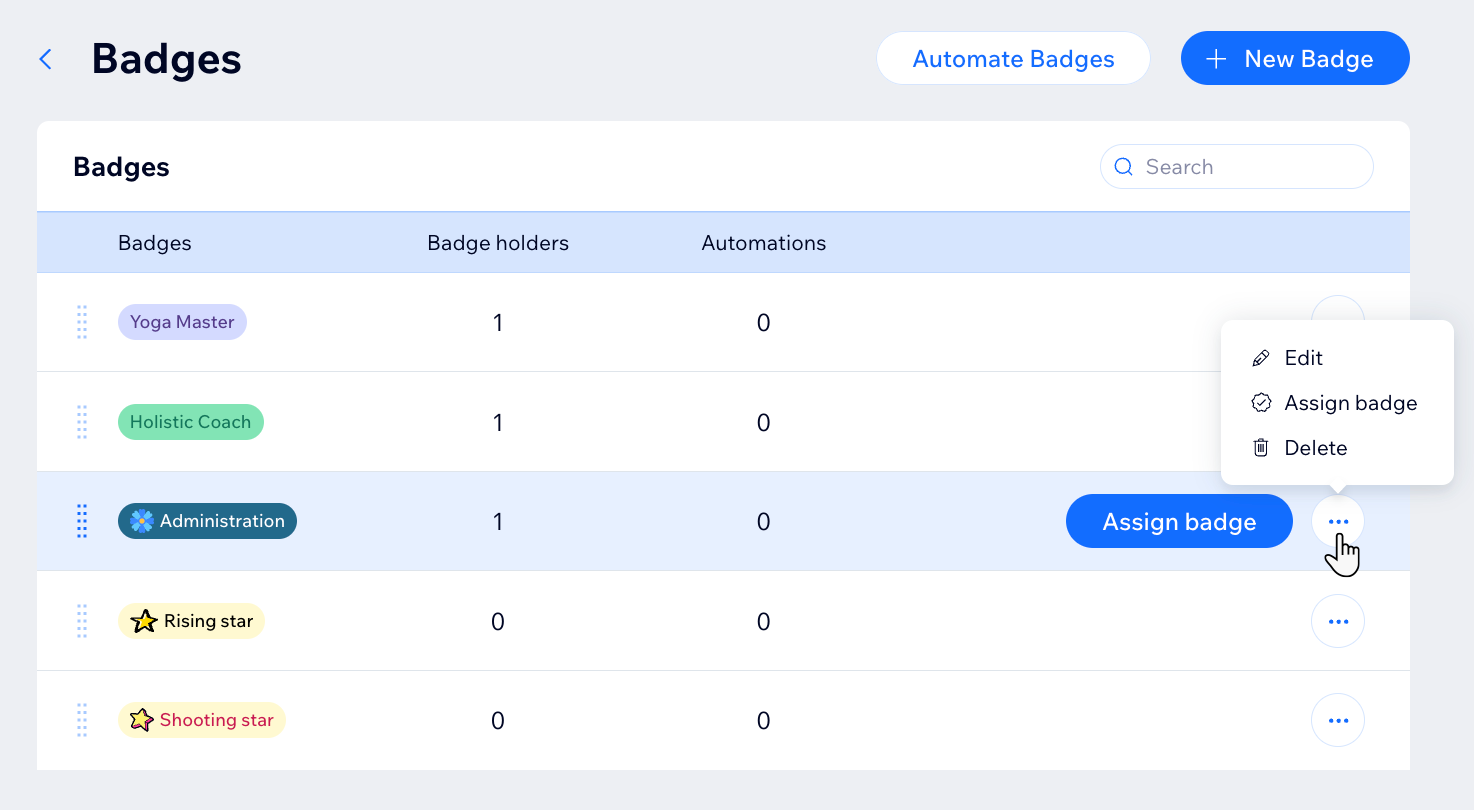
- Go to Badges in your site dashboard.
- Click the More Actions icon
 next to the relevant badge.
 - Choose what you want to do next:
Edit
 . Select free vector art in the media manager or upload your own .svg file.
 Assign a member badge
Delete a badge
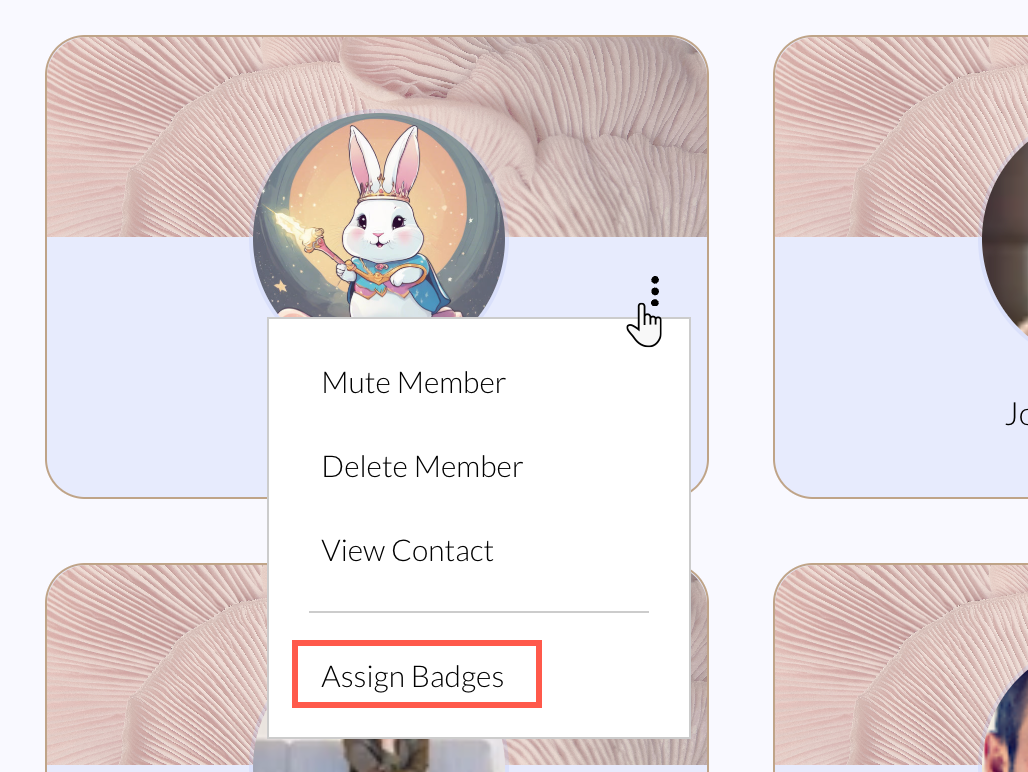
Managing member badges from your live site
Assign roles to your members to help manage member badges. Members with roles can handle badges directly from your live site. For example, you can make a trusted member a back-office manager, which lets them give badges to other members. This helps build a strong community, keeps your site active, and saves you time and energy.
Before you begin:
- Add the members list element to one of your site pages, set the list to "public", and publish your site to update its live version.
- Assign roles to your members to help manage member badges.
To manage member badges from your live site:
- Go to your live site and log in.
- Go to the Members page.
- Click the More Actions icon
 next to the relevant member.
 - Click Assign Badges.
- Select the checkbox next to each badge you would like to assign to the member.
- Click Save.