

Wix Editor: Creating Members Only Pages
2 min
In this article
- Creating Members Only pages
- FAQs
Create Members Only pages, available exclusively to your logged-in members. Choose whether to display this page to all members or members with certain roles and pricing plans.
Note:
Make sure that you've added a Members Area to your site before creating Members Only pages.
Creating Members Only pages
Create a Members Only page to give select visitors access to exclusive content.
To create a Members Only page:
- Go to your editor.
- Click Pages & Menu
 on the left side of the editor.
 - Hover over the relevant page and click the More Actions icon
 .
. - Click Settings.
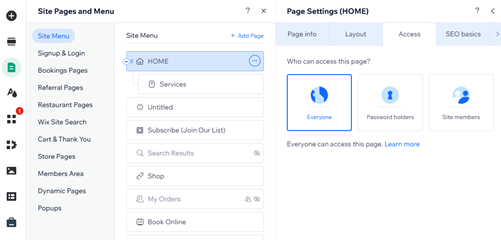
- Click the Access tab.
- Select Site Members.
- Select which members can access this page:
- All members: Any signed in member can access this page.
- Specific members: Limit this page to specific members only. You can choose one or both of the following options:
- Members with roles: Members with a specific role.
- Click Manage Roles.
Note: If you have not created member roles, click Create Role. - Select the checkbox next to the relevant role(s) and click Apply.
- Click Manage Roles.
- Members with plan subscriptions: Members who've purchased a specific pricing plan.
- Click Manage Plans.
Note: If you have not created a pricing plan, click Create Plan. - Select the checkbox next to the relevant plan(s) and click Apply.
- Click Manage Plans.
- Members with roles: Members with a specific role.
Note:
By default, the Site collaborators toggle is always enabled. This ensures you and your collaborators are able to access all parts of your site.
FAQs
Where can I see a list of my members and their roles / pricing plans?
Can I manage and engage with my members on mobile?
