

Creating, Building, and Using Your Own Velo Package
9 min
In this article
- Step 1 | Open the Wix Blocks Package Creator
- Step 2 | Add Code Files to the Package
- Add public files
- Add backend files
- Functions exposed by the package
- Add a configuration file
- Using the config.json settings
- Config.json Examples
- Add npm packages
- Step 3 | Document Your Package
- Step 4 | Build or Test Your Package
- Step 5 | Install Your Package
- Package permissions
- Step 6 | Use your package
All Wix users can create Velo Packages. To create apps for Wix sites with the full version of Wix Blocks, join Wix Studio.
Velo packages are code libraries that allow you to add specific functionality to your site. Wix Blocks enables you to build your own Velo packages so that you can reuse code on your Wix and Editor X websites.
Follow these steps to create, build and use a new Velo package.
Step 1 | Open the Wix Blocks Package Creator
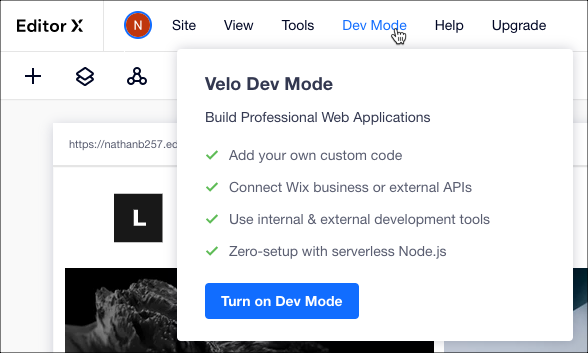
- Turn on Developer Mode on any Wix Editor or Editor X site.
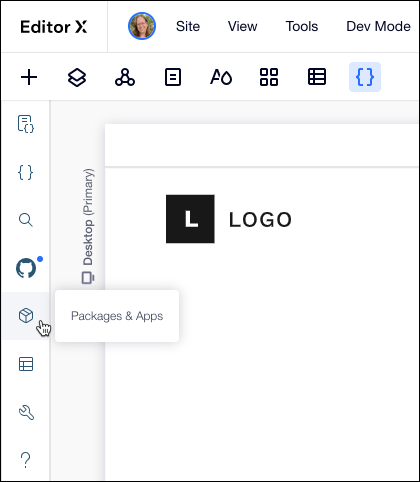
- Click Packages & Apps in the left panel.
- Click the More Actions
 icon in the Package section and click Create a Package.
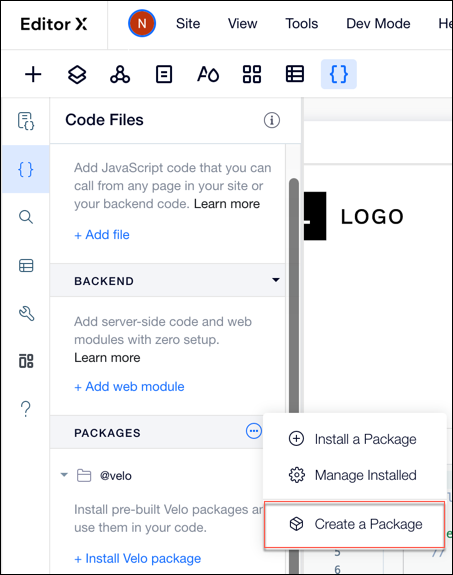
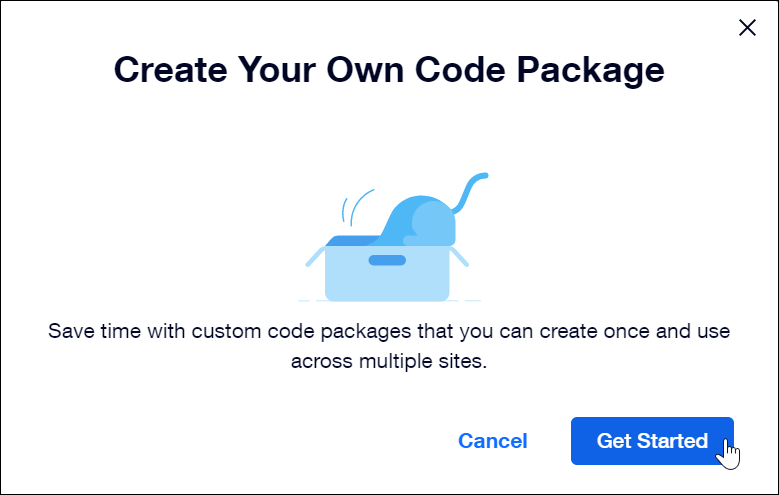
- Click Get Started on the Create Your Own Code Package panel. This opens Wix Blocks in a new browser window.
Step 2 | Add Code Files to the Package
Keep these things in mind when adding code files:
- Your package must contain at least one public file or one backend file.
- Code errors can cause your package build to fail.
- Every exported function at the root of a public/backend directory will be exposed when installing your package on a site.
Autosave
Changes in your package are saved automatically.
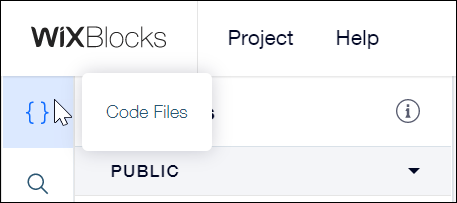
Start by clicking Code Files on the left panel.
Add public files
Public files contain exported functions that can be imported and called anywhere on a website.
Show me how
 and select New .js file from the Public section of the Code Files panel.
Add backend files
You can add two types of backend files to your package:
- .js files, which are not directly accessible to users via front-end code.
- .jsw files, which are web modules that are accessible to the front-end. Use these to import functions from the backend into files or scripts in page code or in public files, and the functions will run on the server. Velo handles the client-server communication. Learn more about Velo web modules.
- Unique backend files: Blocks supports the use of events.js files, but does not support http-functions.js, data.js, or routers.js files (learn more about events.js).
Show me how
 and select New Web Module or New .js File from the BACKEND section of the Code Files panel.
Testing your backend function
You can test your backend functions in your package without building or installing the package. Learn how.
Functions exposed by the package
Every exported function at the root of a public/backend directory will be exposed when installing your package on a site. Note that exported functions that aren't in the root package will not be exposed.
Give your exported functions unique names
Since we can’t expose 2 functions under the same name within a package, please avoid defining multiple exported functions under the same name in the root of a backend/public directory.
Add a configuration file
You can add a config.json file to define settings that affect how the package works on a specific site. These settings typically vary from site to site, so the file you provide contains default settings that you can edit for each site.
The data in the config.json file can only be imported by backend files.
The data in the config.json file can only be imported by backend files.
We recommend that your README.md file contains instructions for modifying the config.json file.
Examples of information you might put in a config.json file include:
Examples of information you might put in a config.json file include:
- Company name and contact info.
- A site-specific default value for a function or API call.
Using the config.json settings
The values in config.json can only be accessed by the backend code in your package.
Import the config.json file, using getPackageConfig:
1import { getPackageConfig } from 'wix-configs-backend'Use the values from the file in your backend code:
1const <variable> = await getPackageConfig('<key>');Config.json Examples
In Tutorial: Creating a Package for API Calls, you create a config.json file that contains a default stock symbol to use in a stock quote API call. You can edit that value on any of your sites on which you've installed the API Call package.
The config.json file:
The config.json file:
1{
2    "defaultSymbol": "wix"
3}
The tutorial's backend apiCall.jsw file imports that value and uses it in the code as the value for the stock symbol variable, sym.
1import { getPackageConfig } from 'wix-configs-backend'
2.
3.
4.
5const sym = await getPackageConfig('defaultSymbol');
Show me how

Add npm packages
You can npm dependencies into your Velo package.
Most npm packages that are useful in Velo sites have already been approved. If a package you would like to use has not yet been approved, you can request that it be added to the list.
Show me how

Step 3 | Document Your Package
Edit the README.md file to provide documentation about your package. Learn more in Documenting your Velo Package.
Step 4 | Build or Test Your Package
About Package Versions
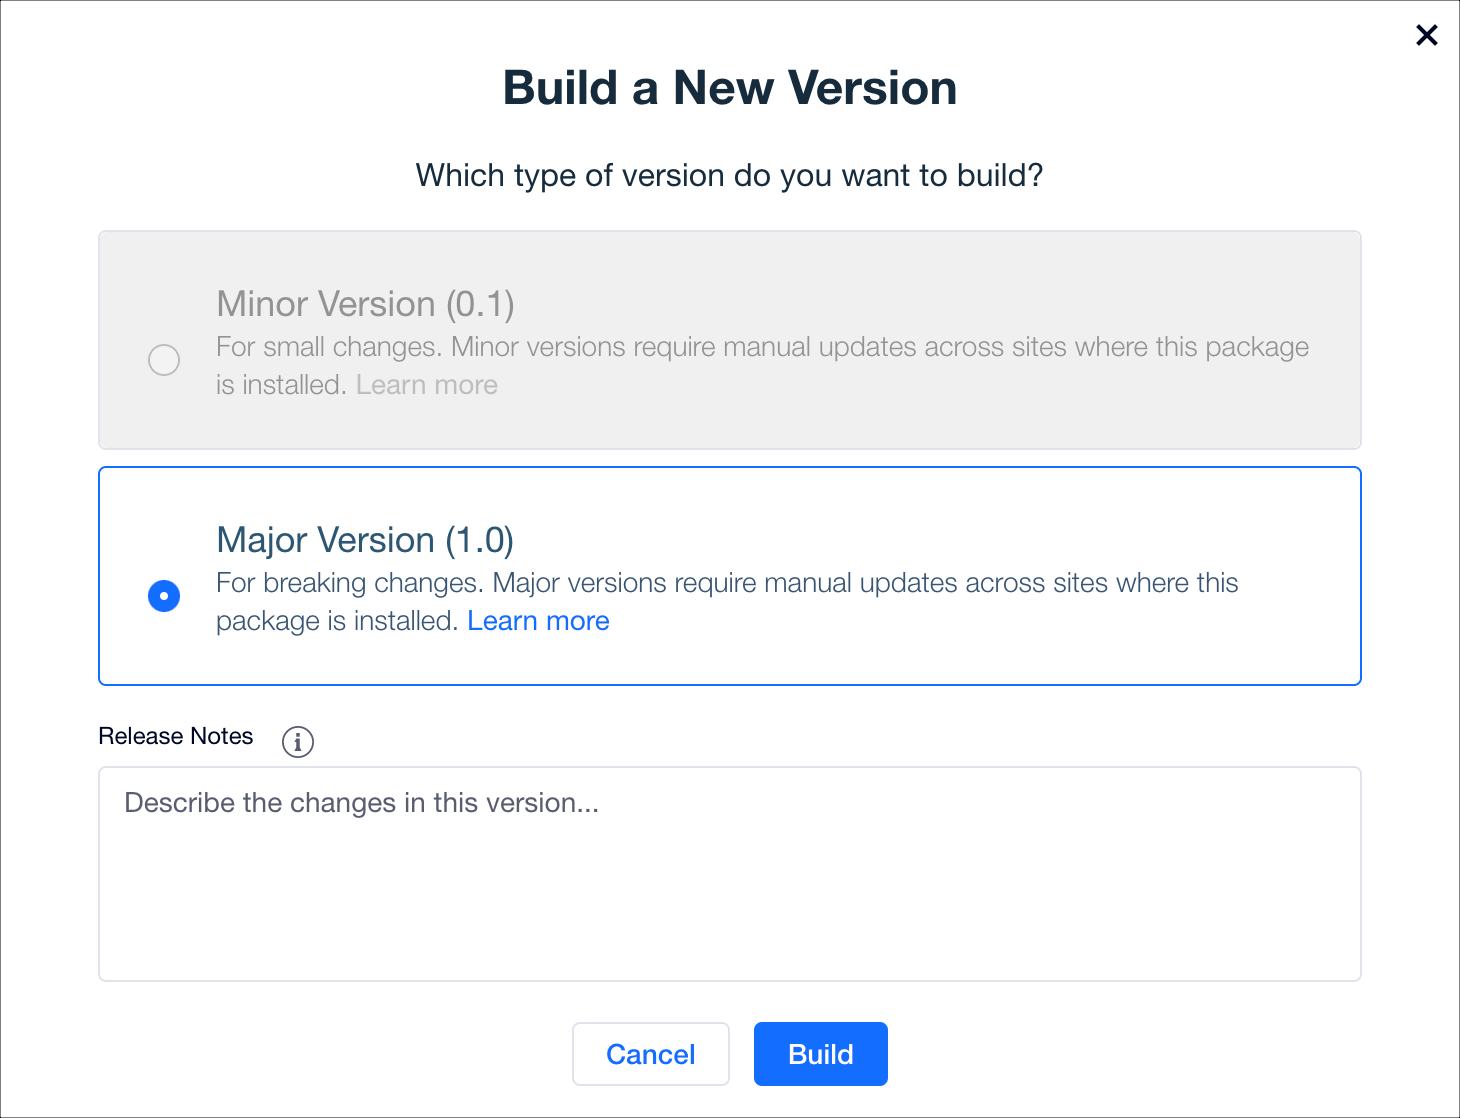
Blocks assigns a version number to every Velo package you create or update. Choose one of two types of versions:
- A minor version. A version with small changes that don't break compatibility.
- A major version. A version with changes that break backward compatibility. For example, removing a function or changing a function's parameters would require a major version release. Note that first build of a package is always a major version.
- A test. Testing your package allows you to test the functionality of your package on a site, but it does not create a new version. Learn more about testing your package.
Blocks automatically updates the version number. For example, if your previous release was 1.0, and you build a minor version, Blocks assigns it the version number 1.1. If your previous release was 2.2, and you build a major version, Blocks assigns it the version number 3.0.
You can configure how each of your sites receives updated versions your package (Learn more about updating your package).
If you are ready to create a major or minor version, go ahead and build your package (if you are not ready to create a version, you can test your package).
To build your package:
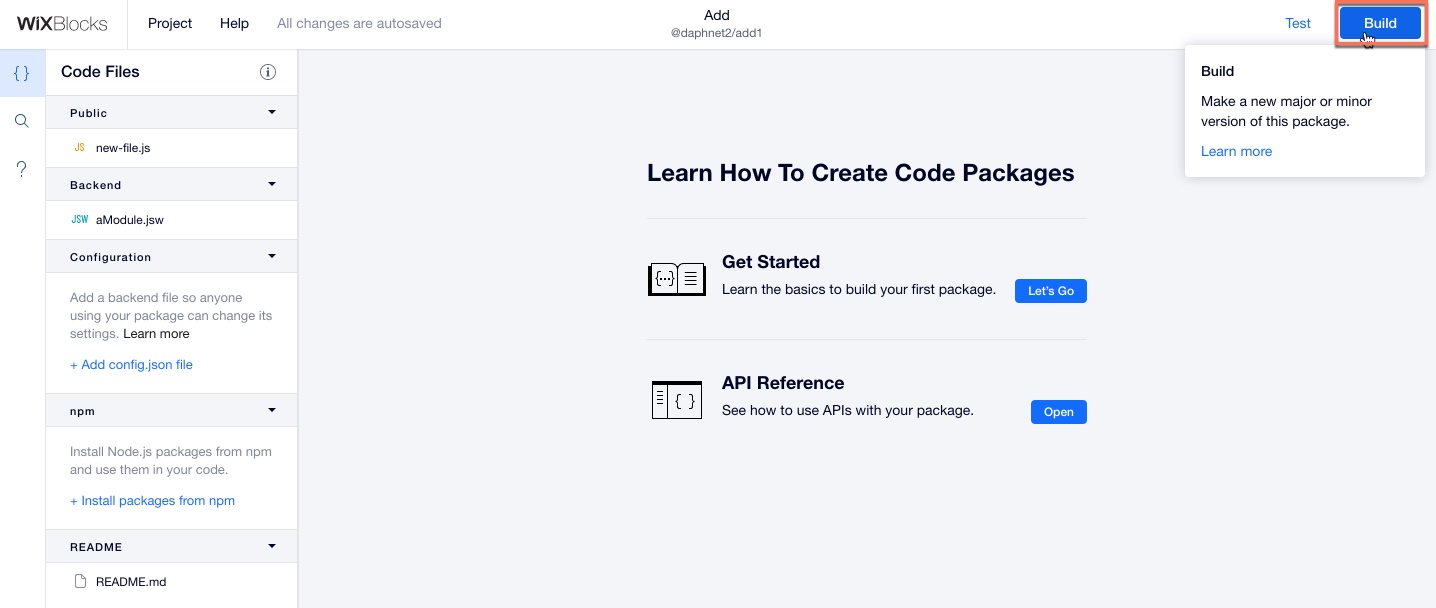
- Click Build.
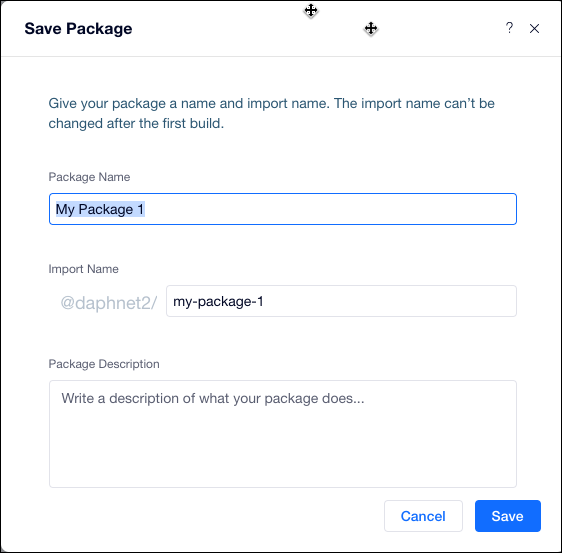
- If you never built or tested your package before, you are prompted to save your package.
- Select your version type (minor or major). Learn more about versions.
- Provide release notes: provide information about the changes you made in the package. Your release notes appear in the Package Manager in the Readme section.
4. Click Build.
Code errors
Errors in your code may cause your build to fail.
Step 5 | Install Your Package
Package permissions
Install your package from the Package Manager in any of your Wix or Editor X sites. Only you (the package creator) can install your package on a site. Site collaborators can access and use a package that you installed on a site, but have less access and control over them.
See package creator permissions
See site collaborator permissions
To install your package on a site:
- Turn on Dev Mode in a Wix or Editor X site.
- Click
 (Code Files) > Packages > Install a Package
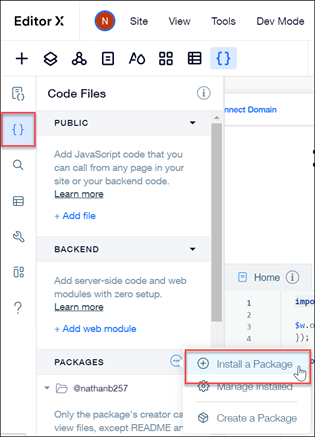
- Click My Packages in the Velo Package Manager to display the packages you created.
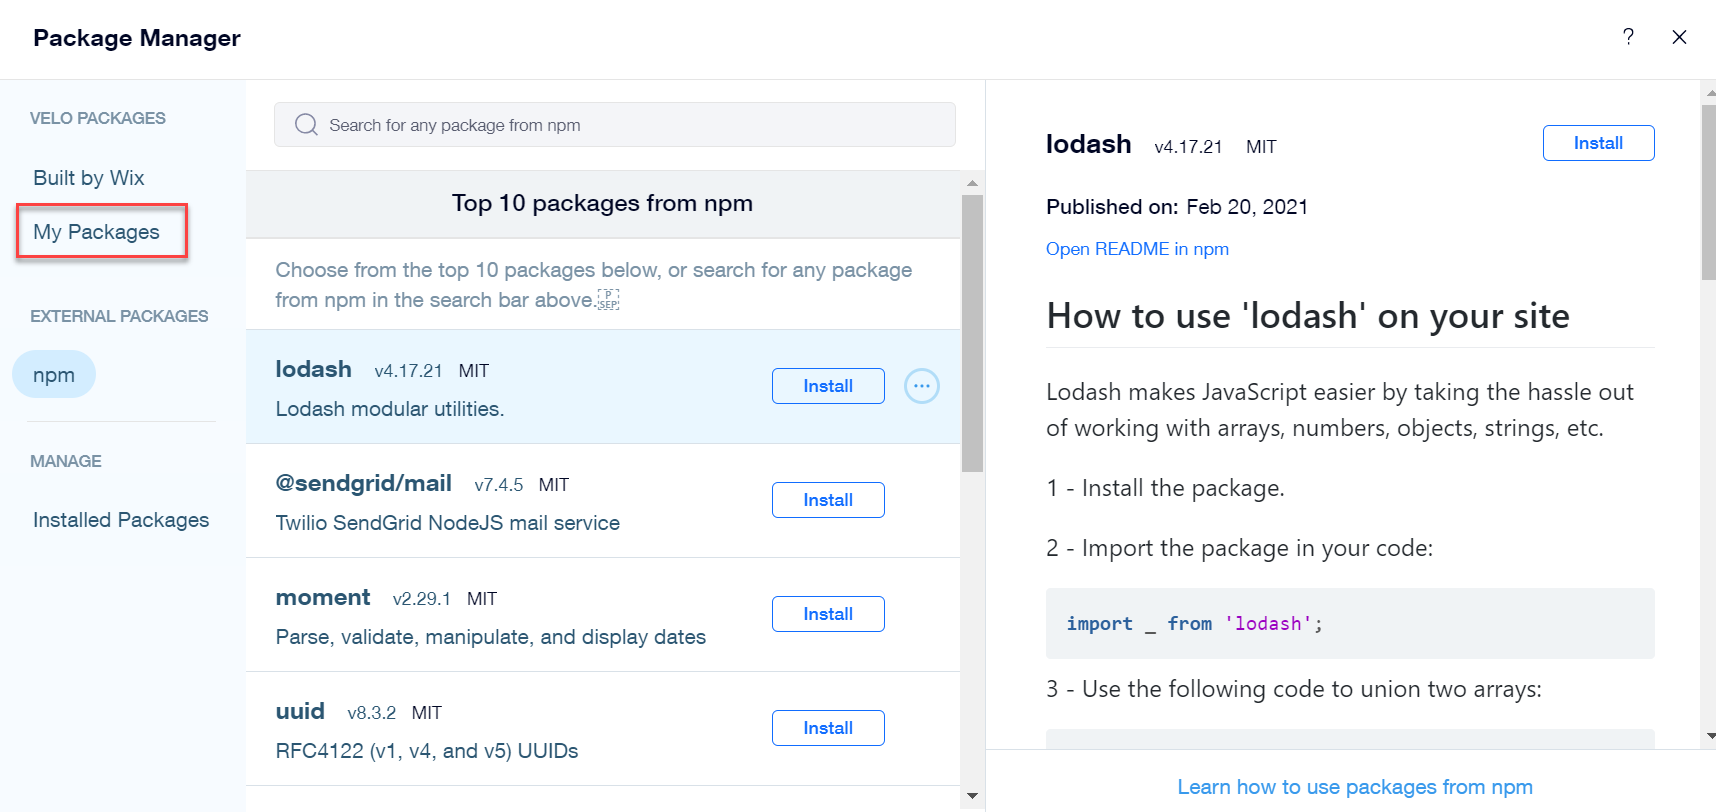
- Click Install next to the package you want to install.
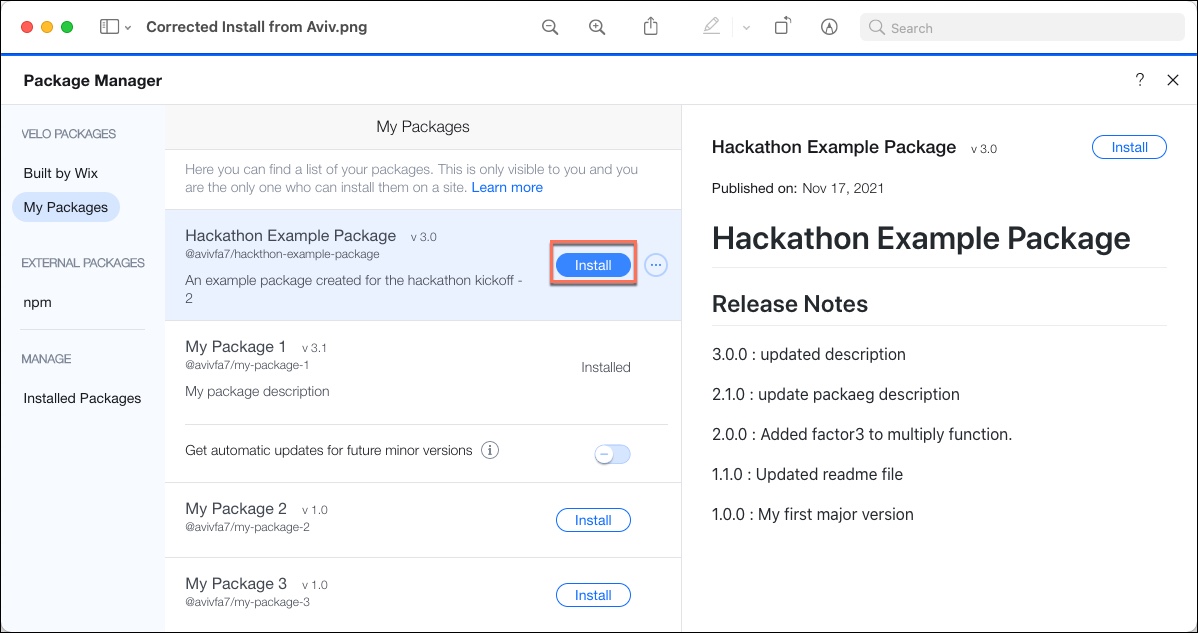
Allow automatic updates of minor versions
At this point you can choose whether to allow automatic updates for future minor versions. Note that when turning this feature on, every new minor version of the package will automatically impact any live sites it's installed on, without publishing the site again.
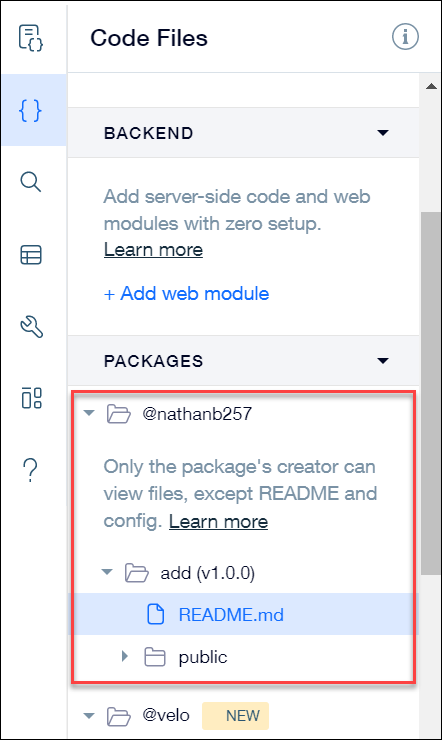
- Click View or close the package manager. Your package is shown in Code Files > Packages under your username.
Step 6 | Use your package
Once you've built and installed your package follow these steps to implement its functions.
- If the package requires elements to function correctly, add those elements and change their IDs to match the package's requirements.
- Update the config.json file as needed to customize the package for your site.
- Import and use the package's functions in your page code. Your import statement must include your username. Here's an example from the API Call tutorial:
1//Example syntax for importing and using package functions
2//from public files
3import { getStock } from '@nathanb257/stockquotesfromapi';
4
5$w.onReady(function () {
6     getStock()
7});
8
9
Imports from backend files must use this syntax:
import { functionName } from '@username/packageName-backend';For example:
import { getStock } from '@nathanb257/add1-backend';