Velo: Functional Testing in the Backend
The code editor comes equipped with a quick-test environment for debugging your backend code. Functional Testing saves you the time and effort of building your own system for triggering and testing your backend functions.
Test Your Backend Function
To test your backend function, follow these steps:
Step 1: Open the Test Tab
- In the Editor, open the backend code file containing the function you want to test.
Notes
- You can only test functions located in .js, .web.js, and .jsw backend files.
- You can only test functions that are exported.
- Click the Play icon
 next to the function declaration.

A new tab opens in the code editor for testing your function. Your function name appears in the tab header.
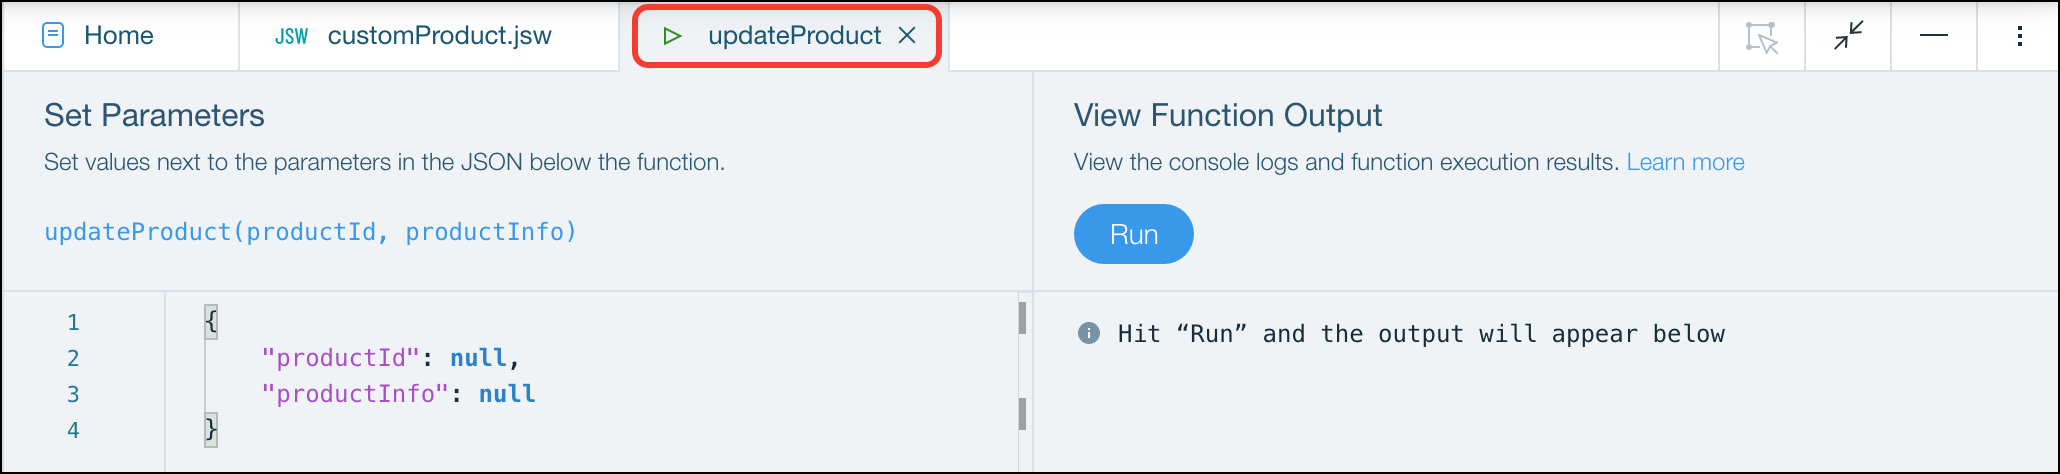
Step 2: Add Arguments to Your Test
In the Set Parameters section of the test tab, each parameter appears as a separate property in a JSON.

- Add sample arguments to each property.

- In the View Function Output section, click Run.
Note If your function does not take any parameters, the Set Parameters JSON will be empty. Just click Run without adding any arguments.

Step 3: View the Output
The output of your function appears on the right side of your test tab in the View Function Output section.

Your output is comprised of 4 parts:
- Call statement: Includes the file name, function name, and parameter values.
- Return statement: Includes the file name, function name, and return value.
- Console logs: Logs from your console messages. Just as in Preview mode, you can click the line number to navigate to the line of code that triggered the log.
- Errors: Errors appear if there is a problem with your code or the sample parameter values.
Note When you close the test tab, the last sample parameter values you entered and the most recently generated function output are saved and will appear when you open the tab again.
More Actions
You can also perform the following actions in your test tab:
Clear sample parameter values
- Hover over your parameter values in the Set Parameters section and click the reset button:

Clear the test output
- Hover over your output in the View Function Output section and click the clear button:

Advanced Use Cases
You can use Functional Testing to test a variety of functions.
HTTP Functions

To test HTTP functions with Functional Testing, specify the HTTP request object in the Set Parameters section. A request template will initially be built for you including placeholder data, but you will need to edit it to fit your specific needs.
For example, when testing a post function, you will need to replace the placeholder JSON object in the body property with a JSON object you want to test with.
The following properties are included in the request templates:
- For
getanddeletefunctions:path,headers, andquery - For
putandpostfunctions:path,headers, andbody - For
optionsfunctions:pathandheaders - For
usefunctions:path,headers,query, andmethod

Remember that HTTP Functions, even when run using Functional Testing, run with the permissions of an anonymous site visitor.
Destructured Parameters

To test a function with destructured parameters, place parameter values in a JSON inside an array:

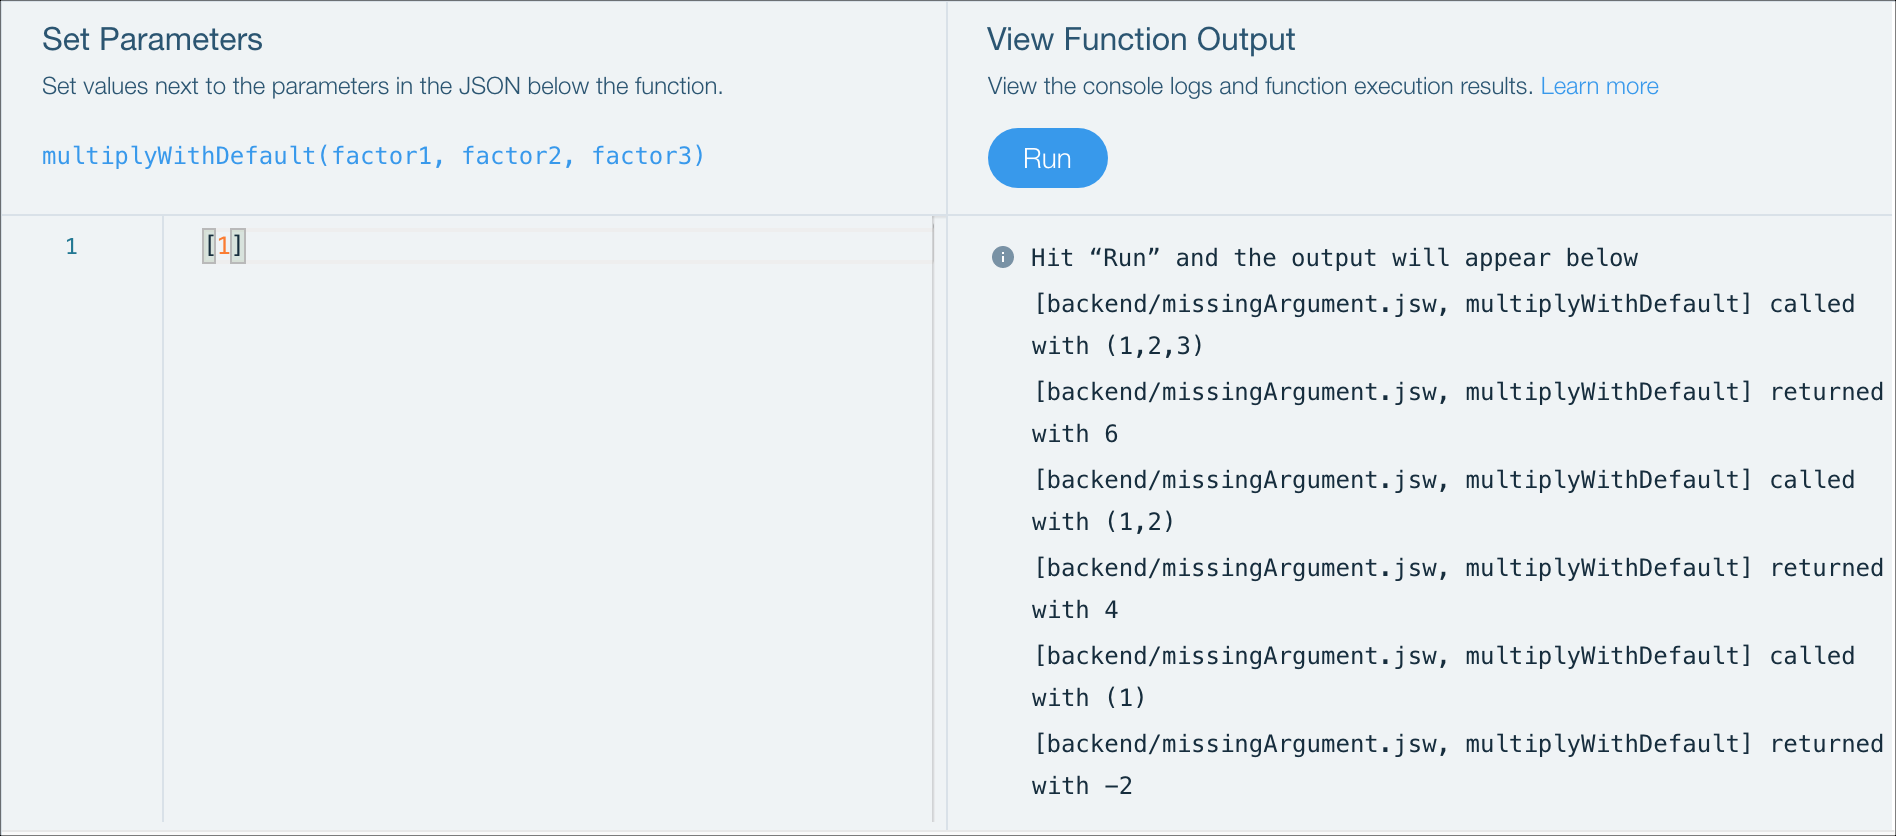
Missing Arguments

To test a function without providing all of the arguments, you'll need to set defaults for the missing arguments in the function declaration. When testing, place the arguments in an array, and leave out one or more of the arguments which have default values.
We tested the multiplyWithDefaults() function 3 times with the following arguments:
- [1,2,3]
- [1,2]
- [1]
We received the following output:
- 1 * 2 * 3 = 6
- 1 * 2 * 2 = 4
- 1 * -1 * 2 = -2
Javascript 'arguments' Object
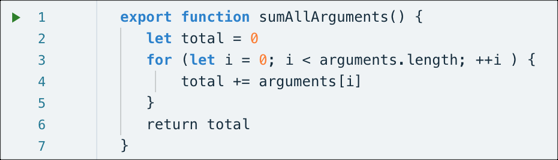
To test a function containing the Javascript arguments object that accepts any number of arguments, place the arguments in an array:

Dates

To test a function with a parameter of type Date, use the following syntax with a stringified date when setting your parameter:
{
  "date": {
    "$date": "<myStringifiedDate>"
  }
}
You can also use the following syntax:
[
  {
    $date: "<myStringifiedDate>",
  },
];
Here's an example using the first syntax option:

And here's an example using the second syntax option:
