

Wix Events: Creating a Membership Plan
11 min
In this article
- Creating a membership plan
- Connecting membership plans to an event
- FAQs
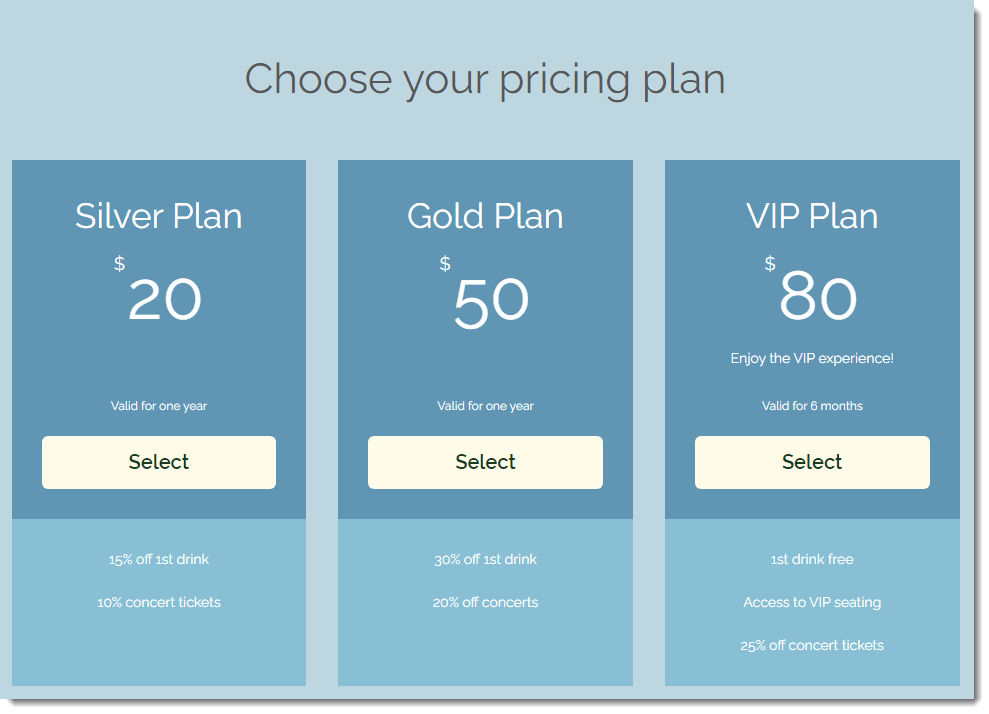
Boost event loyalty and recurring revenue with exclusive membership plans. Guests can enjoy discounted or unlimited access to your events for a set period—monthly, annually, or on your own schedule.
You decide which events are included, the discount level, and membership duration. When guests purchase tickets, they’ll see these plans alongside standard options, giving them a clear incentive to commit long-term.
Before you begin:
Make sure you create a ticketed event with at least one ticket type.
Creating a membership plan
When you create your first membership plan, the Pricing Plans app is automatically added to your site (if it isn’t already). It powers your membership offerings and creates a dedicated page where visitors can view and purchase plans. You choose the plan details, benefits, pricing, and settings.
To create a membership plan for an event:
Dashboard
Wix app
Wix Studio app
- Go to Events in your site's dashboard.
- Hover over the relevant event and click Manage.
- Click the Tickets and Seating tab.
- Click Edit next to Membership plans.
- Click Create Membership.
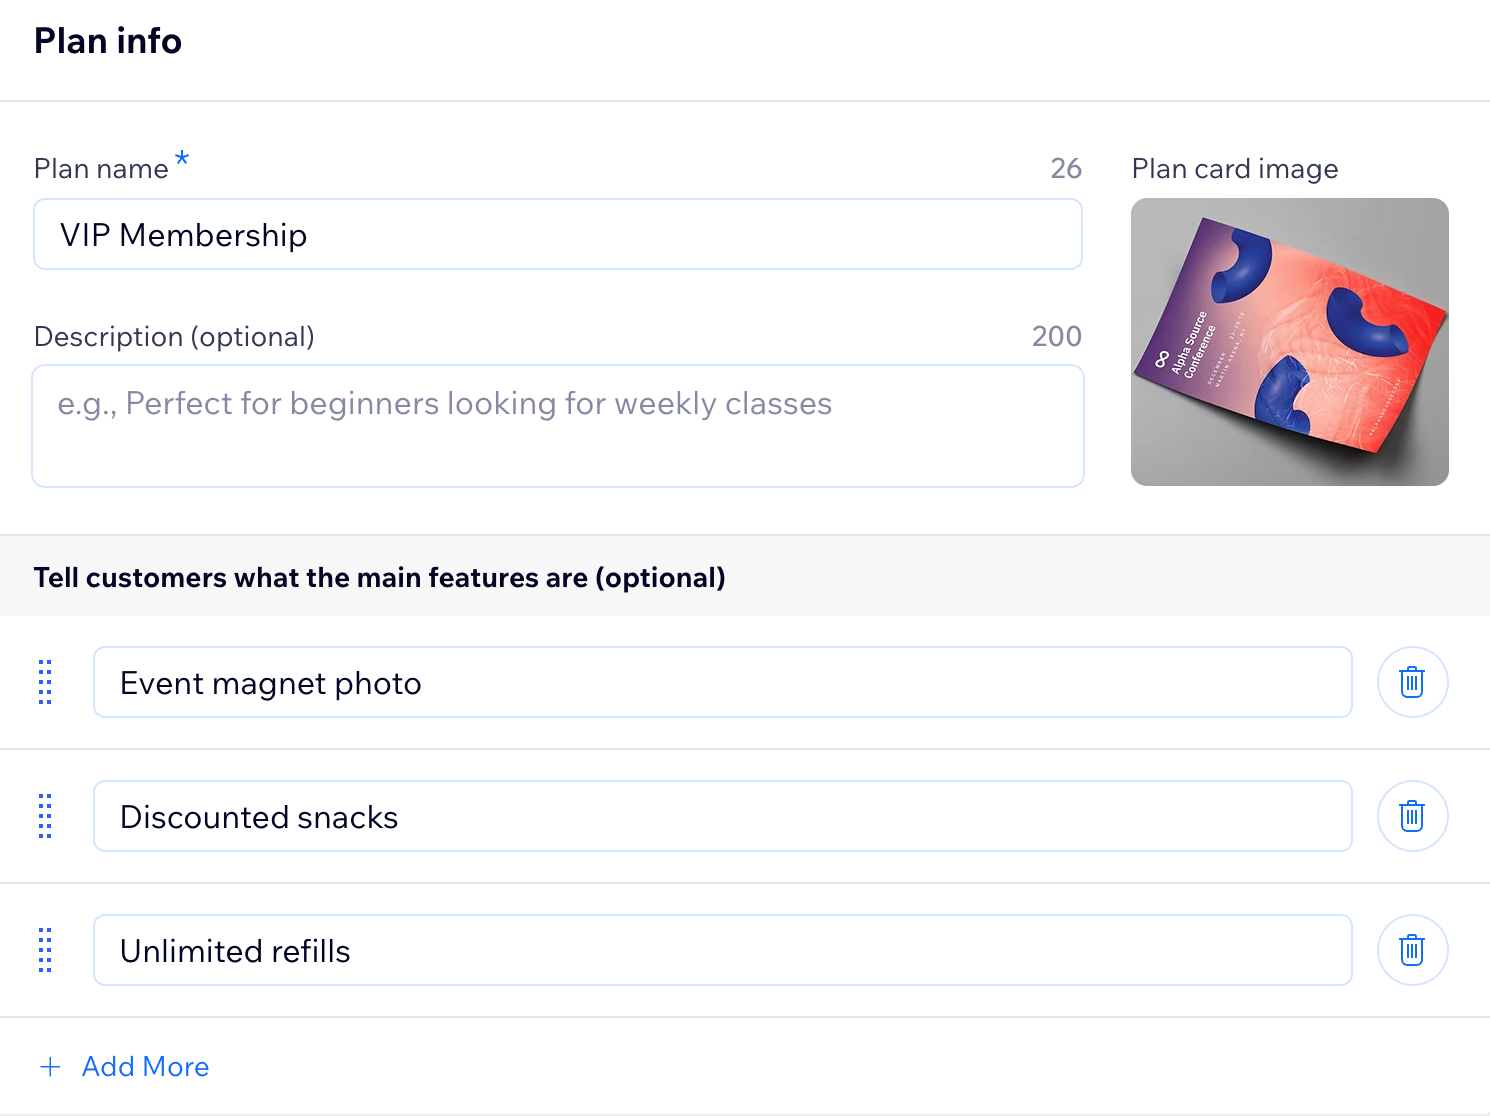
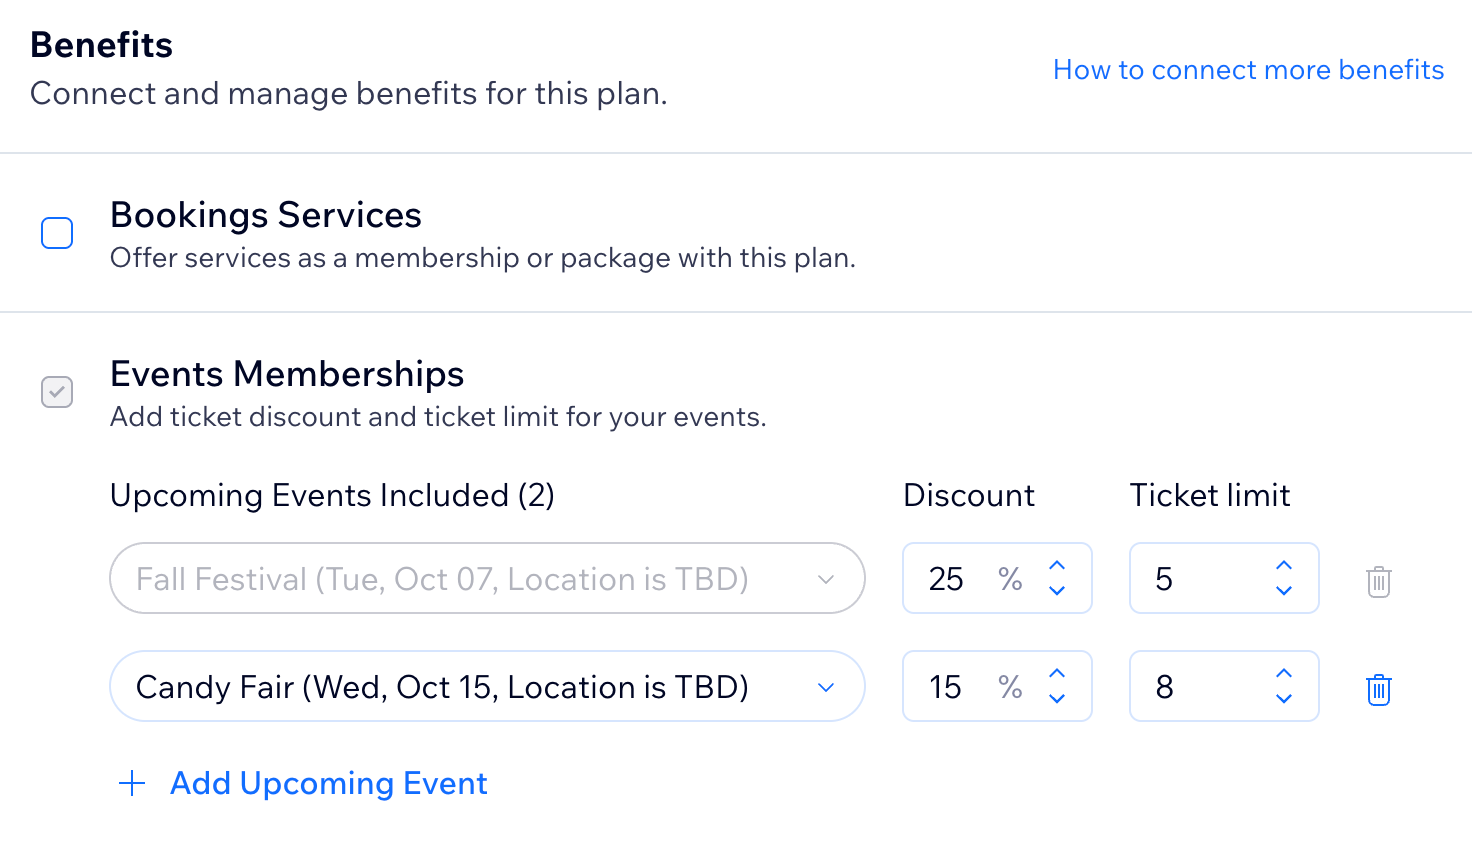
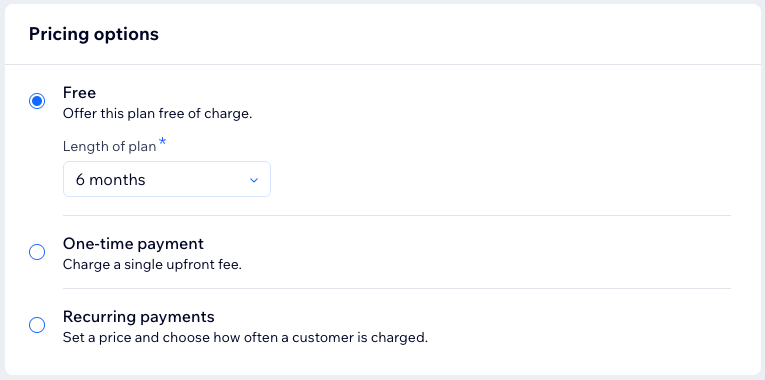
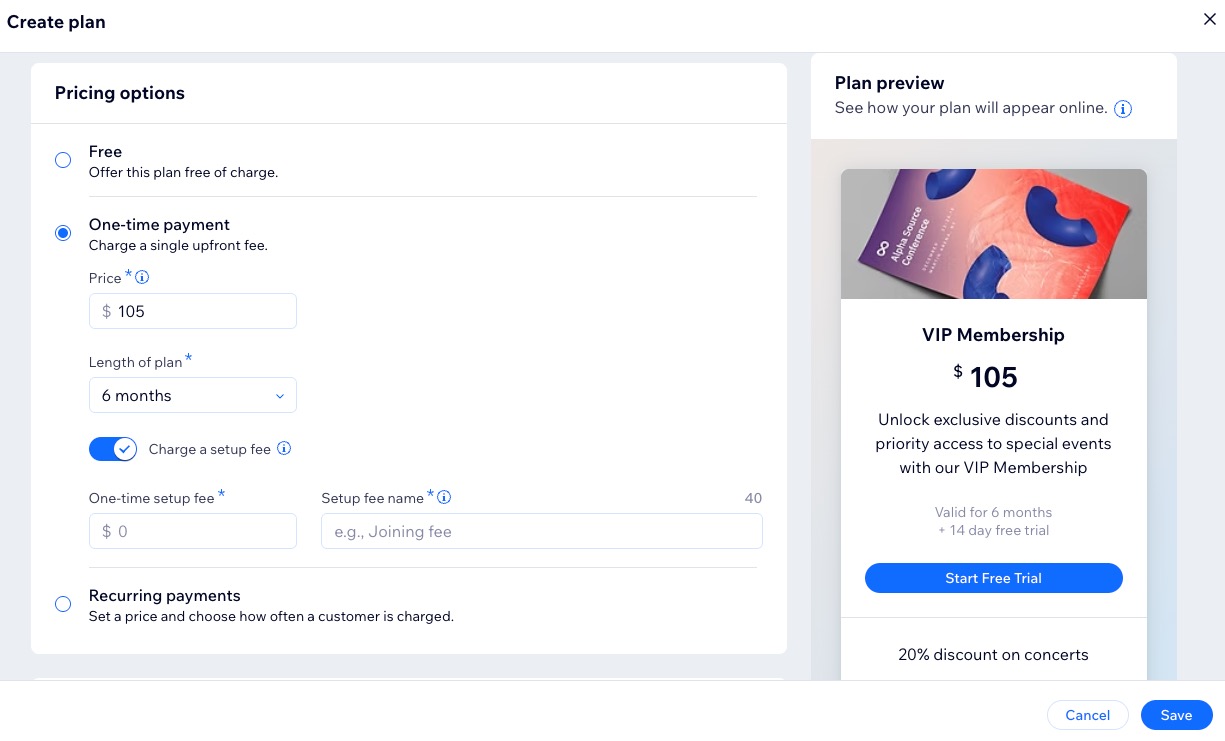
- Add the plan details:
Plan info
Benefits
Pricing options
Settings

7. When ready, click Save.
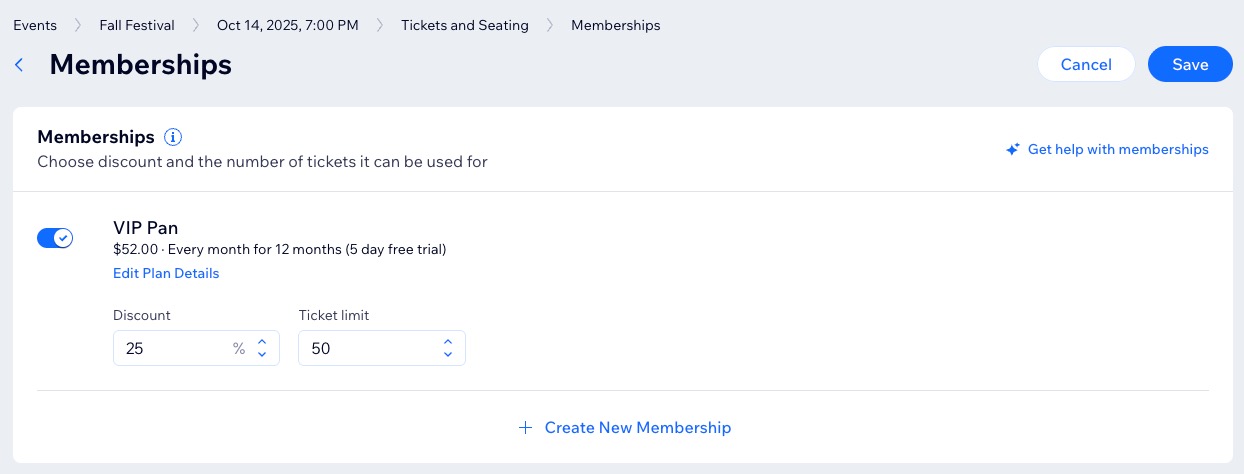
Connecting membership plans to an event
After creating a membership plan, you can apply it to any new or existing events. You can choose to set the same discount percentage and ticket limit for all events, or customize the discount and ticket limit for each event individually.
To connect a membership plan:
Dashboard
Wix app
Wix Studio app
- Go to Events in your site's dashboard.
- Hover over the relevant event and click Manage.
- Click the Tickets and Seating tab.
- Click Edit next to Membership plans.
- Enable the toggle next to the relevant plan.
- Enter the Discount and the Ticket limit.
- Click Save.
FAQs
Click a question below to learn more about creating a membership plan for your events.
I can't see the Pricing Plans app on my site. What should I do?
How can I customize the Plans & Pricing page?
Can I limit event access to members with a specific pricing plan only?
Can I use a membership plan to give members free tickets to events?
