


Pricing Plans: Offering Your Clients a Free Trial Period
In this article
- Creating a plan with a free trial period
- FAQs
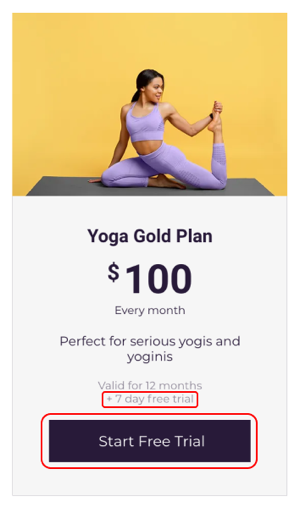
Let potential customers get to know your products, services and content by offering them a free trial period at the beginning of their plan or package. You can choose the length of the free trial period to suit the plan or package.
Tip:
Instead of offering a trial period at the start of a regular pricing plan, you can
create a promotional trial plan that customers can book only once.
Creating a plan with a free trial period
You can create free trial periods for plans that include recurring payments (e.g. a monthly gym membership or a coffee subscription). This is a great way for customers to get to know your business before making a commitment.
To create a plan with a free trial period:
- Go to Pricing Plans in your site's dashboard.
- Click + Create Plan.
- Enter the details of the plan, such as the name and benefits.
- In the Pricing options section, select Recurring Payments.
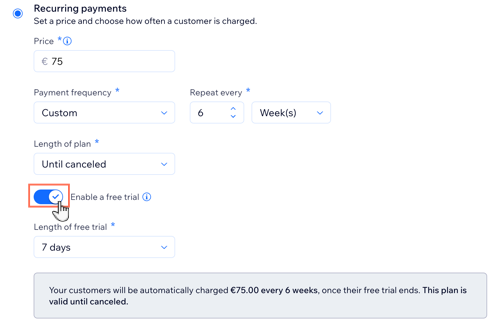
- Enter the Price.
- Set how often you take payment from Payment frequency in the drop-down.
- Click the Length of plan drop-down and choose from the following options:
- Choose a set length: Choose from the available options.
- Until canceled: This option allows the plan to continue until you or the client cancels it.
- Custom: Choose the number of months you want the plan to last for.
- Click the Enable Free Trial toggle.
- Select the duration of the free trial in the Length of Free Trial drop-down:
- Select a time: Choose 7, 14, or 30 days.
- Set a custom time:
- Click Custom.
- Enter the number of days.
- Finish creating your plan and click Save.
FAQs
How do free trials work for Pricing Plans?

How do free trials work with packages?
Can the same client book multiple free trials?

What happens if a client cancels a plan during their trial period?
How do I track plans with free trial periods?
