

Displaying a Usercentrics for Wix Cookie Banner
7 min
In this article
- About cookies
- Step 1 | Add the cookie banner
- Step 2 | Run a scan of your site
- Step 3 | Customize your banner's look & texts
- Step 4 | Enable your banner
- FAQs
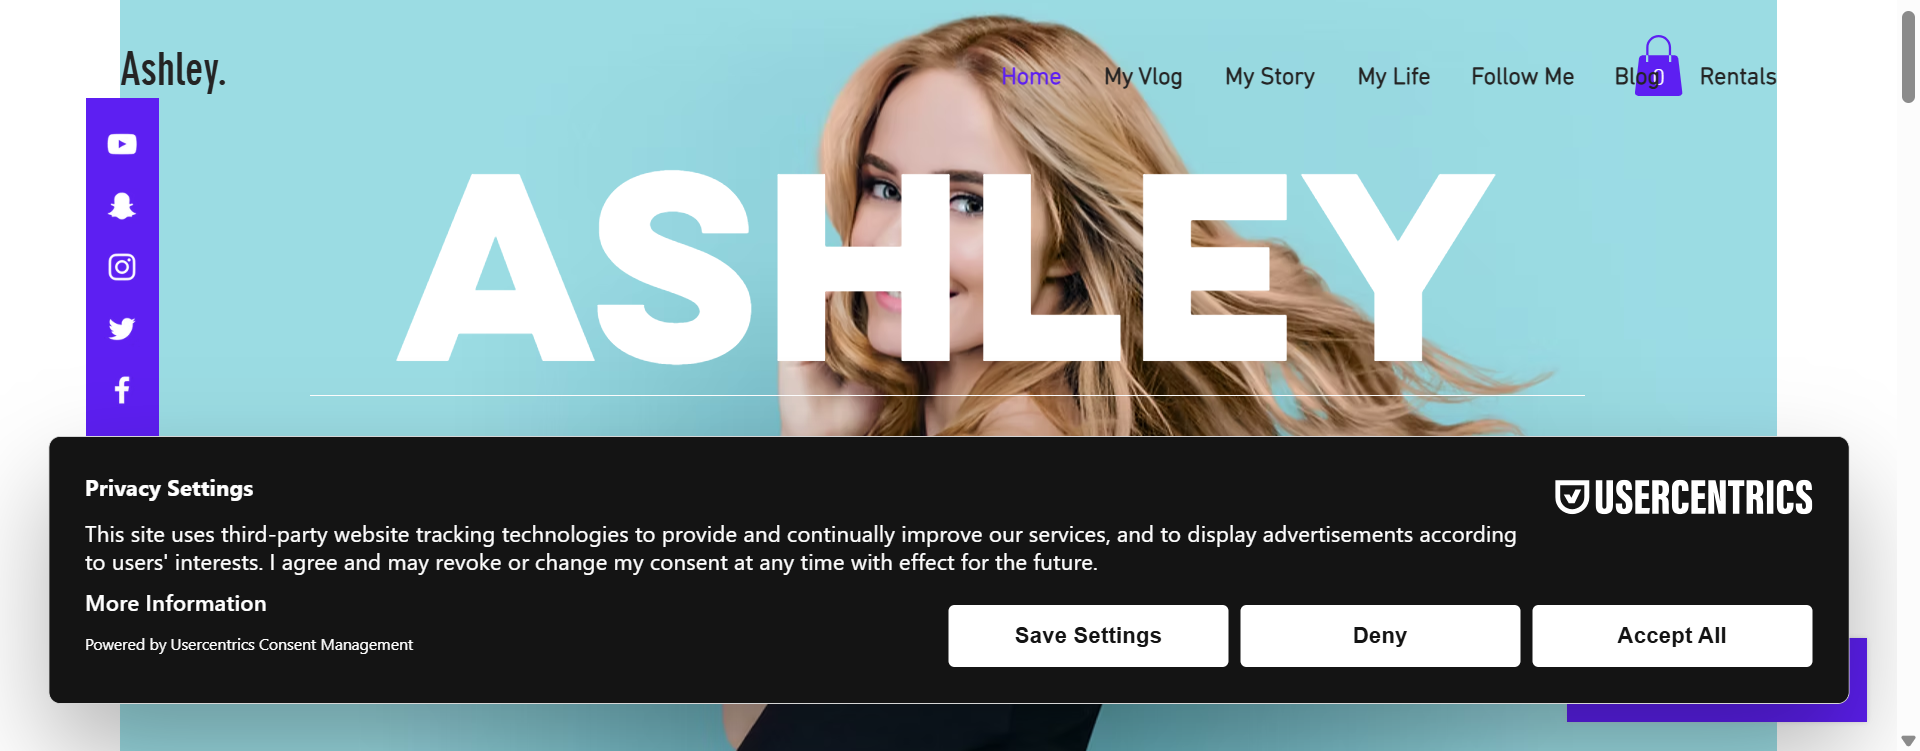
A cookie consent banner is a notification that informs your visitors on how their cookies are being used on your site. Wix has partnered with Usercentrics to offer you a consent banner solution that includes anytime site scans, translation in up to 60 languages, and is supported for Google Consent Mode v2.
About cookies
If you don't have a cookie consent banner active, all cookies and scripts are loaded when a visitor first enters your site.
If you have a cookie consent banner active, the behavior is different. When a visitor first enters your site, only essential cookies and scripts are loaded. In order to use other types of cookies and scripts (e.g., Functional, Marketing, Analytics), you must obtain consent from your visitor. Visitors can either approve all cookie types by simply clicking Accept All, or only allow specific types by disabling the toggles for those cookie types.
Important information about Marketing & Analytics integrations
Step 1 | Add the cookie banner
To make the Usercentrics for Wix cookie banner appear on your site, head over to the Wix Privacy Center and add the consent banner to your site. The basic version of the Usercentrics cookie banner is free to use and fully GDPR-compliant.
If you wish to access premium features such as privacy trigger placement, translations, customizable text and legal document linking, you'll need to sign up for a monthly or yearly Usercentrics plan. Usercentrics offers a 14-day trial period on sign up.
To add the cookie banner:
- Go to Privacy & Cookies in your site's dashboard.
- Click Add to Site next to Add a cookie consent banner.
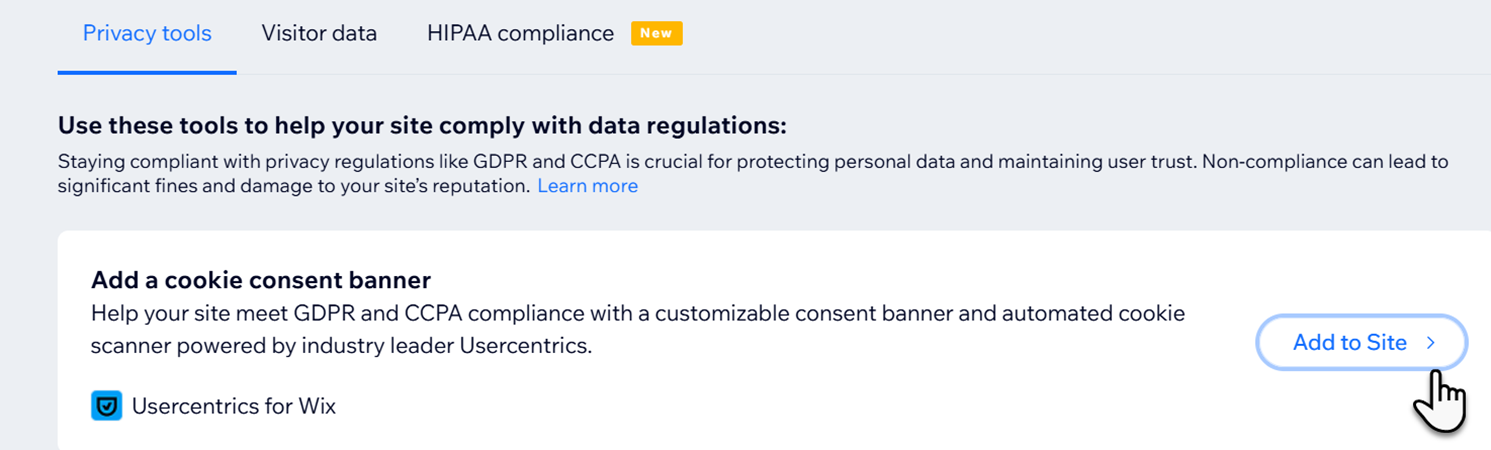
- Review the Usercentrics information and click Agree & Add to continue.
- (Optional) To access premium banner features, click Upgrade Now.
- Add your billing information for app renewal and click Submit Purchase.
Step 2 | Run a scan of your site
Perform a scan of your site to identify components that may require user consent. The scan shows both Wix and 3rd-party components as well as describing the cookie type (e.g., Functional, Marketing, Analytics) they employ.

If the scan tells you that action is required, you can review the relevant component as well as the suggested courses of action presented in your scan report. A scan can be performed monthly for all users. For premium users, an automated scan can be scheduled monthly, or a site can be re-scanned at any time.
To run a scan:
- Go to Cookie Consent Banner in your site's dashboard.
- Click Website Scan.
- Choose one of the following:
- For first-time users, click Scan.
- To re-scan your site, click Re-scan website now.
- Click View scan results to review your scan report.
Step 3 | Customize your banner's look & texts
After enabling the cookie banner, make it your own by customizing the design. Premium users can also edit colors, layout, theme and adjust the text to your tone & voice.
Additionally, all users can link the banner to a privacy policy so visitors are aware of all of the ways your site collects, uses, discloses, and manages their data.
Learn more about creating a privacy policy for your site.
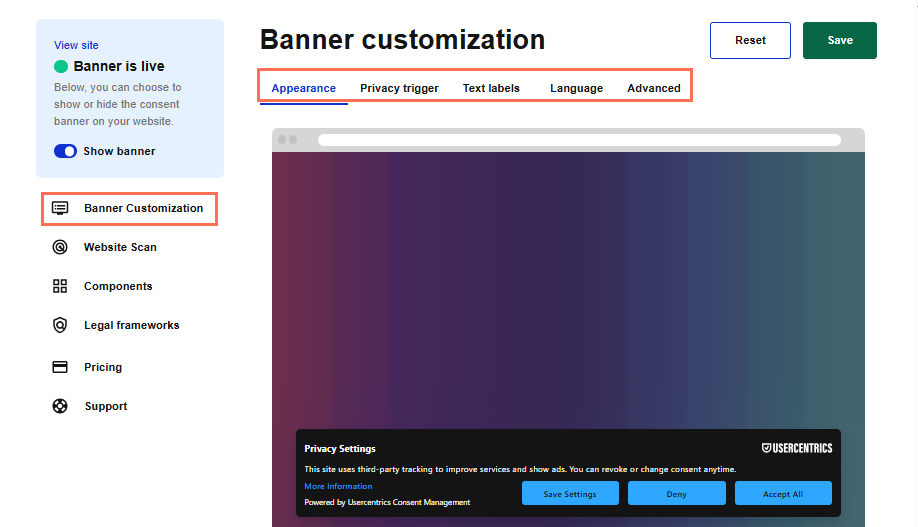
To customize your banner:
Free banner
Premium banner
- Go to Cookie Consent Banner in your site's dashboard.
- Customize your banner with the following options:
- Under Appearance:
- Layout: You can choose a slimmed or full-size banner.
- Theme: You can choose from a light or dark theme.
- Under Privacy trigger:
- Choose to display your privacy trigger on all, or only selected pages.
- Under Text labels:
- Main language: You can set the main language of your banner.
- Links: Add links to your policy documents such as your privacy policy.
- Under Language:
- Language: Select the language you wish your cookie banner to display in.
- Under Advanced:
- Enable placeholders: Enable the toggle to prevent loading third-party components managed by Wix, like Google Maps and Facebook, until consent is provided.
- Redisplay your banner: Click Resurface to force the consent banner to reappear for all users.
- Under Appearance:
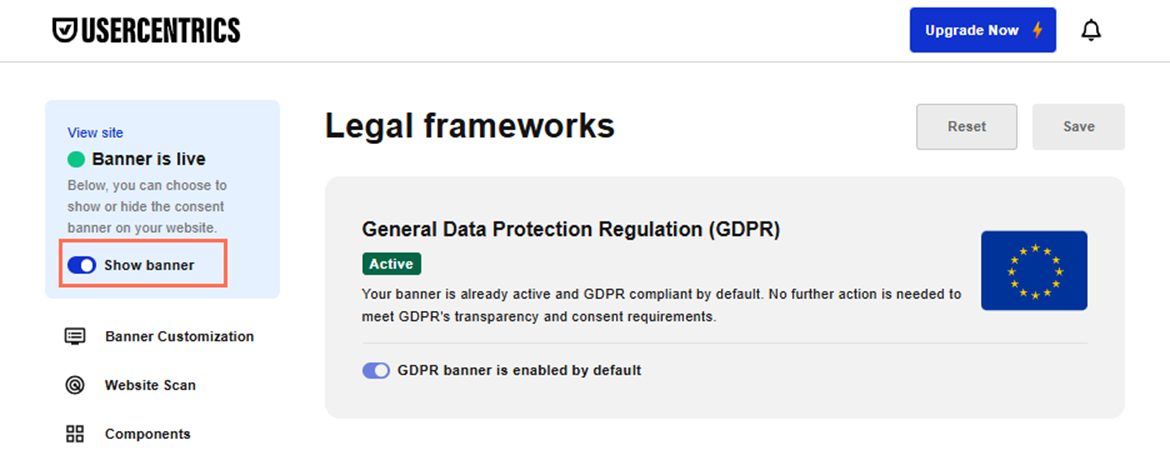
Step 4 | Enable your banner
After reviewing your banner you're ready to make it visible to your site visitors. Once you do, the banner is enabled on your site and starts collecting consent from your visitors.
To enable your banner:
- Go to Cookie Consent Banner in your site's dashboard.
- Enable the Show banner toggle.
Note: You can use the toggle to disable your banner if you need to.
Tip:
Access your Consent Log to view and manage consent collected through your cookie banner. If needed, you can export the log and search for specific site members.
FAQs
Click a question below to learn more about cookies and your Wix site.
What is a privacy trigger?
My cookie banner does not display for visitors. Why is this happening?
Can I view my cookie banner while editing my site?
How do I create a privacy policy for my site?
I have a Wix Cookie Banner. Does it still collect consent?
