

Wix Pro Gallery: Adding and Setting Up Your Gallery
7 min
In this article
- Step 1 | Add the gallery to your site
- Step 2 | Add media to your gallery
- Step 3 | Customize your gallery layout
- Step 4 | Customize your gallery settings
- Step 5 | Customize your gallery design
- Step 6 | Customize your gallery's advanced settings
- FAQs
The Wix Pro Gallery allows you to showcase your images, videos, and text all in one beautiful multimedia gallery. You can choose from multiple layouts and customize your gallery's design and settings. This tool helps you create a visually engaging experience for your visitors, making your content stand out.
For example, you're an interior designer looking to showcase your work. With the pro gallery, you can upload a mix of photos and videos that highlight different spaces you've designed and present it in a sleek layout. Then add text descriptions that detail the materials used or the design inspiration behind each project. You can even choose to have these descriptions always visible, or only appear on hover.

Step 1 | Add the gallery to your site
First, add the gallery to your site. Once you've added it, you can add your media and customize the settings.
Wix Editor
Studio Editor
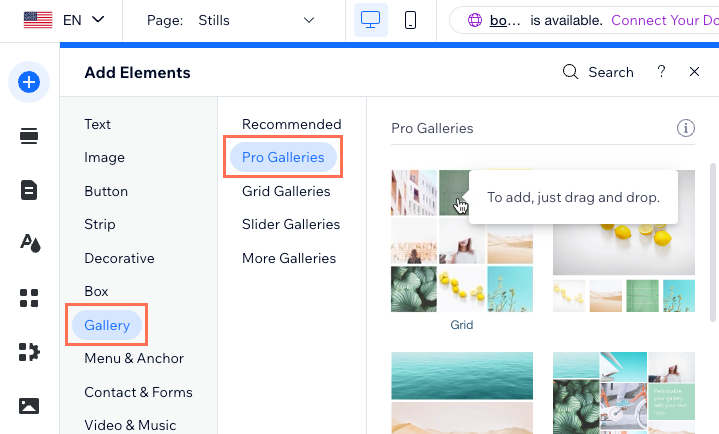
- Go to your editor.
- Click Add Elements
 on the left side of the editor.
 - Click Gallery.
- Click Pro Galleries.
- Drag a pro gallery onto your page.
Step 2 | Add media to your gallery
Next, add your media. This can include images, videos and text. You can choose to upload your own media or upload content from the Wix Libraries.
To add media to your gallery:
- Click the pro gallery element in your editor.
- Click Manage Media.
- Click Add Media at the top.
- Choose the type of media you wish to upload.

Tip:
To delete the default media that come with the gallery, hover over the item you want to delete and click the Delete icon  .
.
.Step 3 | Customize your gallery layout
Now you can focus on customizing the layout. There is a wide variety of layout options to choose from:
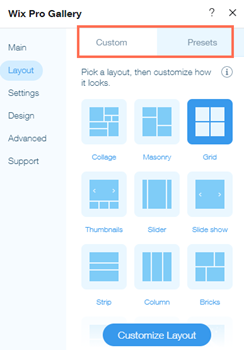
- Preset: These ready-made gallery templates allow you to speed up the process of showcasing your images on your site. Preset templates include a built-in layout, design and settings.
- Customize: These gallery layouts allow you to design and customize your gallery from scratch.
To customize your gallery layout:
- Click the pro gallery element in your editor.
- Click Settings.
- Click the Layout tab.
- Click Custom or Presets.
- Depending on the customizable layout option you choose, adjust the settings.
Step 4 | Customize your gallery settings
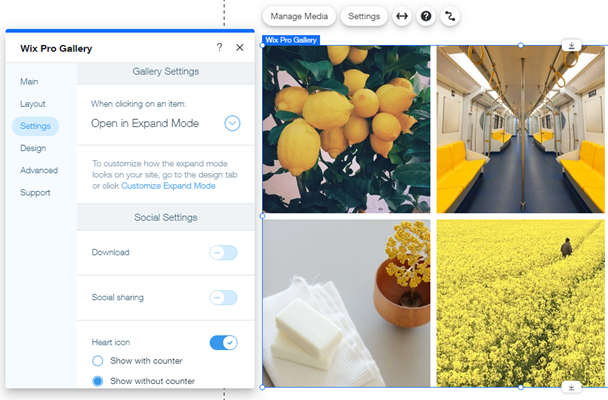
Next, customize your gallery's general and social settings. Choose what happens when visitors click an item, allow them to share their favorite content on social media, and more.
To customize your gallery settings:
- Click the pro gallery element in your editor.
- Click Settings.
- Click the Settings tab.
- Customize your gallery settings using the options available.
Step 5 | Customize your gallery design
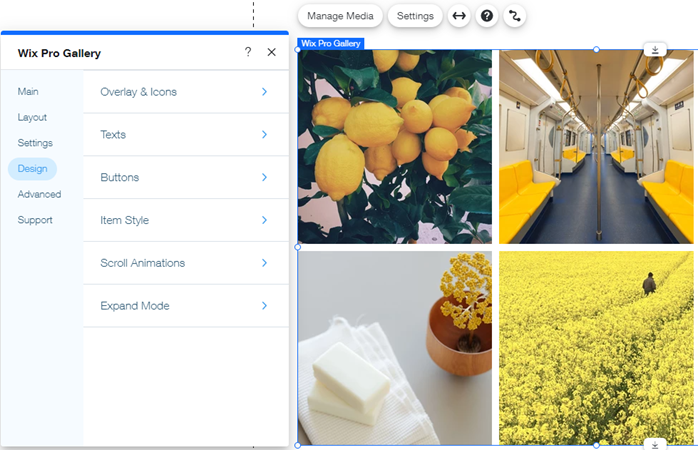
Now it's time to make your gallery completely your own by customizing the wide range of design options available. You can add and adjust an overlay and icons, scroll animations, text, item style, buttons, and expand mode.
Note:
Available design options depend on the layout and settings you've previously chosen. For example, in order to customize text, you have to enable the Title and / or Description checkbox in the Text tab of the Design panel.
To customize your gallery design:
- Click the pro gallery element in your editor.
- Click Settings.
- Click Design.
- Customize your gallery design using the available options.
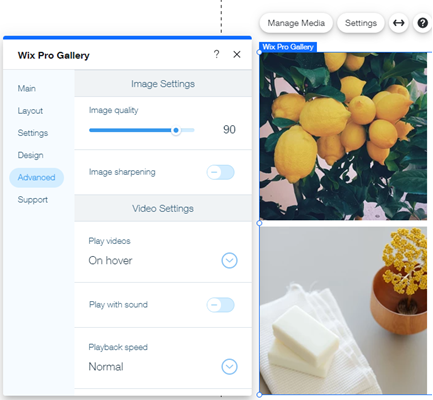
Step 6 | Customize your gallery's advanced settings
Lasty, customize the gallery's advanced settings to take your gallery to the next level. These settings allow you to focus on customizing how your videos play, setting the quality of your images, and adjusting the gallery's direction.
To customize your gallery's advanced settings:
- Click the pro gallery element in your editor.
- Click Settings.
- Click the Advanced tab.
- Customize your gallery using the options available.
FAQs
Click a question below to learn more.
Can I restore a previous version of my pro gallery?
Can I add a title to my pro galleries on my live site?
What happens if I have several pro galleries on one of my site pages?
What media can I add to my gallery?
Where can I find more information about Wix Pro Gallery?
Can I hide an item from the pro gallery without deleting it?
What if I want to add single images, videos or display a portfolio?
How can I allow visitors to zoom in on gallery items?
Can I organize gallery items into categories or collections?
How can I create a private gallery for clients to download images?
