Wix Pro Gallery: Managing Your Gallery
6 min
In this article
- Downloading images from a gallery
- Duplicating a gallery
- Reordering items in a gallery
- Adding a heart icon to gallery items
- FAQs
The Wix Pro Gallery allows you to showcase multimedia content all in one place. With this gallery, you can easily reorder gallery items and duplicate / copy galleries onto the same or different pages. We also make it easy for you to manage the social and interactive settings of your gallery, such as the heart and download icons.
Downloading images from a gallery
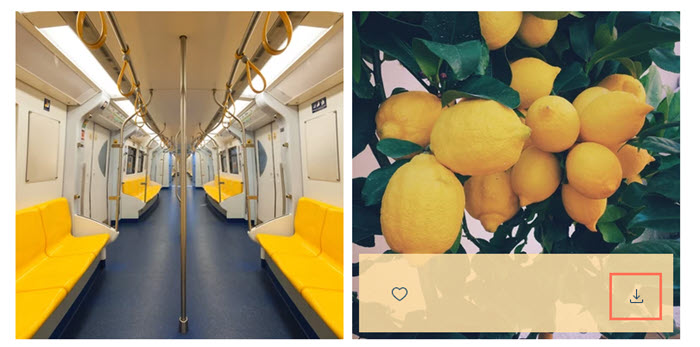
Allow visitors to download gallery items by enabling the Download toggle in the Settings tab. A download icon appears on each individual item upon hovering. Visitors can download your original images but not Free Wix media.
To enable downloading of images in the Wix Pro Gallery:
- Go to your editor.
- Click the pro gallery element on your page.
- Click Settings.
- Click the Settings tab.
- Click the Download toggle to enable it.

Note:
The pro gallery has a built-in Right Click Protect feature on desktop, so it's not possible to save images added to your gallery with a right-click.
Duplicating a gallery
Save yourself time and duplicate your gallery onto the same page, or copy and paste it onto a different page of your site. The gallery's content and settings are carried over onto the duplicate.
To duplicate a gallery:
- Go to your editor.
- Click the pro gallery element on your page.
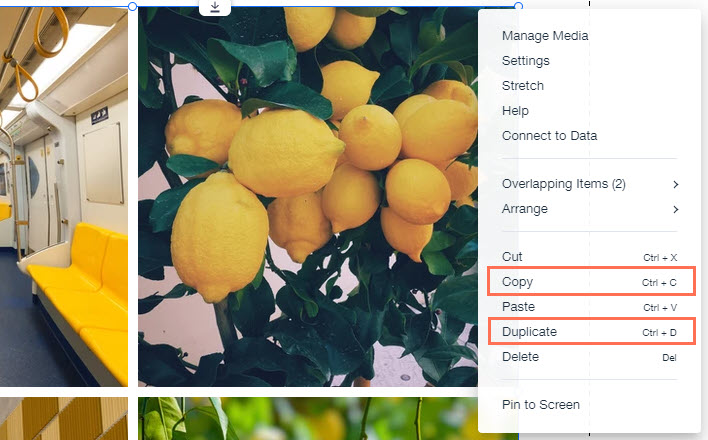
- Right-click on the gallery and choose what you want to do:
- Duplicate a gallery on the same page:
- Click Duplicate.
- Drag the gallery to your preferred location.
- Copy and paste a gallery elsewhere:
- Click Copy.
- Navigate to the relevant page on your site.
- Right-click anywhere on the page and select Paste.
- Duplicate a gallery on the same page:

Reordering items in a gallery
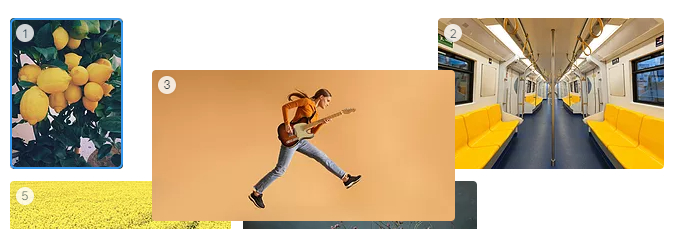
You can change the order of the images, video or text in your gallery from the Organize Your Gallery window.
To reorder your gallery items:
- Go to your editor.
- Click the pro gallery element on your page.
- Click Manage Media.
- Click and drag the gallery items into the order you want.

- Click Done.
Tip: You can also sort the images alphabetically by image title or file name. Click the Arrange by icon and select an option.
Adding a heart icon to gallery items
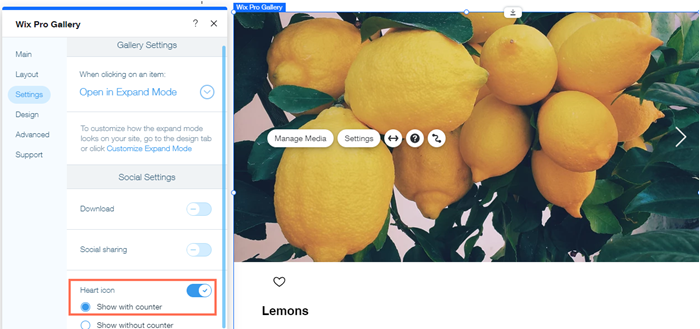
Track how many "likes" your images and videos are getting by adding a heart icon to media items in your gallery. This is a great way to see how your site visitors are responding to your content. The heart icon and counter both appear on your live site when you hover over an image in your gallery.
To add a heart icon to your pro gallery images and videos:
- Go to your editor.
- Click the pro gallery element on your page.
- Click Settings.
- Click the Settings tab.
- Enable the Heart icon.
- Select Show with counter to enable the "likes" counter.

FAQs
Click a question below to learn more about managing your gallery.
Can I download all my gallery items at once?
Can I track gallery items that have been liked or downloaded by my site visitors?
How can I prevent my images from being saved on a mobile device?
Can Wix randomize the order of my gallery items?
Why is my heart counter not visible?
Will I be notified if a visitor likes one of my gallery items?
What happens if I have several pro galleries on one of my site pages?
Why does my gallery change its layout on different devices?
How can I move my gallery to another page?
Can I add filters or tags to my pro gallery?
Can I make new media automatically appear at the beginning of the gallery?


 . In order to fill the full width on a device screen, the gallery may change the position and size of your gallery items and / or the number of items per row.