Wix Editor: Changing Your Gallery's Layout
5 min
In this article
- Choosing the number of rows and columns
- Resizing your gallery
- Resizing a gallery with the stretch handles
- Stretching a gallery to full-width
- Aligning your gallery image text
- Displaying landscape and portrait images in a gallery
- Customizing the layout of a Freestyle gallery
Adjust your gallery's layout to suit your site's alignment. Use options such as the width, spacing, and height to structure and display your images the way you want.
Note:
The available layout options depend on the gallery you choose.
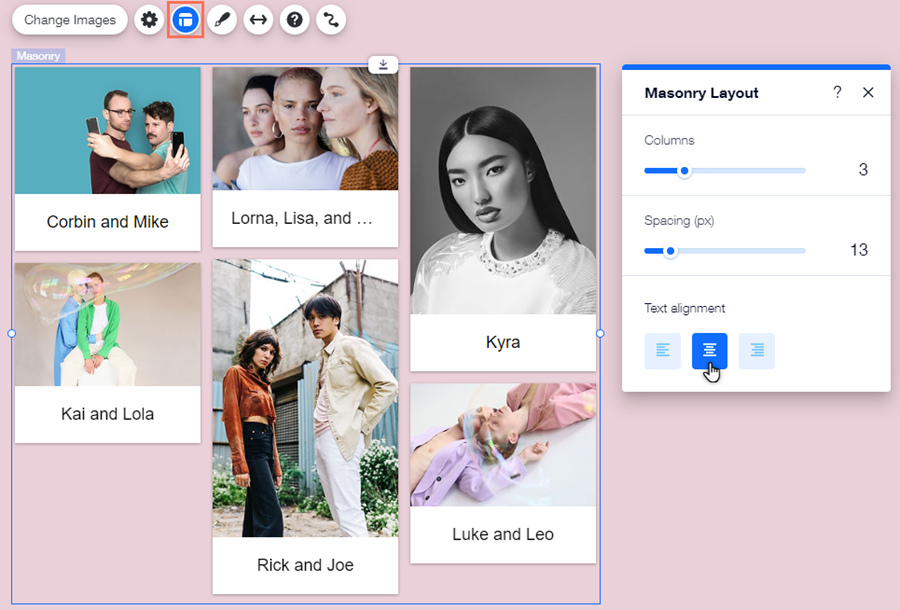
Choosing the number of rows and columns
Decide how many rows and columns you need for your gallery's content. For example, if your gallery contains 9 images, you can set 3 rows and 3 columns to ensure they're displayed evenly.
After choosing the number of rows and columns, you can make the spacing between images bigger or smaller.
To change the number of columns and rows:
- Go to your editor.
- Click the gallery on your page.
- Click the Layout icon
 .
. - Drag the sliders to adjust the number of columns, rows and the spacing between the columns / rows.
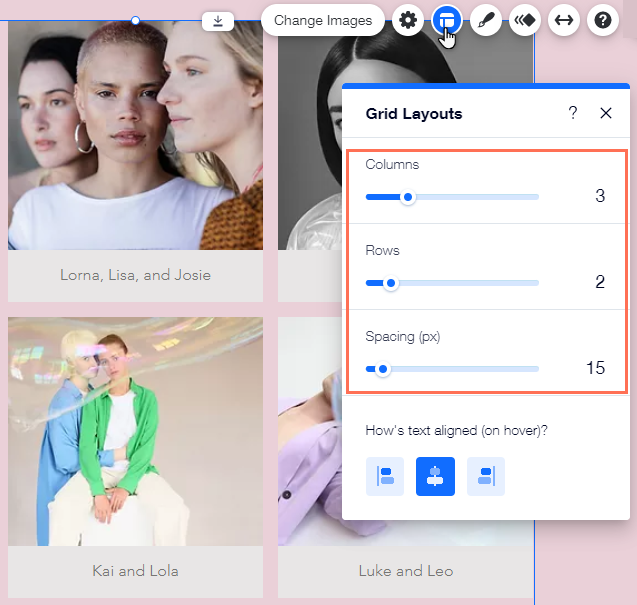
Note:
Some galleries only contain the Columns option.
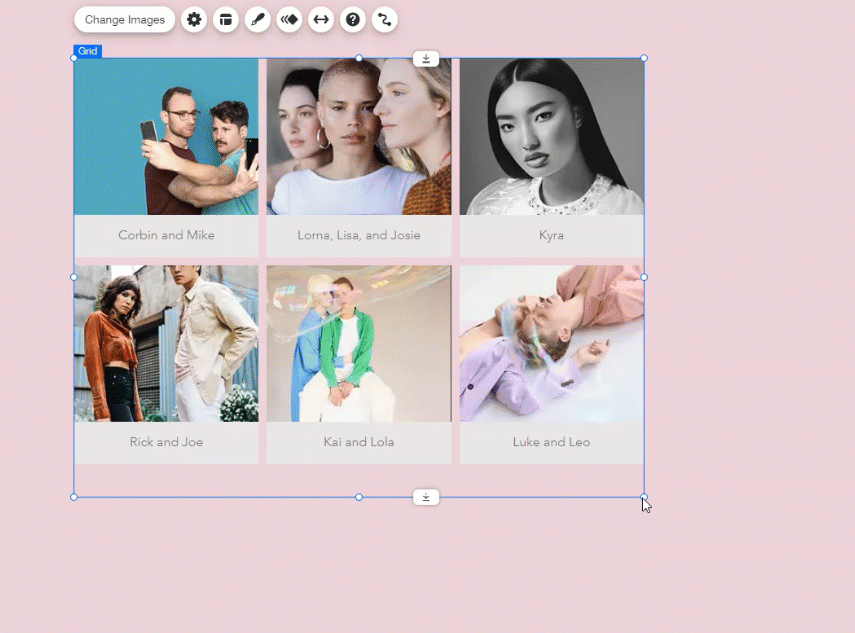
Resizing your gallery
Depending on your needs, there are two ways to change the size of your gallery: using the stretch handles to make it bigger or smaller, or stretching it to full width.
Resizing a gallery with the stretch handles
- Go to your editor.
- Click the gallery on your page.
- Click and drag the handles on the gallery's edges to resize it.
Note:
If you're unable to resize your gallery using the stretch handles, it's probably already set to full width. You can disable this option if needed.
Stretching a gallery to full-width
- Go to your editor.
- Click the gallery on your page.
- Click the Stretch icon
 .
. - Click the Stretch to full width toggle:
- Enabled: The element is stretched to the full width to fit your screen.
- Disabled: The element is not stretched to fit your screen.
- (Optional) Drag the Margins slider to increase or decrease the space on either side of the gallery.
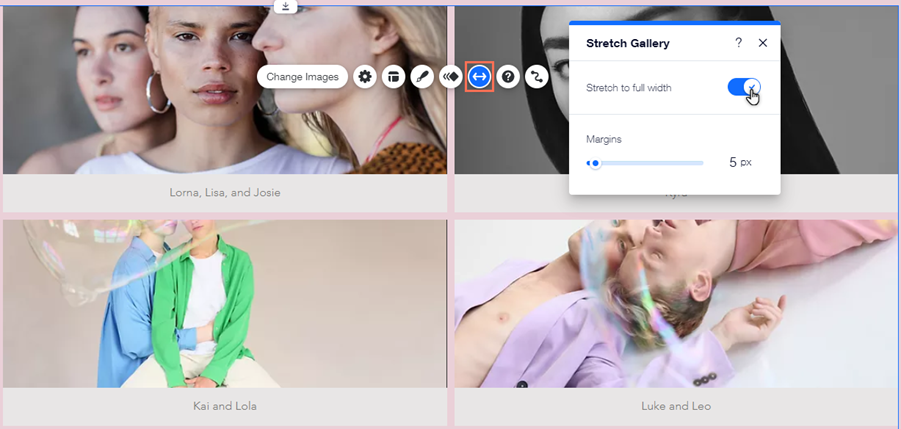
Note:
The margin limit for full-width galleries is 80 pixels.
Aligning your gallery image text
Certain galleries display image titles and / or descriptions to give your visitors extra information or context. You can set the text's position by choosing an alignment from the Layout panel.
To align text in your gallery:
- Go to your editor.
- Click the gallery on your page.
- Click the Layout icon
 .
. - Choose an option under Text alignment or How's text aligned?: Left, Center or Right.
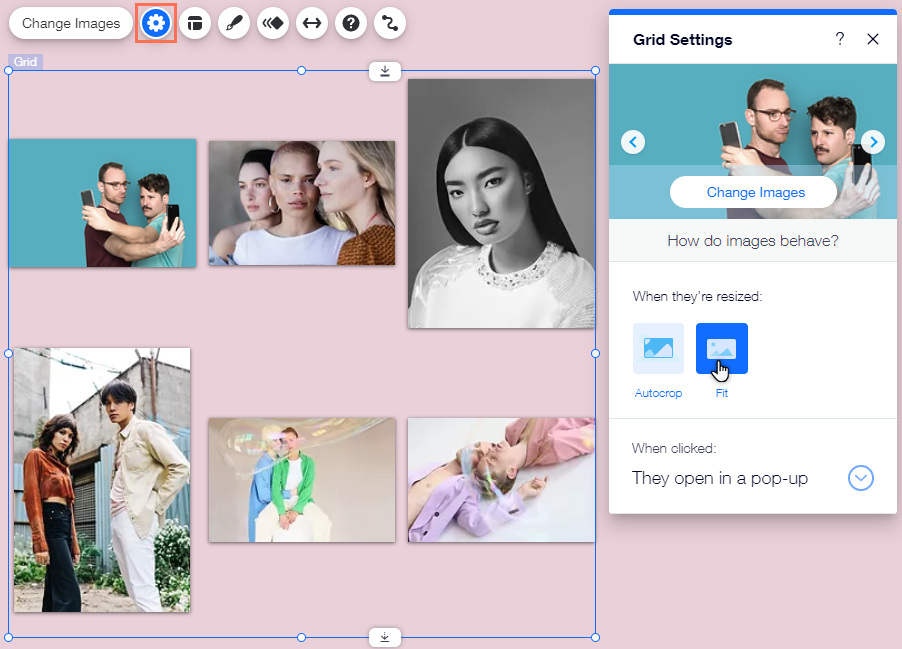
Displaying landscape and portrait images in a gallery
If you have both landscape and portrait mode images in your gallery, you can set the image scaling to 'fit'. This prevents the images from being automatically cropped, so you can display all of your images in their correct orientation.
Before you begin:
Make sure you save and upload the images in the orientation that you want to use (landscape or portrait).
To set image scaling:
- Go to your editor.
- Click the gallery on your page.
- Click the Settings icon
 .
. - Choose an option under When they're resized:
- Autocrop: Images are automatically cropped to fit the space, and have the same orientation.
- Fit: Images are fit into the image space and displayed in their original orientation.
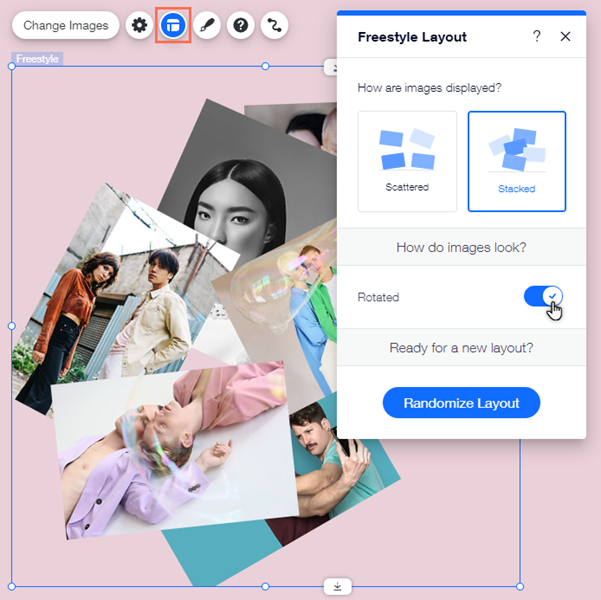
Customizing the layout of a Freestyle gallery
Adjust the structure of a Freestyle gallery by setting its display and rotation. You can also randomize the layout for a fresh new look.
To change the layout of a Freestyle gallery:
- Go to your editor.
- Click the gallery on your page.
- Click the Layout icon
 .
. - Select a layout option under How are images displayed?:
- Scattered: Images are scattered randomly in the gallery.
- Stacked: Images are stacked on top of each other.
- Click the toggle next to Rotated to enable or disable image rotation:
- Enabled: Images are placed at an angle (partially rotated).
- Disabled: Images are placed horizontally.
- (Optional) Click the Randomize Layout button to randomly select a different layout for your gallery images.