

Enterprise Solution: Managing all of Your Sites
4 min
In this article
- Creating a new site
- Creating a new folder for your sites
- Organizing your enterprise site list
- Requesting Client Feedback
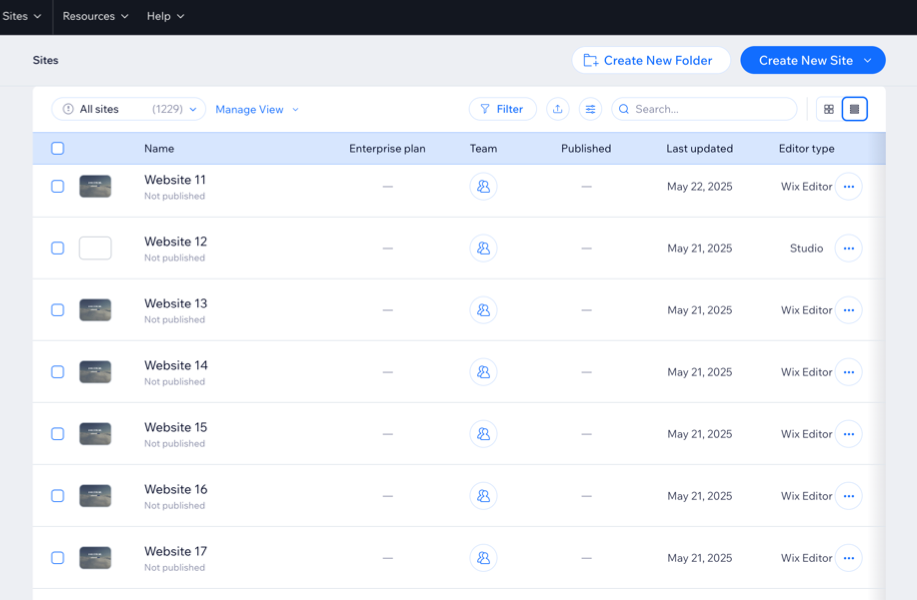
Stay in control and keep track of all the sites managed by your enterprise. Create new sites directly from your enterprise dashboard, and keep your sites organized by creating folders to group them together. You can also filter your site list to see specific sites, and save filtered views that you want to access regularly.
Click on a site in your site list to see detailed information regarding the site's plan status, domain info, template used and more. You can also access the site's dashboard, or perform site-level actions like editing, renaming, previewing and duplicating.
Learn more about Wix Studio for enterprise or contact our sales team.
Creating a new site
Create new sites for your enterprise with just a few clicks. You can choose to build a site from scratch and customize it, or use a custom template that has already been created by your organization.
To create a new site:
- Go to Sites in your enterprise dashboard.
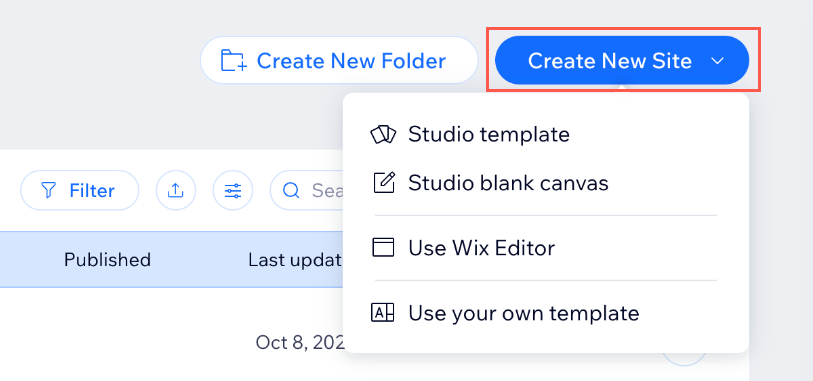
- Click Create New Site at the top right.
- Choose how you want to create your website:
- Studio template: Build a site using a Wix Studio template.
- Studio blank canvas: Build a site from scratch using Wix Studio.
- Use Wix Editor: Build a site using the Wix Editor.
- Use your own template: Use a template already created by your organization to create a new site.
Creating a new folder for your sites
Organizing your enterprise sites is essential to effectively manage them. Create folders and group sites together based on your preferences. By creating folders, you can quickly locate specific sites and manage them more efficiently.
To create a new folder:
- Go to Sites in your enterprise dashboard.
- Click Create New Folder at the top.
- Enter a name for your folder and click Create.
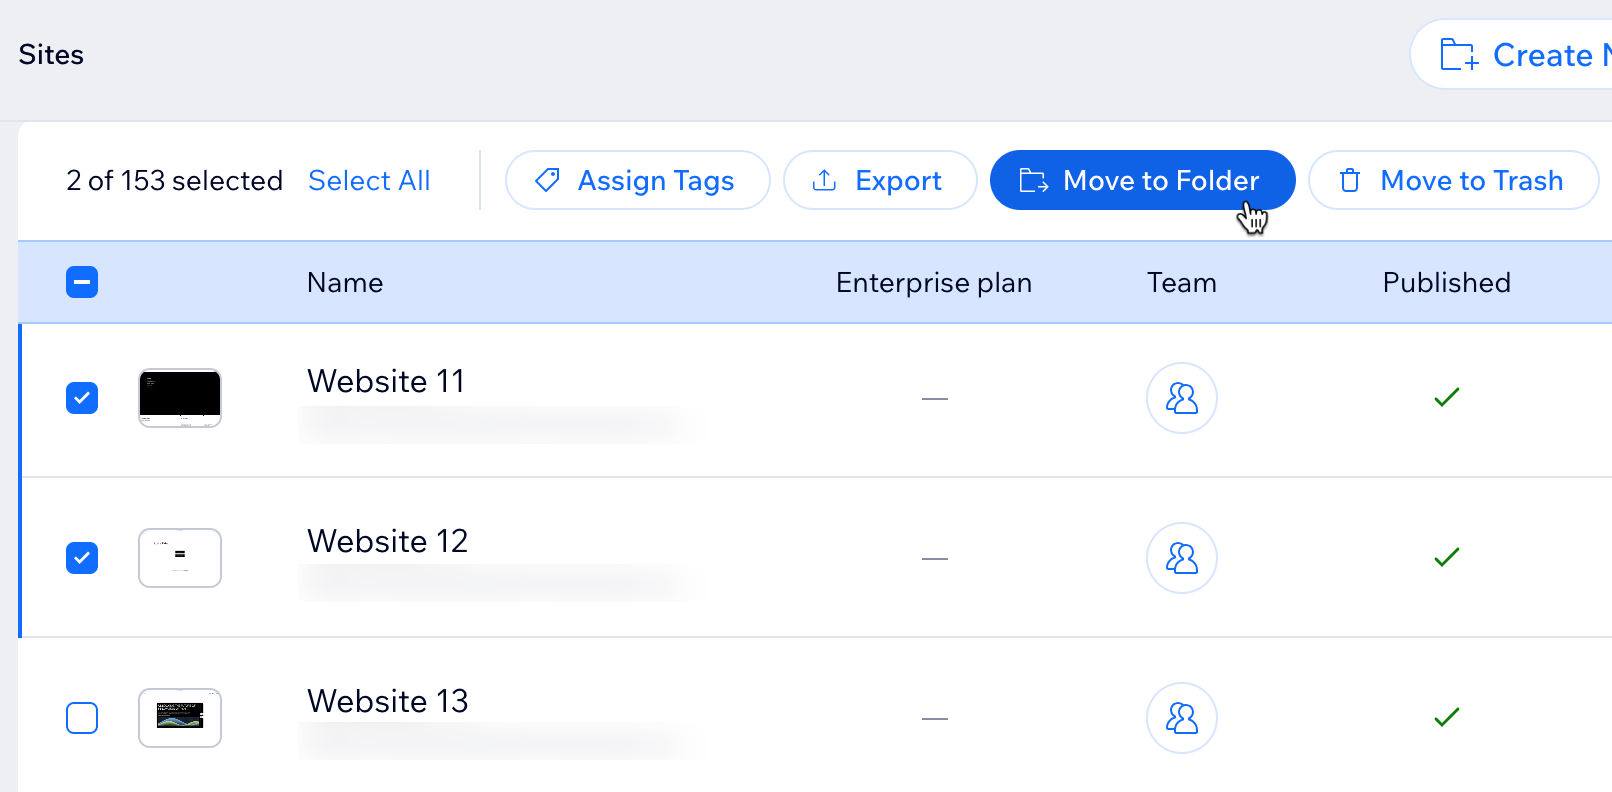
- (Optional) Move sites into the folder:
- Select the sites you wish to move.
- Click Move to Folder at the top.
- Click on the folder you wish to move the sites to.
- Click Move Here.
Organizing your enterprise site list
Managing multiple sites within an enterprise can be a challenging task, especially when you're trying to find a specific site in a long list. You can quickly search for specific sites based on their site name, or filter your site list to see a specific subset of sites based on your criteria. Once you've filtered your site list, you can save those filtered views to access them quickly in the future.
To filter your site list and save your view:
- Go to Sites in your enterprise dashboard.
- Click Filter.
- Select the filters to apply to the site list.
- Click Manage View and then click Save as new view.
- Enter a name for the saved view.
- Click Save.
Tip:
Click the Customize columns icon  and select the columns to show in your site list. You can also drag and drop the columns to reorder them.
and select the columns to show in your site list. You can also drag and drop the columns to reorder them.Requesting Client Feedback
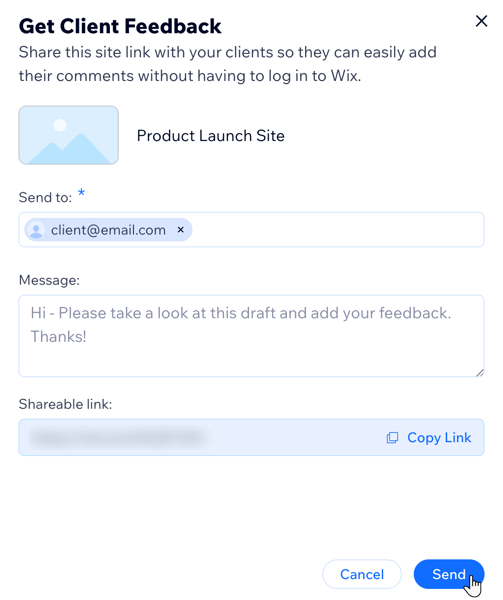
In your Sites tab you also have the option to send preview links of your websites to your clients so they can leave feedback without making changes. This feature allows clients to browse your site and comment on specific sections, ensuring they can provide detailed and clear input.
To get client feedback:
- Go to Sites in your enterprise dashboard.
- Click the More Actions icon
 next to the relevant site.
 - Click Get feedback.
- Enter the name or email address of each person you want to get feedback from.
- (Optional) Enter a message your clients will see when they receive the invite.
- Click Send.
Tips: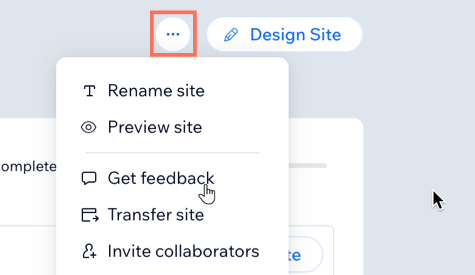
- In the pop-up, click Copy Link next to Shareable link to share the link manually.
- You can also request client feedback by going to your site's dashboard, clicking Site Actions
 at the top right of your screen and clicking Get feedback.
