

Enterprise Solution: Managing all of Your Media Assets
3 min
In this article
- Uploading your media files
- Managing categories for media files
- Archiving media files
Directly uploading images and videos to your Wix Studio for enterprise account is a convenient solution for efficiently managing your media assets across all of your sites. Whether your goal is to share a set of images or videos across various sites or quickly distribute new media assets to all your clients, uploading media to your Wix Studio for enterprise account can save you time and ensure consistency across your sites.
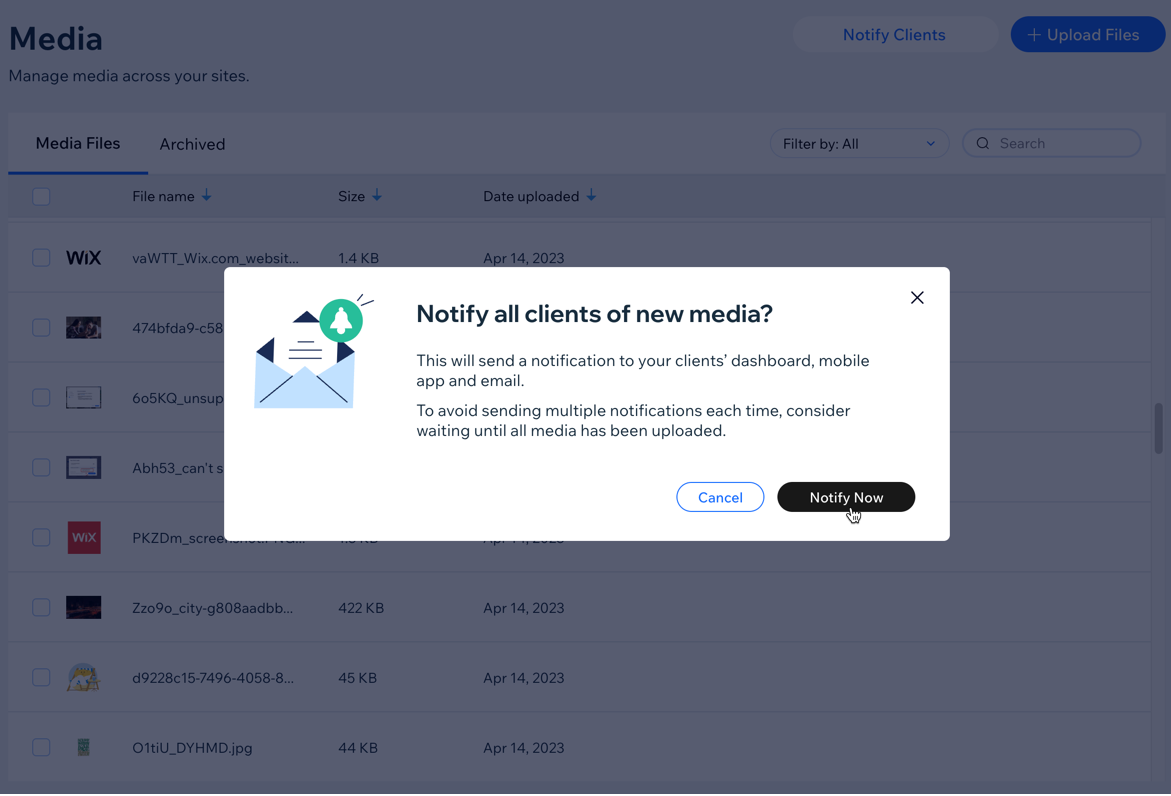
When you upload your files, you can choose a category to add them to or add a new one to keep your files organized, e.g. sales, holidays, social media. Once you've uploaded a batch, you can notify your clients of the new media available for them to use. You and your clients can filter the media files by the categories you've created.
Learn more about Wix Studio for enterprise or contact our sales team.
Uploading your media files
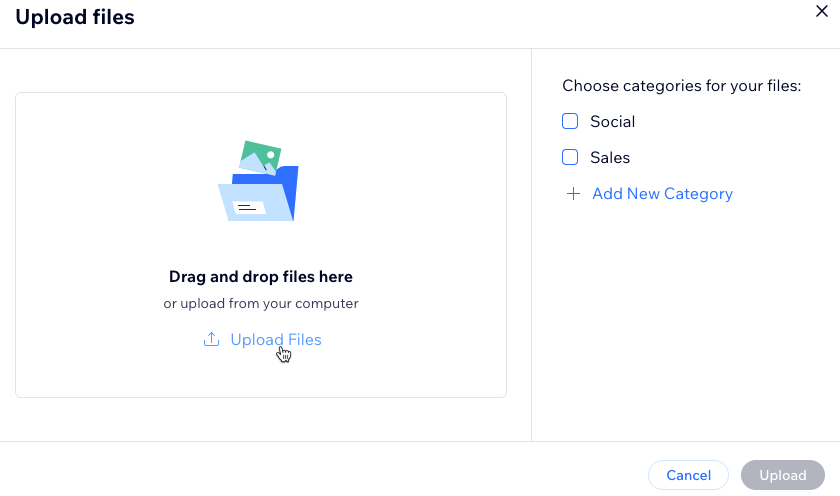
Upload images and videos directly to your Wix Studio for enterprise account to use across all of your sites. Choose a category for your media files, or add a new one, to keep your media assets organized and labeled. You can then filter your media assets by the categories you've created.
Once you've uploaded a batch and want to share the news, click Notify Clients to notify your clients of the new media available for them to use in their sites. Your clients can also filter their media by the categories you've created.
Tip:
Learn more about supported file types and sizes for videos and images.
To upload your media:
- Go to Media in your enterprise dashboard.
- Click + Upload Files at the top right.
- Click Upload Files to select the files you want to upload.
- (Optional) Choose a category for your files, or click + Add New Category to add a new one.
- Click Upload.
Managing categories for media files
Effortlessly manage your media file categories to maintain a well-organized digital library. By assigning files to specific categories or creating new ones, you can ensure easy navigation and quick access to your media assets. Enjoy full control by editing, deleting, or rearranging categories with easy hover and drag-and-drop actions. You can always add or remove categories to your media files.
To manage categories:
- Go to Media in your enterprise dashboard.
- Click Manage Categories.
- Click + Add New Category to add a new category for media files.
- Enter a category name and click the checkmark icon to save it.
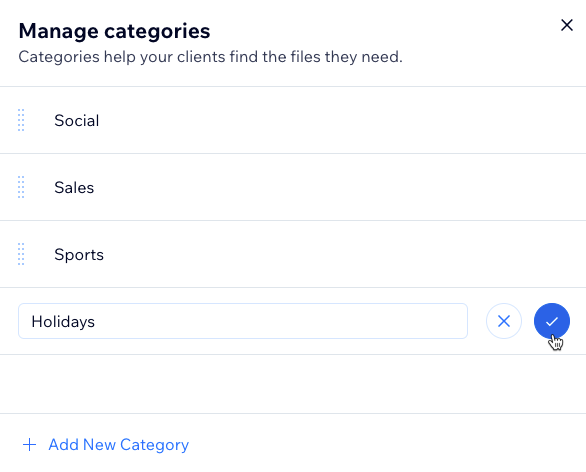
Tip:
Hover over a category to edit or delete it. You can also drag and drop categories to rearrange their order.
Archiving media files
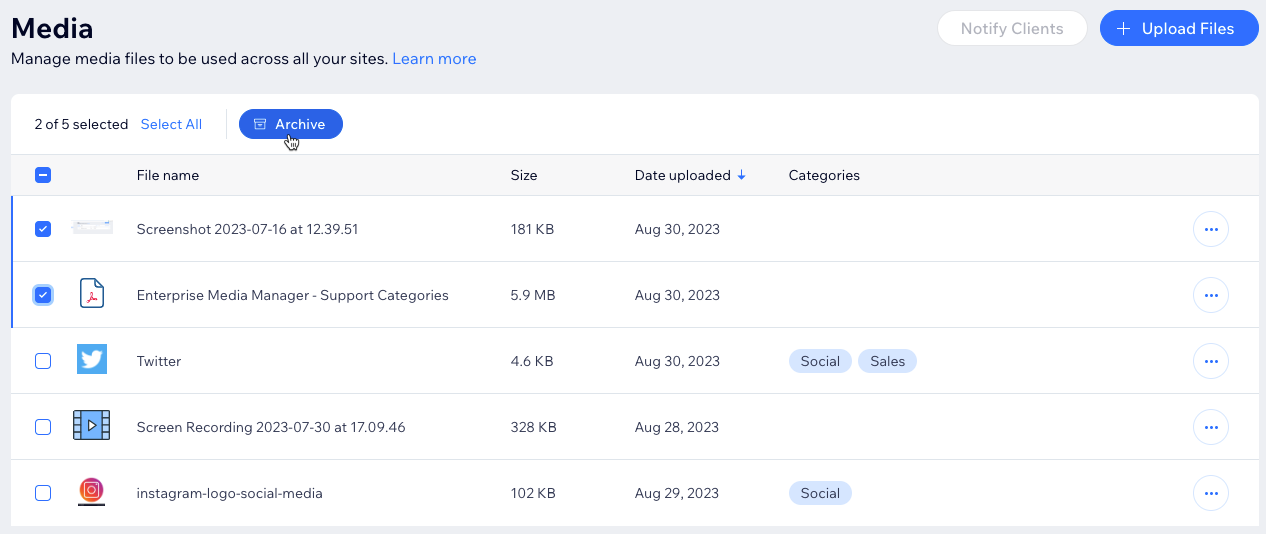
When you're no longer using specific media files, but you still want to retain them for future use, archiving them is a great way to keep your library organized and reduce clutter.
Note:
You cannot delete media from the enterprise Media Manager, you can only delete media at a site level. Learn more about deleting media files from your media storage.
To archive files:
- Go to Media in your enterprise dashboard.
- Select the files you want to archive.
- Click Archive.
Tip:
To view your archived files, click the Archived tab. To unarchive files and have them available for use again, select the archived files and click Unarchive.
