

Studio Editor: Adding and Customizing a Form
10 min
In this article
- Creating a form
- Customizing the form design
- Adding an existing form to a site
- Viewing form submissions
- FAQs
Build unique forms with customizable layouts and styles for client sites. When you create a form, a form builder opens directly inside the Studio Editor. Add fields that fit all types of questions like multi choice, checkboxes, and drop-downs. You can also use new layout options to create columns, titles and sections for the form.
Once you're done building the form, it's available inside the Studio Editor to add to any page of the site you choose, along with pre-installed form templates.
Important:
Starting August 1, 2025, the old Wix Forms app will no longer be available in the Add Elements panel of the Studio Editor.
Creating a form
Create a form directly inside the Studio Editor using a drag and drop form builder. Building a form inside the editor allows you to continue creating the form and site together without navigating away or losing your place.
Note:
Most of the available forms in the Studio Editor are the new Wix Forms. However, if you prefer using the old Wix Forms, you can add the Order or Donate form presets.
To create a form:
- Click Add Elements
 on the left side of the editor.
 - Click Contact & Forms.
- Click Create New Form and drag the form element onto the page. You can also select a form from the pre-installed templates including Contact, Subscribe and Order forms.
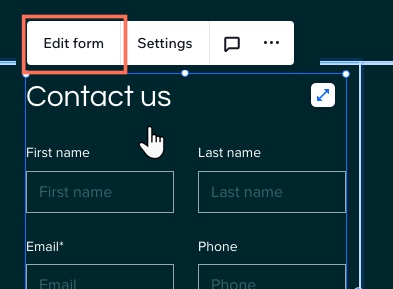
- Click the form in the Editor and click Edit Form to open the form builder.
Note about Order forms:
Order forms were built using the previous version of Wix Forms, so the options to customize form fields are different. If you are creating an order form, follow these instructions about how to customize form fields.
- In the form builder, click the Edit icon
 at the top left to name the form. This form name is only visible internally to help you identify it.
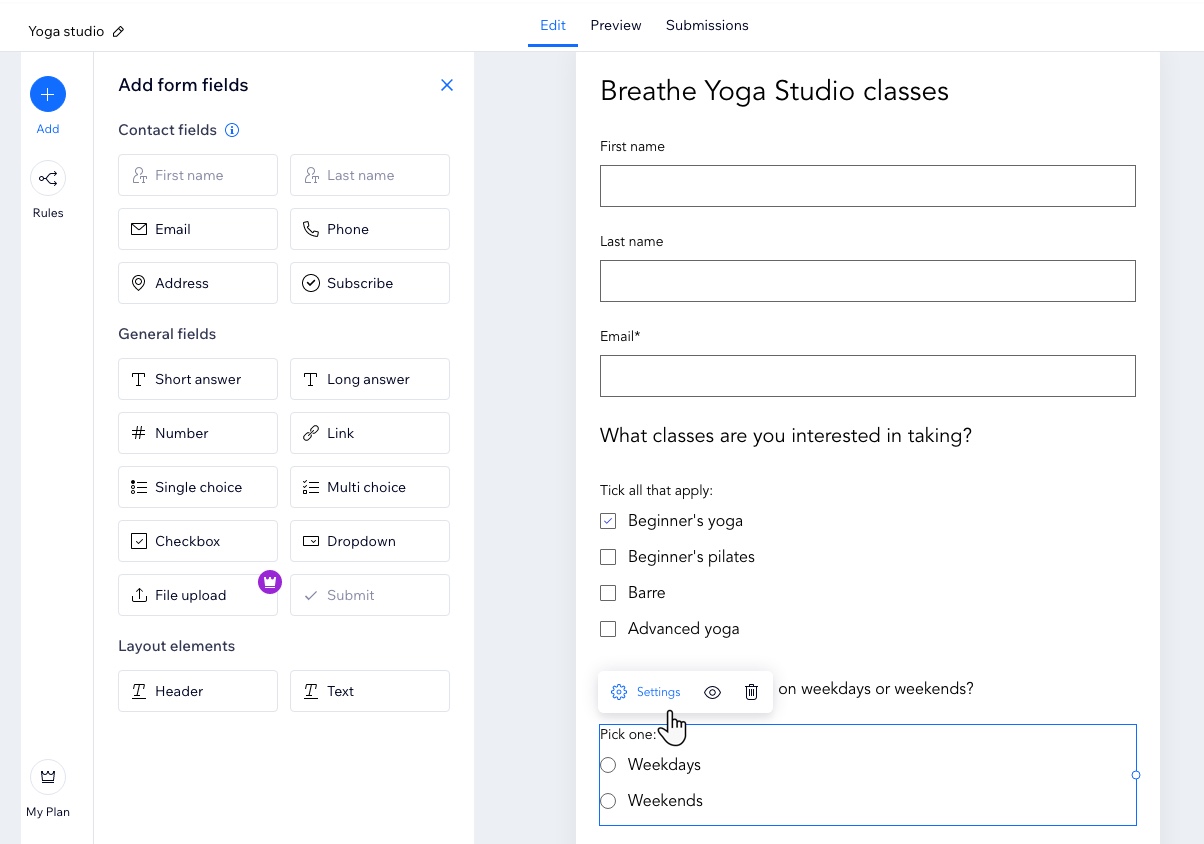
 - Choose fields for the form under Add form fields. The types of fields include:
- Contact fields: Add fields that collect and store personal data in Wix Contacts.
- General fields: Add elements like multi choice, checkboxes, drop-downs, and answer boxes.
- Date fields: Add time and date fields for appointment scheduling or time sensitive enquiries.
- Layout elements: Add a header or text element to organize the form or further explain a field.
Note:
The new Wix Forms do not have a CAPTCHA field as all forms are already integrated with spam filters. Learn more about spam filters in the FAQ section of this article.
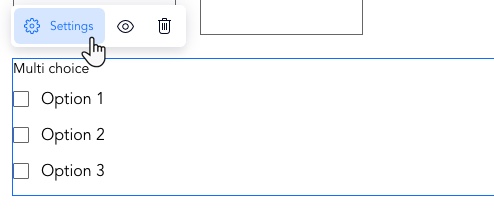
- (Optional) Click a field to customize it further, including:
- Updating the field settings.
- Making it a required field.
- Deleting a field.
- Resizing the field to make a form with multiple columns. Learn how to add columns in the FAQ section of this article.
- (Optional) Click Rules or Pages at the left to add conditional rules or multiple pages to the form:
- Rules: Add a conditional rule to the form. Rules improve the way you collect information based on responses. A visitor's response to one field can determine if another field is shown, hidden, required, or optional. For example, add a rule such as, 'If a visitor chooses Option A in Question 1, then Question 2 is hidden. But if they choose Option B, Question 2 is visible.'
- Pages: Create multiple pages for the form. This keeps questions and information organized.
Tip: If you have multiple pages, make sure you add a Submit field to each page so visitors can navigate through the pages by clicking 'Next.'
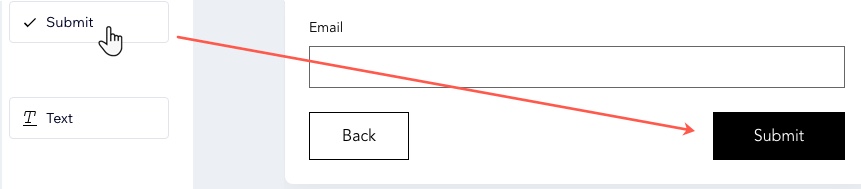
- Click Save at the top right.
Important:
Make sure you add a Submit field to the bottom of the form. If you don't have a submit button, visitors have no way to send the form.
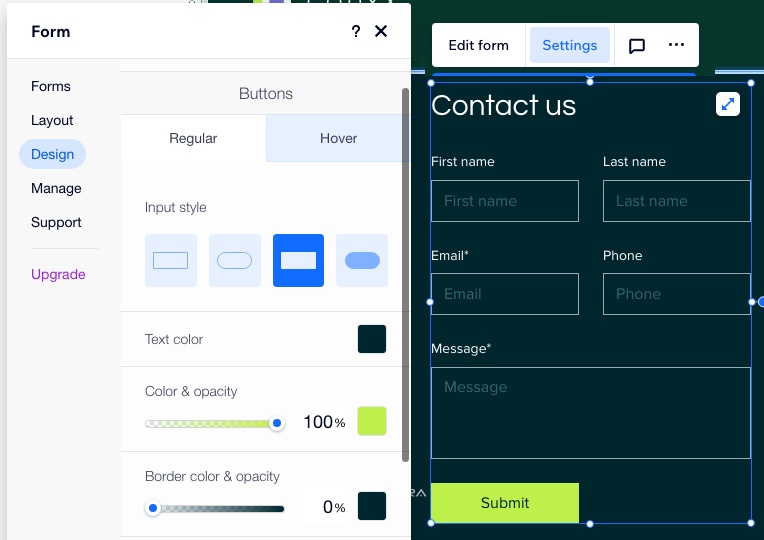
Customizing the form design
Once you've created a form and added the relevant fields and sections, customize how the form appears on the page including the background color, button style, and font.
To customize the form design:
- Click the relevant form in the editor.
- Click Settings.
- Click the Design tab.
- Customize the form design using the available options:
- Form Background: Choose the form background color as well as the border color and width.
- Form Fields: Choose a color and style for your form fields as well as how they appear in Regular, Hover and Error states.
- Header and Paragraph: Choose a font and color for the form text.
- Buttons: Design the form buttons including how they appear on hover.
- Submit Button: Design the submit button style and color.
Note:
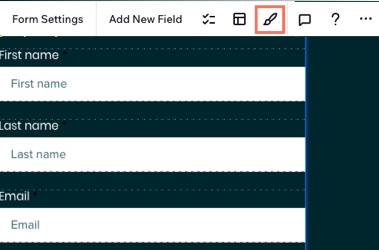
If you are customizing a form built with the previous version of Wix Forms (e.g. an Order form) click the Design icon  in the settings panel above the form to customize it.
in the settings panel above the form to customize it.Adding an existing form to a site
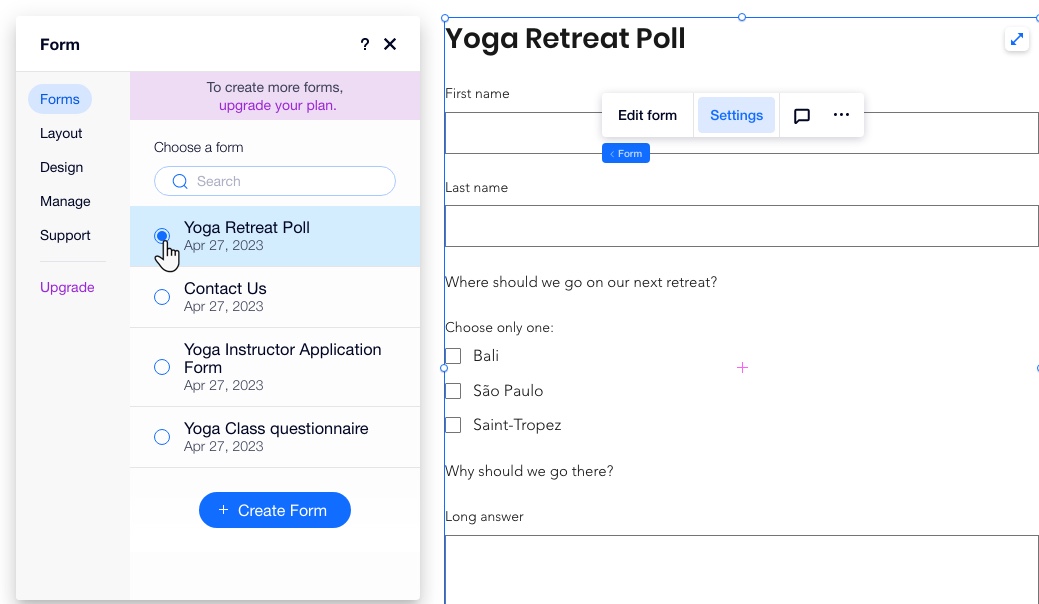
All forms created in the Studio Editor are saved in the site's dashboard along with that form's submission data. When you want to add a new form to a site, you can choose from all the existing forms as well as the pre-built form templates.
To add an existing form to a site:
- Click Add Elements on the left side of the editor.
- Click Contact & Forms.
- Click Add Existing Form.
- Click the new Form element in the Editor.
- Click Settings.
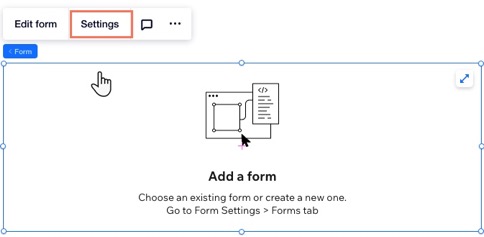
- Click the Forms tab.
- Choose a form to display from all the forms created on the site. If there are many forms, use the search bar to locate the right one.
- (Optional) Click the Layout and Design tabs to further customize the form.
Tip:
You can switch out one form for another at any time. Click Settings above a form and then choose another form in the Forms tab. The new form automatically replaces the previous one without breaking the layout or design of the page.
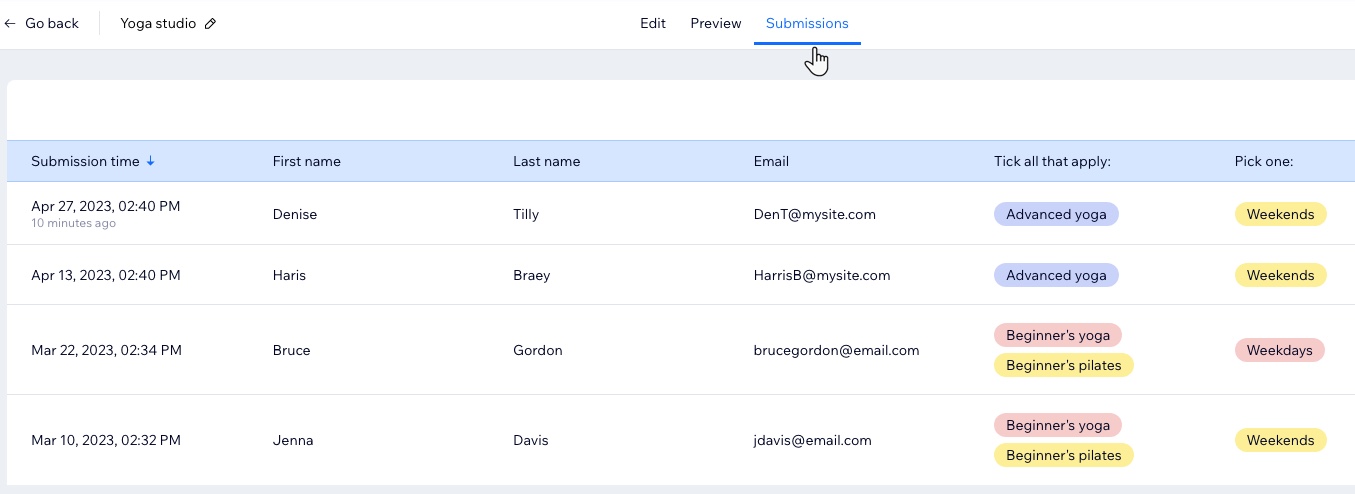
Viewing form submissions
From the site's dashboard you can access the most detailed submission data for each form on the site. If you want to quickly glance at data for a specific form, you can also view responses by clicking the Submissions tab inside the form builder.
To view form submissions:
- Go to Forms & Submissions in the site's dashboard.
- In the Forms tab, you can see all the forms you've created as well as the number of submissions each form has. To view more details:
- Click the More Actions icon
 next to a form.
 - Click View submissions.
- Click the More Actions icon
Tip:
All form submissions appear in a table. Information is separated into columns depending on what fields you've added. You can also see the exact submission time.
FAQs
Click a question below to learn more about adding forms in the Studio Editor.
What's the difference between new Wix Forms and the old Forms?
Can I accept payments with new Wix Forms?
Do I have to pay to use the new Wix Forms?
Why do the edit and settings options above my form look different?

How do I add columns to my form?

How do I test a form?
How do I set email notifications for a form?
 next to a form.

Why can't I add a CAPTCHA field to my form?
Can I translate my forms?

