

Wix Mobile Apps: How Members Use the Spaces App
5 min
In this article
- Joining a site
- Join with an invite code
- Invite others to join
- Managing their sites on the app
- Organize their site list
- Search for sites
- Manage their notification settings
- Browsing your site
- Chatting with you and other site members
- Viewing their activity
- Managing credit card information
Spaces by Wix is an app for your members to engage with your business and online community.
The app helps your members interact with their favorite sites, receive important updates, and keep track of their personal activity (e.g. bookings, programs, or upcoming events). They can also book services, buy products, invite others to join, chat, read your blog, and more.
Joining a site
There are 2 ways for people to become members of a site:
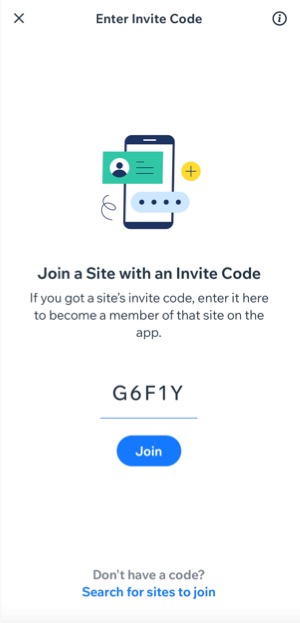
Join with an invite code
Visitors can join your site through the Spaces app using a unique invite code which you, the site owner, provides them with.
If they don't have an invite code, app members can tap Search sites at the bottom to search for your site.
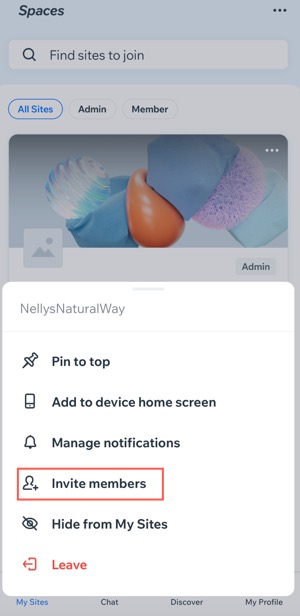
Invite others to join
Existing site members can share the experience by inviting others to become part of your community.
Note:
If invitees don't have the Spaces app, they'll be directed to download the app from the invite link. From there, they can join and be taken directly to your site.
Managing their sites on the app
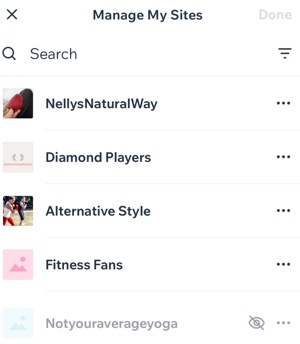
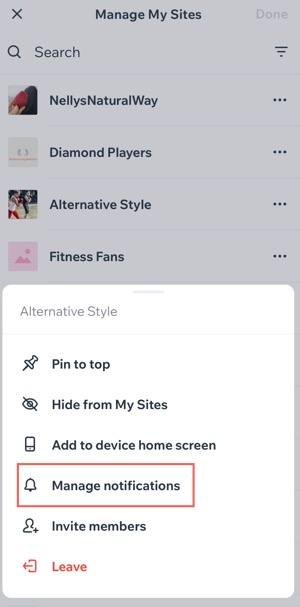
When members open the Spaces app, they see their site list (sites they are members of). They can prioritize their favorites by pinning them to the top and hide less frequented sites. They can also adjust notification preferences and opt out of sites they wish to leave
Organize their site list
Members can organize their home screen by pinning favorite sites to the top, hiding infrequently visited ones, and leaving sites they no longer wish to be part of.
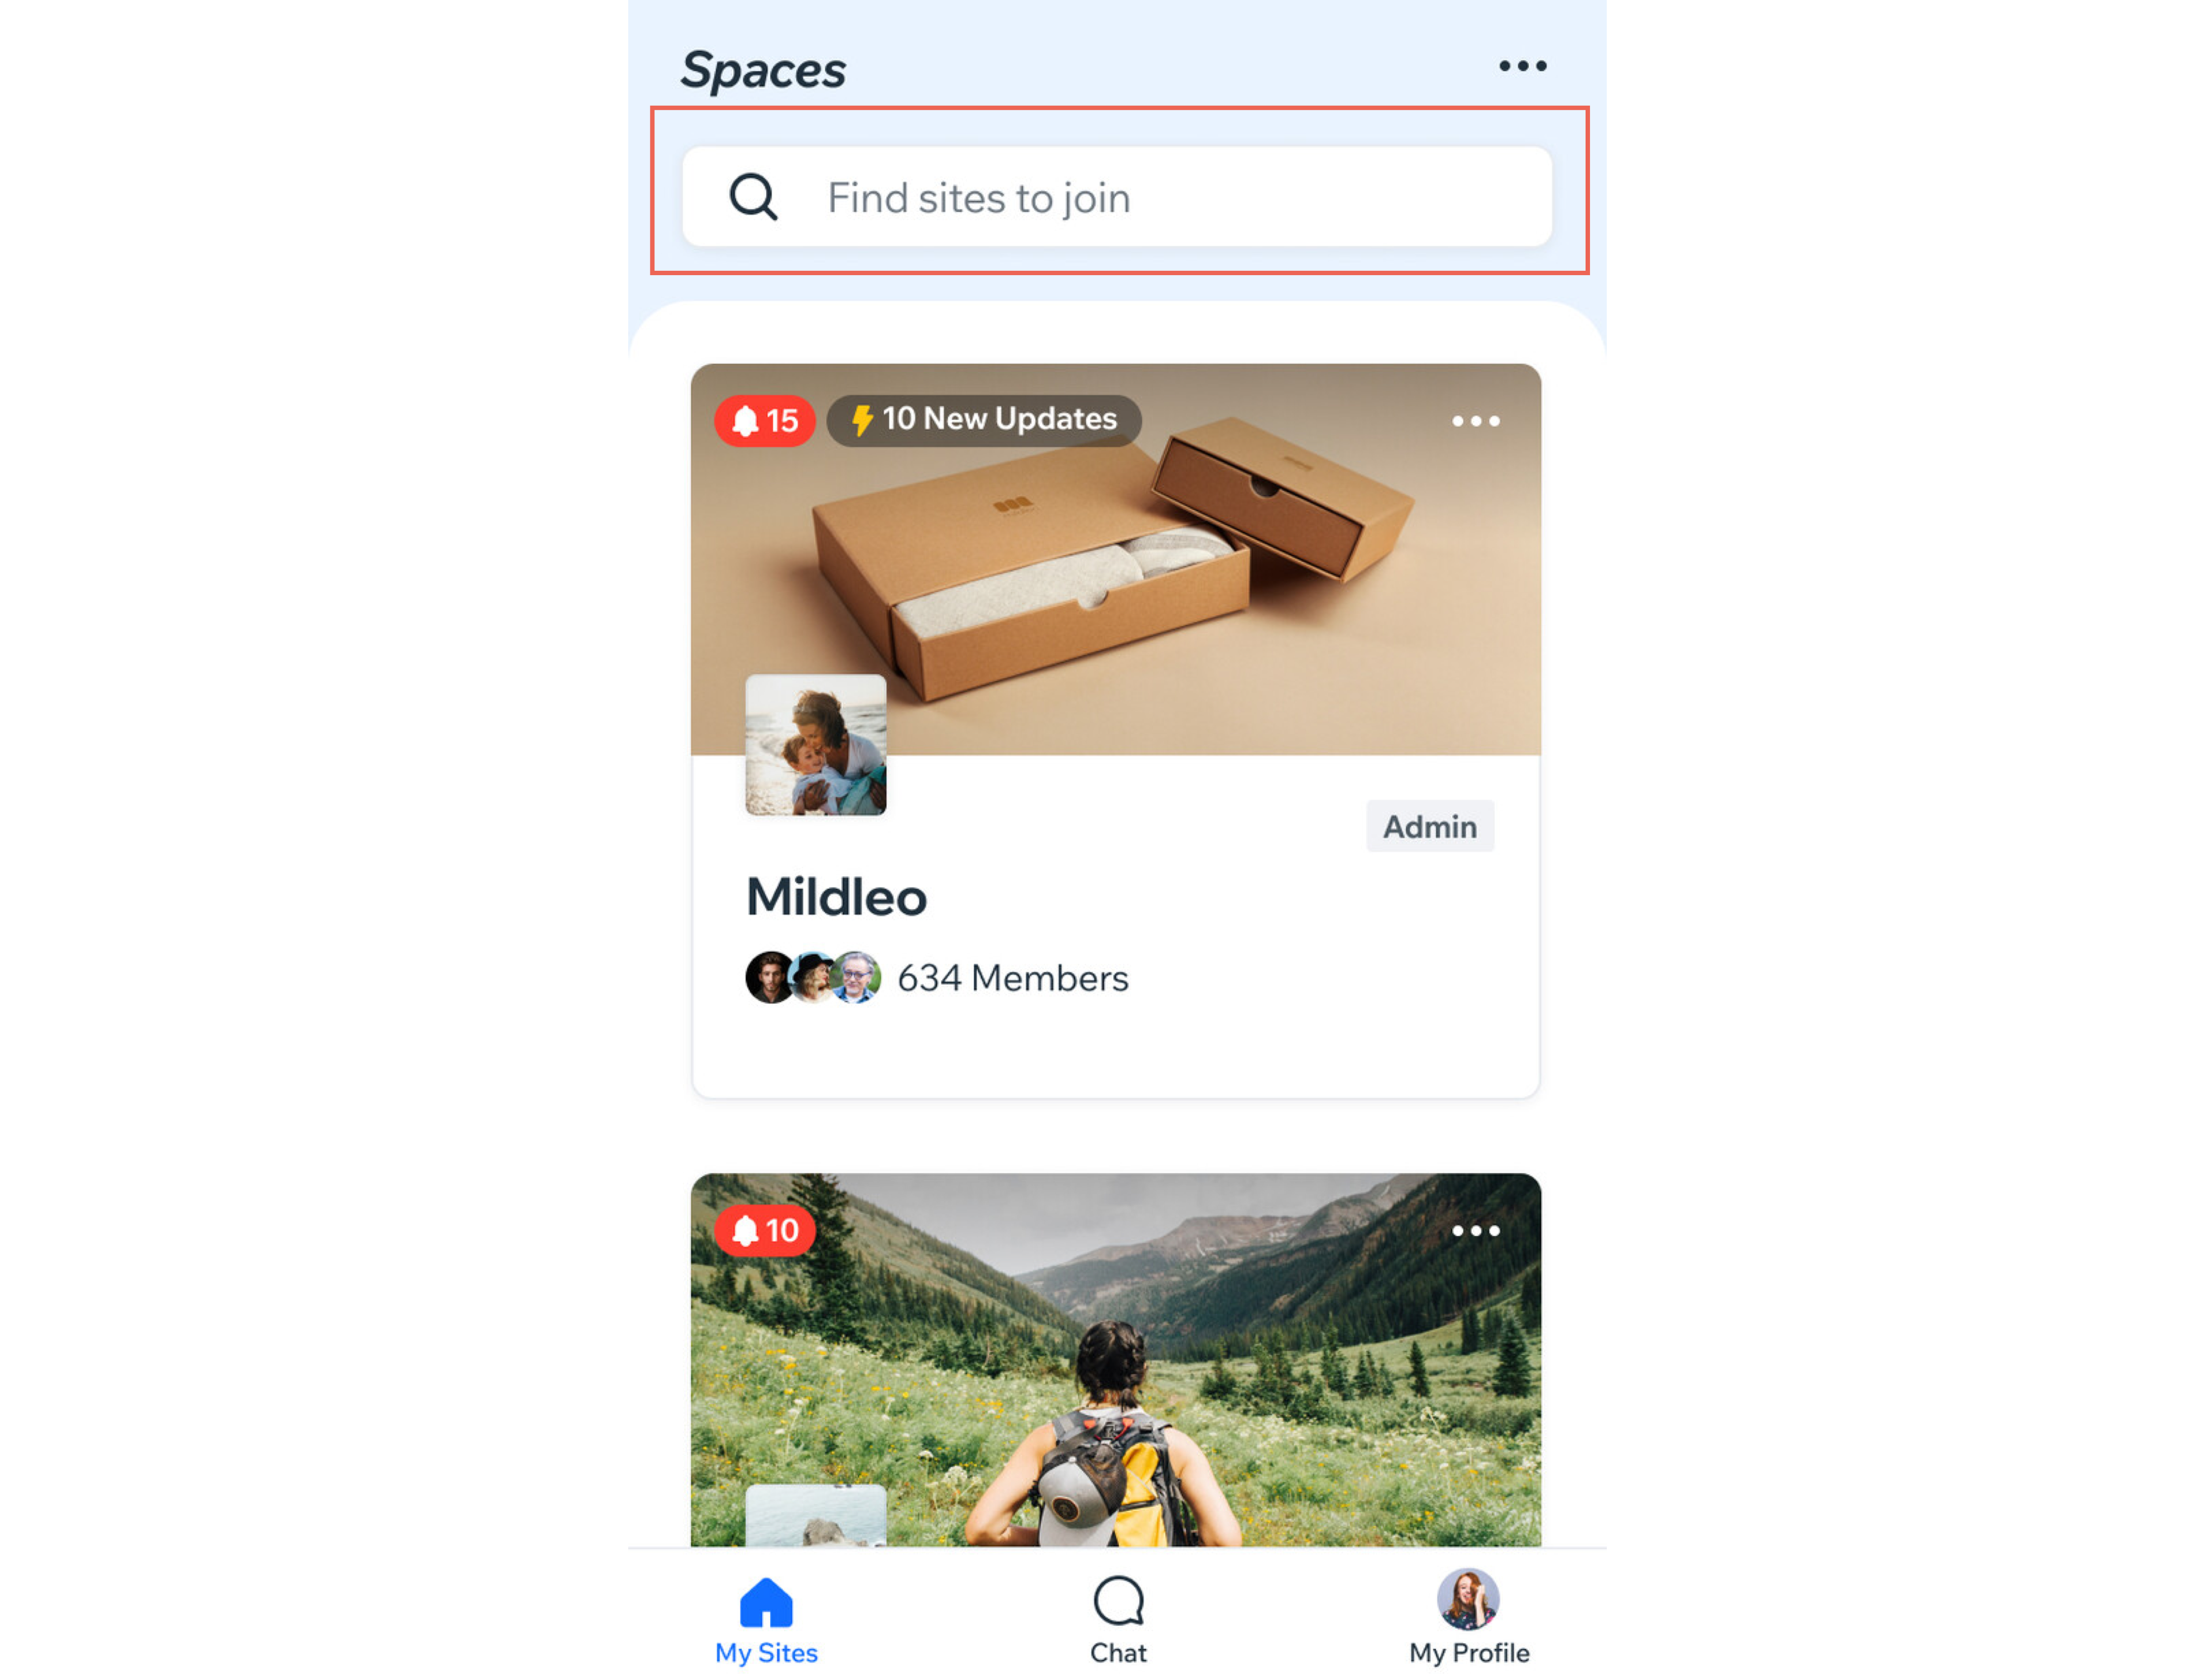
Search for sites
Members can use the search bar at the top of the Spaces app to find a site they're a member of or interested in. They can search by name, URL, sites they've interacted with, or been invited to in the past.
Tip:
As a site owner, you can help people discover your site by enabling the site search feature from your dashboard or the Wix app.
Manage their notification settings
Members can personalize their notification preferences by selecting between push notifications or email. They can also specify the types of notifications they wish to receive, such as general announcements, updates, or reminders.
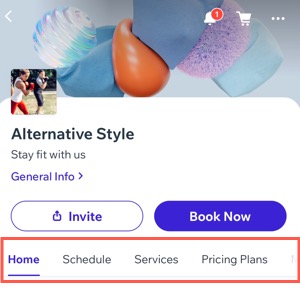
Browsing your site
Your members can browse your site using the navigation tabs. They can view everything on your home page, shop for your products, view and join events, groups or programs, read your blog, and more.
Tip:
You can restrict some navigation tabs so that only members with specific badges and pricing plans can access them. Learn more about setting tab permissions for members.
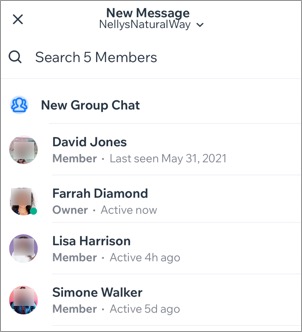
Chatting with you and other site members
Your members can chat with you and other site members directly from their mobile devices. They can also initiate group chats, control participation, and leave chats at your their discretion.
Important:
- To chat with your site visitors, you must have the Wix Chat app installed on your site.
- Group chat is only available for your members if you've added a Blog or a Forum to your site, and have Members Chat enabled.
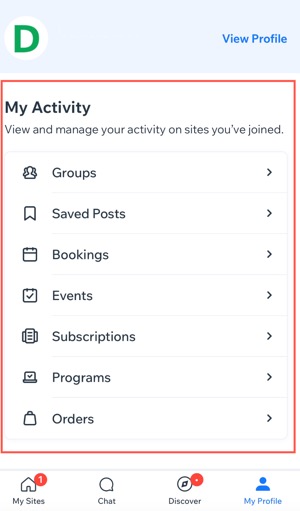
Viewing their activity
Once a member books a service, RSVPs to an event, or purchases a paid plan, their activity is logged under My Profile  in the Spaces app.
in the Spaces app.Members can then access their upcoming classes, appointments, events, orders, and subscriptions by tapping an option under My Activity to manage their engagements.
Managing credit card information
Your members can securely store their credit card details to simplify the payment process for bookings, event registrations, and subscription plans, eliminating the need to repeatedly input information.
Additionally, members have the flexibility to manage multiple payment methods with the ability to add, update, or remove credit card information at any time.
To manage their credit card info:
- Open the Spaces by Wix app.
- Tap My Profile at the bottom.
- Scroll down to Settings and tap Credit Cards.
- Choose one of the following:
- Add a card: Members can add a new card for payment.
- Tap Add at the top right.
- Enter the credit card information.
- Tap Done, then tap Save.
- Make primary card (if they have multiple cards saved): Members can select their preferred card as primary from their saved options.
- Tap the More Actions icon
 next to the relevant card.
 - Tap Make primary card.
- Tap the More Actions icon
- Delete card: Members can remove a card they no longer use.
- Tap the More Actions icon next to the relevant card.
- Tap Delete card.
- Tap Yes to confirm.
- Tap the More Actions icon
- Add a card: Members can add a new card for payment.
Tip:
Your members may request that you permanently delete their personal information from your site. Learn more about managing deletion requests.
