Wix Blog: Customizing Your Blog's SEO Settings
9 min
In this article
- Editing the SEO settings for a single blog post
- Customizing SEO settings for all your blog posts
- Editing your post's page URL
- Using canonical tags with your blog posts
- FAQs
Creating a blog with Wix is a great way to share your ideas, attract visitors, and grow your business. Regularly adding fresh content helps your site rank better in search results.
Wix automatically applies basic SEO settings to your pages so search engines and social networks can index and display your content. These default settings use your site’s information and follow SEO best practices.
To improve your blog’s visibility, you can customize the search engine optimization (SEO) settings for each blog post, or adjust your site’s SEO Settings to apply them to all posts at once.
Editing the SEO settings for a single blog post
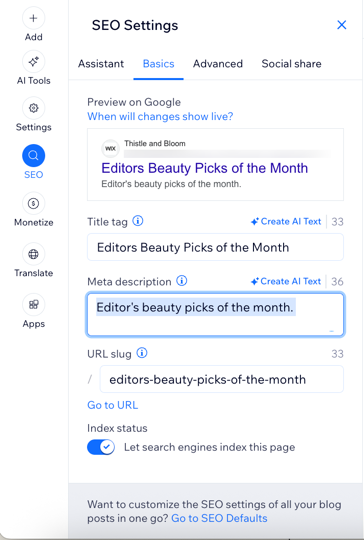
You can customize the SEO settings of individual blog posts in the post's SEO settings. Edit the post’s URL slug, title tag, and meta description and choose whether to let search engines index the post or not.
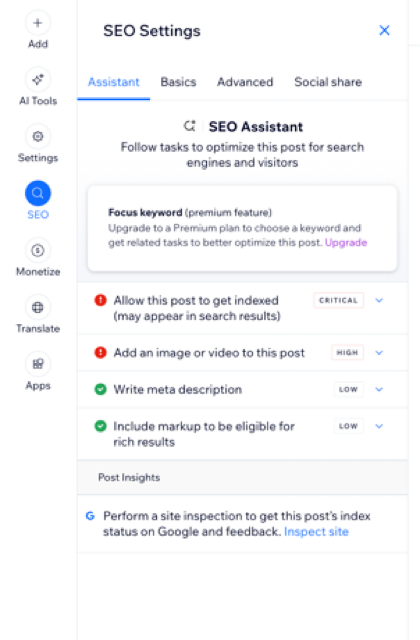
You also have the option to use the SEO Assistant and its suggestions to help you improve your blog post’s SEO settings. When you open the assistant, it reviews your content and highlights ways to optimize your meta title, description, and keywords. You can decide which suggestions to apply.
To edit your SEO settings:
Dashboard
Wix app
- Go to Blog in your site's dashboard.
- Click Edit next to the relevant post.
- Click the SEO tab on the left.
- Choose what you want to customize:
Assistant
Basics
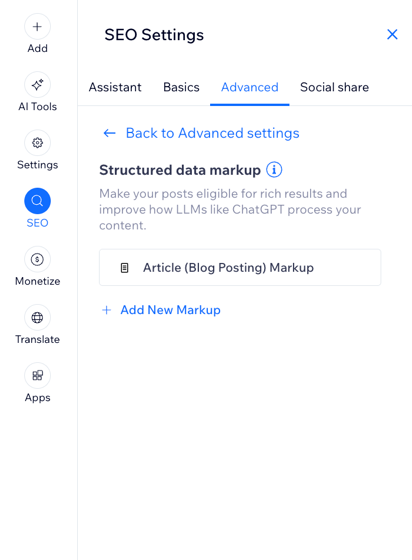
Advanced
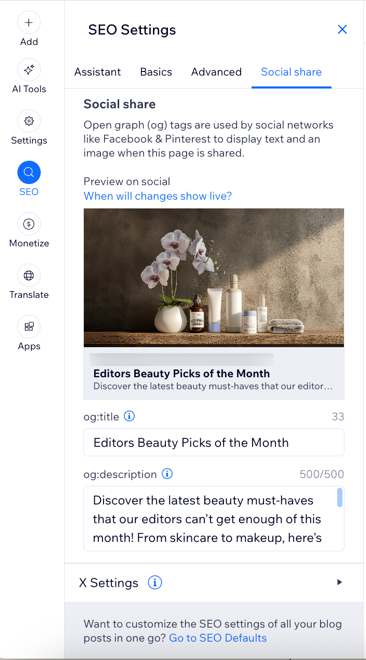
Social share
Customizing SEO settings for all your blog posts
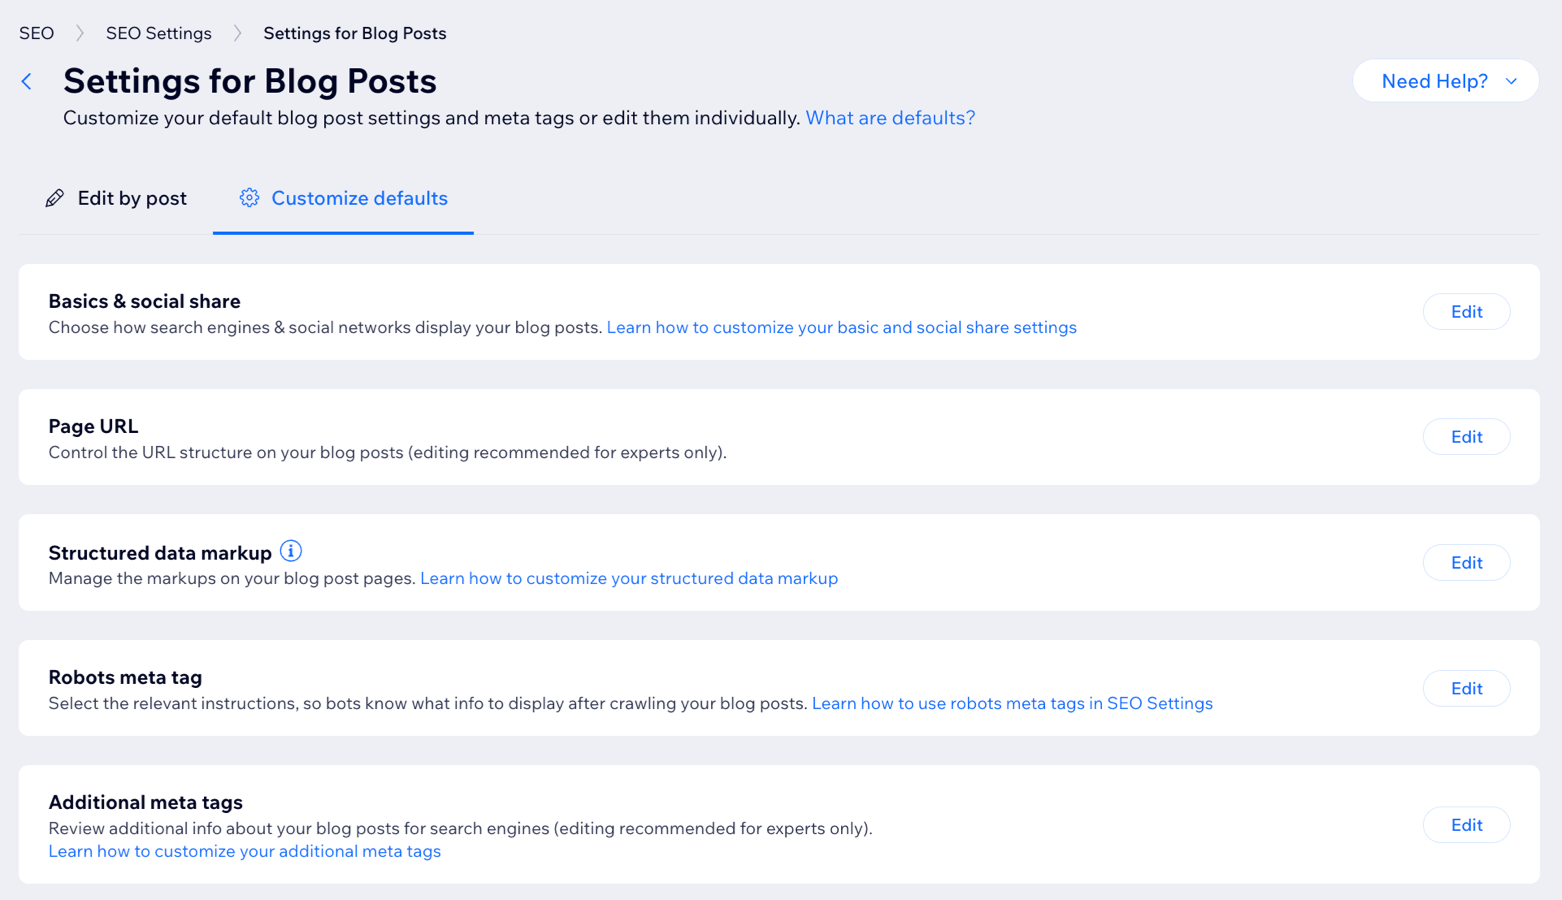
You can use your site's SEO Settings to apply the same settings to all of your blog posts at the same time instead of editing each post's individual settings.
Wix automatically creates default SEO Settings for your blog posts. These settings are based on common SEO best practices and include basic meta tags and other advanced settings. You can customize these settings in your site's SEO dashboard.
Editing your post's page URL
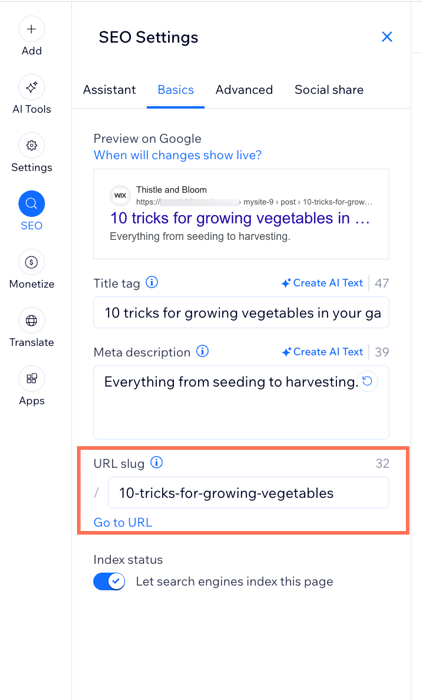
When you create a new blog post, Wix automatically generates a URL for it. This URL includes your site’s domain, a prefix such as, /post/, and a unique ending called a slug, usually based on your post’s title. An example URL of this type is: "https://mystunningwebsite.com/about".
Your blog’s URL (or slug) plays a role in SEO by helping search engines understand what your page is about. The URL structure for your main blog page and individual blog posts is part of your site’s hierarchy and should be customized separately.
Here's an example of site page hierarchy for URLs:
- /(homepage)
- /blog (main blog page)
- /blog/my-first-post (specific post)
A correct URL structure for a blog post looks like this: “https://mystunningwebsite.com/post/my-first-blog-post”.
Important:
Customizing your site's URL structure is an advanced topic. Customizing your URLs incorrectly can drastically change your site and cause issues with its search engine ranking. Before you make any changes to your site's URL structure, it's a good idea to consider if the possible risks to your site's ranking are worth the benefits of making the change.
To edit a URL slug for a blog post:
- Go to Blog in your site's dashboard.
- Click Edit next to the relevant post.
- Click the SEO tab on the left.
- Click the Basics tab.
- Customize the URL slug link in the field provided.
Using canonical tags with your blog posts
When different URLs use the same page content, search engines choose one URL and consider it the primary one. This is the only URL that appears in search results. Other URLs are treated as duplicates and receive less attention from search engines.
For example, you may have a blog post that you publish on your Wix site and on an external blog site. Search engines will consider one of these pages as the primary one for search results and omit the other one.
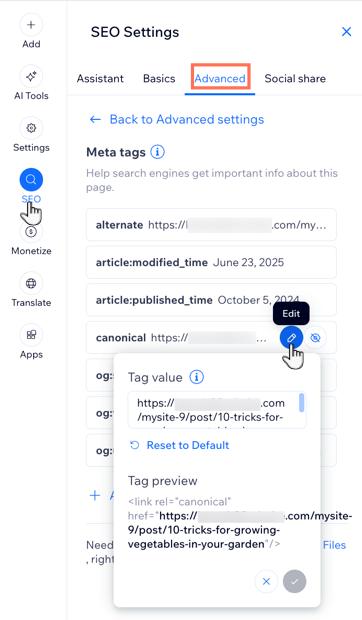
Wix automatically creates a default canonical URL for all of your blog posts. You can change the canonical tag for a post in the Advanced tab if you have multiple URLs that use the content of that post. This tells search engines to index only this post and show it in search results for a given keyword or search phrase.
Important:
Changing your canonical tags can have an effect on how your site appears in search results. Before making any changes here, we recommend learning more about canonical URLs.
To change a post's canonical tag:
- Go to Blog in your site's dashboard.
- Click Edit next to the relevant post.
- Click the SEO tab on the left.
- Click Advanced.
- Click Additional tags.
- Click the Edit icon
 next to canonical under Meta tags.
 - Enter the URL in the text box under Tag value.
- Click the Checkmark icon
 to apply the changes.
Want to learn more?
You can read about Wix's great SEO features and how to use them in the Complete Wix SEO Guide.
FAQs
Click a question below to learn more about customizing your blog SEO settings.
Can I remove the default '/post/' or '/blog/' in my blog post URLs?
What is indexing and how can I ensure my blog is indexed correctly?
Why are my blog posts not appearing in Google search results?
Why is 'noindex' or 'nofollow' being applied to some of my blog pages?
What is alt text and how do I add it to images in my blog posts?


