

Google Workspace: Transferring Your Business Email to Another Wix Account
3 min
In this article
- Transfer a premium site to another Wix account
- FAQs
You can transfer a Google Workspace business email from one Wix account to another at any time.
The transfer process will move your premium site, domain, and business email to the new Wix account. Ownership of the site, domain, and business email will transfer to the new account when the transfer is completed.
Note:
A business email is associated with the domain to which it was purchased. If you wish to use the business email with another site within the same Wix account, you need to reassign the domain that is related to that email, as well as the business email itself.
Transfer a premium site to another Wix account
To transfer your site, you need the email address of the person you want to transfer the site to. They will need to accept ownership in order to complete the transfer.
Important:
- Sites that have Premium plans paid for with recurring invoices cannot be transferred. To transfer this type of site, you need to first cancel the recurring invoice.
- After transfer of a site, any subscriptions that were transferred (the Premium plan itself, as well as the domain, business email, and any premium apps) are now managed by the new owner.
To transfer a site:
- Go to your site's dashboard.
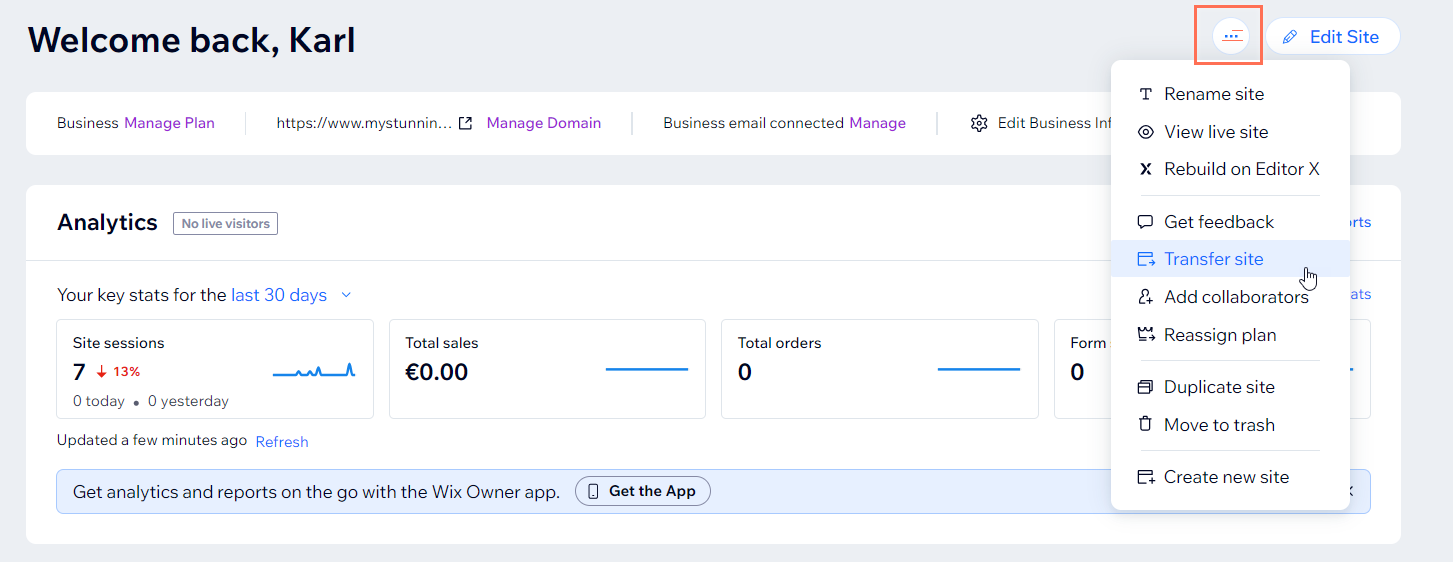
- Click the Site Actions icon
 at the top of the page.
 - Select Transfer site.
- Fill out the transfer ownership form:
- Enter the email address associated with the new owner's Wix account.
- Choose a description of your relationship with your transferee and click Continue.
- Enable or disable the following transfer options:
- Transfer Premium plan: Transfer the assigned site plan, along with the site, to the new owner's account.
- Transfer domain & business email: Move the domain and its associated mailboxes, along with the site, to the new owner's account.
Note: "and business email" appears only if you purchased a Google Workspace business email from Wix. - Transfer premium apps: (If applicable) The site's premium apps automatically transfer, along with the site, to the new owner's account.
- Select or deselect the Keep my role as Co-Owner of this site after the transfer checkbox:
- Selected: You remain a collaborator on the site with limited access. The new site owner can revoke your access at any time.
- Deselected: You are no longer able to edit or manage the site in any way.
- Select or deselect the Create a copy of this site and keep it in my account checkbox:
- Selected: A copy of the site remains in your account after the transfer takes place.
- Deselected: A copy of the site is not saved in your account. However, if you keep your role as Co-Owner (see step 4d) you can still edit the site.
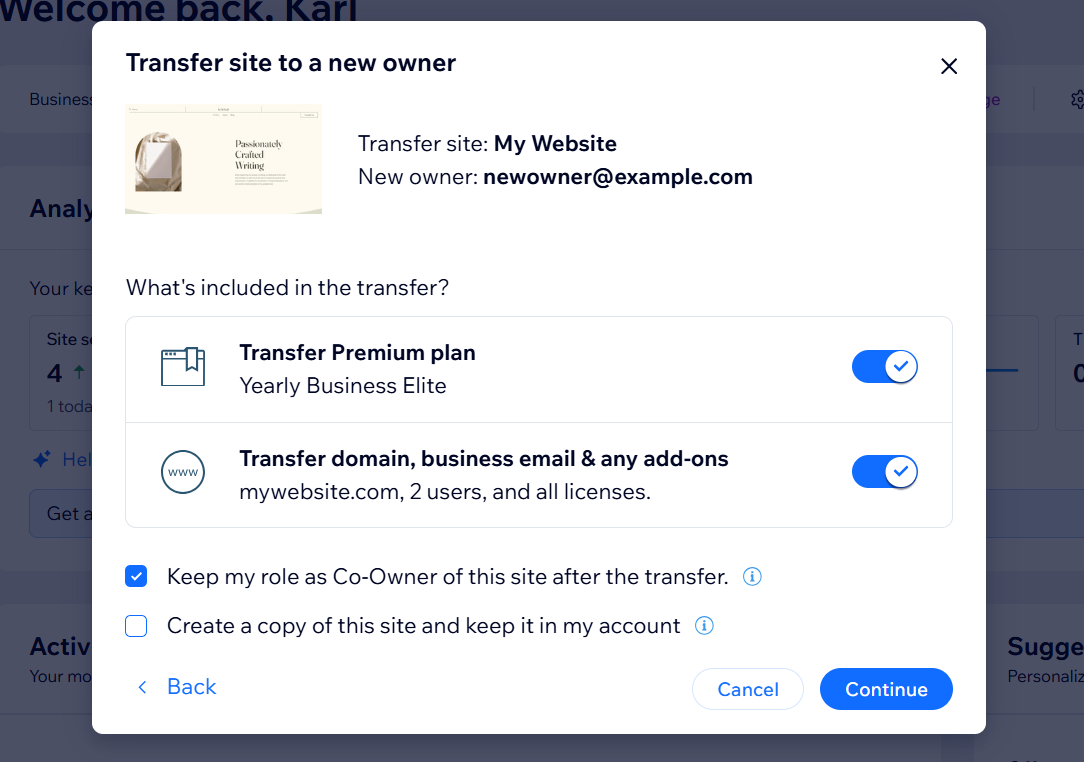
- Click Continue.
- Review the transfer summary and select the confirmation box.
- Click Transfer Ownership.
What's next?
- The new owner receives an invite email which they'll need to accept to complete the transfer. The invite expires in 3 days. Learn more about accepting transferred site ownership.
- You can go to Roles and Permissions in your Wix account to track and manage your transfers.
FAQs
Click below for answers to common questions about transferring your business email.
Can I transfer my business email (but not my plan and/or domain) to another Wix account?
Can I transfer a Google Workspace business email from Wix to Google?
Can I transfer a business email to another site in my own Wix account?
