CMS: Creating Custom Member Profile Pages
4 min
In this article
- Step 1: Create a form for members to add their own content
- Step 2: Add and customize a private member page
Visit the Velo Documentation Center to onboard and continue learning.
This article explains how to create a custom private member page so your members can view the content they have added to your site. This article assumes you have already added a Member Area to your site. We’ll use an example of a recipes site to explain how things work.
Step 1: Create a form for members to add their own content
In order for your members to be able to add content to your site, you first need to create a form for them to fill in. If you have never created a form before, see this tutorial, which walks you through the steps of form creation, including how to set up your database collection and your dataset to receive input from your members.
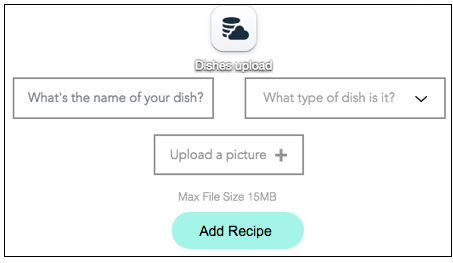
Here’s a small sample form to allow members to add their recipes to your site. To keep it simple, it only has two fields: title and type, and two buttons: an upload button for uploading an image file, and an "Add Recipe" button that submits the content to the collection. You can, of course, add any fields you want.
Here’s a small sample form to allow members to add their recipes to your site. To keep it simple, it only has two fields: title and type, and two buttons: an upload button for uploading an image file, and an "Add Recipe" button that submits the content to the collection. You can, of course, add any fields you want.

Because your members have logged in to your site, when they upload their recipes, their unique ID is listed in the item’s “Owner” system field for each item. This means you can then create a member page that shows the items uploaded by all members. You can also create a member page that shows only those items uploaded by the currently logged-in member.
Step 2: Add and customize a private member page
Now that you have provided a way for your members to add their content to your site, the next step is to customize a private member page so each member can see the items they themselves have uploaded.
Wix Editor
Studio Editor
- Go to your editor.
- Click Pages & Menu
 on the left side of the editor.
 - Click Members Area.
- Click + Add Member Pages at the bottom.
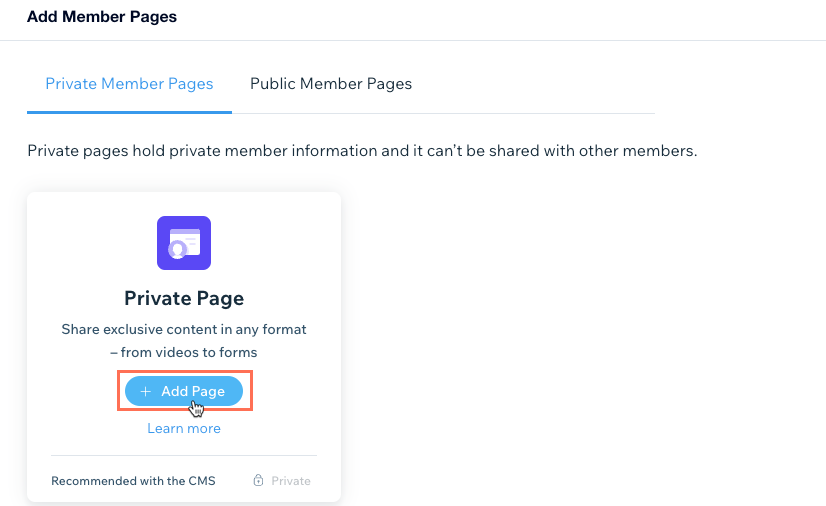
- Click + Add Page under Private Page.

- Add a dataset to the page and connect it to the collection that stores the content your members submitted.
- Add a filter for the Owner (Text) field with the Condition se to "is" and the Status to "logged in".
- Add elements that can display collection content (e.g. repeaters, text, images).
- Connect the elements to the dataset.
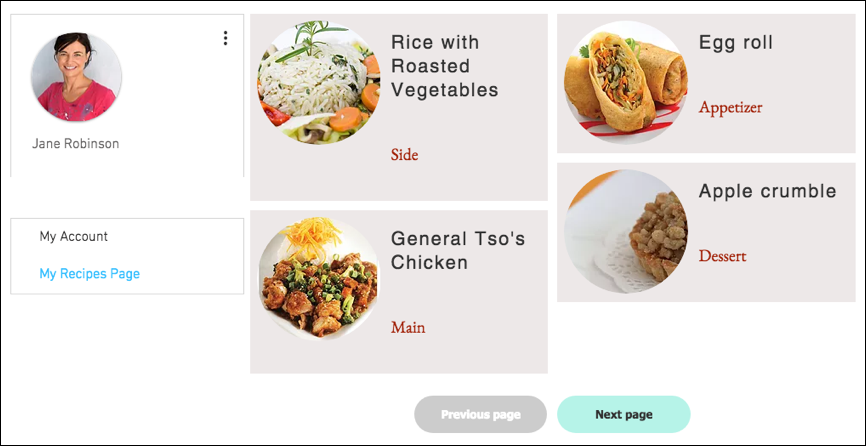
View an example of a custom member profile page in the image below. The page includes a Member Profile card, a Member's Menu, a repeater with an image and text in each container, and Previous/Next page buttons. When your members view their private page, they can see the items they have added in the elements that connect to the CMS.

Note:
When you preview the page, you are the logged-in user, so you will see the content you yourself have uploaded. If you have not yet uploaded any items to the collection, your page will not show any content when you preview it.
Learn more about:


