Studio Editor: Using the Members Area
5 min
In this article
- Adding the Members Area
- Choosing which tabs to display
- Customizing tabs in the Members Area
- Showing exclusive member-only content
- Viewing and managing site members
A Members Area is the ideal platform to turn site visitors into loyal customers. Every member gets their own account where they can see their information and manage their activity. For example, members can check on their latest store order or reschedule a session they've booked.
Go to our Wix Studio Academy to check out additional Wix Studio webinars, tutorials, and courses.
Adding the Members Area
Add the Members Area app to your client's site directly from the editor. This automatically adds the Member Page and a Login Bar element, allowing people to sign up and log in.
Before you begin:
If you see the Member Page in the Pages panel, the Members Area is already installed. Some templates already include the Members Area app, and certain Wix apps (e.g. Wix Stores, Wix Groups) automatically install the Members Area.
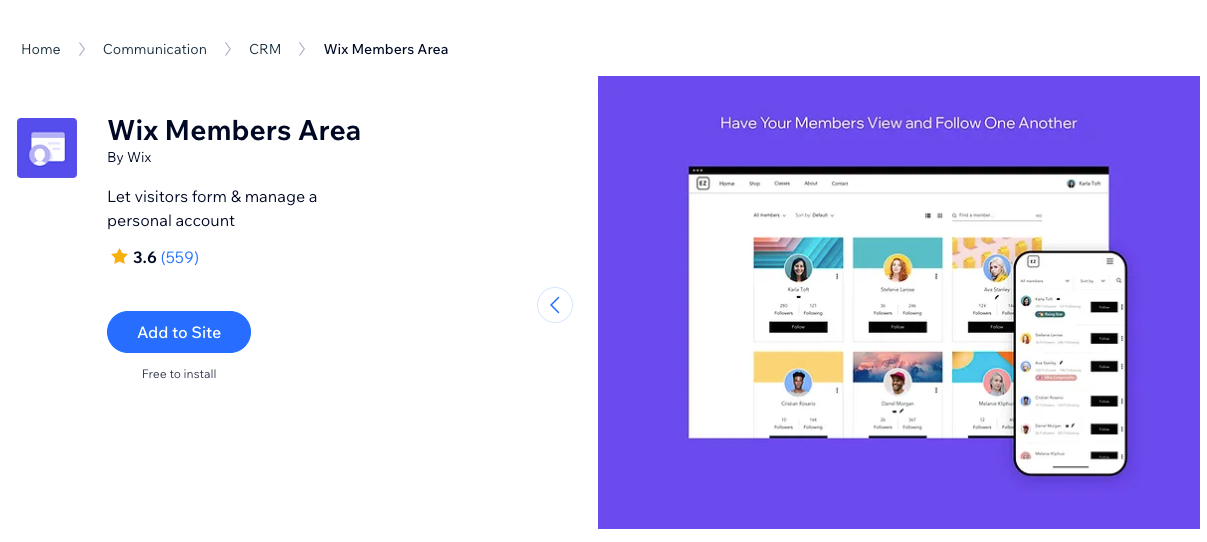
To add the Members Area:
- Click App Market
 on the left side of the editor.
 - Click App Market.
- Enter "Wix Members Area" in the search bar.
- Click Wix Members Area.
- Click Add to Site.
Choosing which tabs to display
The Members Area is made up of different tabs, centralized under one site page – the Member Page. You can choose which tabs to show on the Member Menu, depending on the capabilities your client wants members to have. While the Member Menu only shows the default tabs, you can add any link to the Login Bar menu.
The available tabs depend on the Wix apps that are currently installed. For example, Wix Stores adds tabs like "My Wallet" and "My Orders", for members to easily manage their purchases. When using Members Area with other social Wix apps (e.g. Wix Blog), every member also gets a Profile tab, encouraging interaction between members. If you're not using a social app, you can always add this tab from the Member Menu.
Customizing tabs in the Members Area
You can personalize each tab of the Members Area so it fits your client's brief. Edit the texts that appear on the tab and adjust the design, choosing the colors and fonts you need. You can also customize the Members Area to fit your client's design and purposes. For example, you can switch to a different layout.
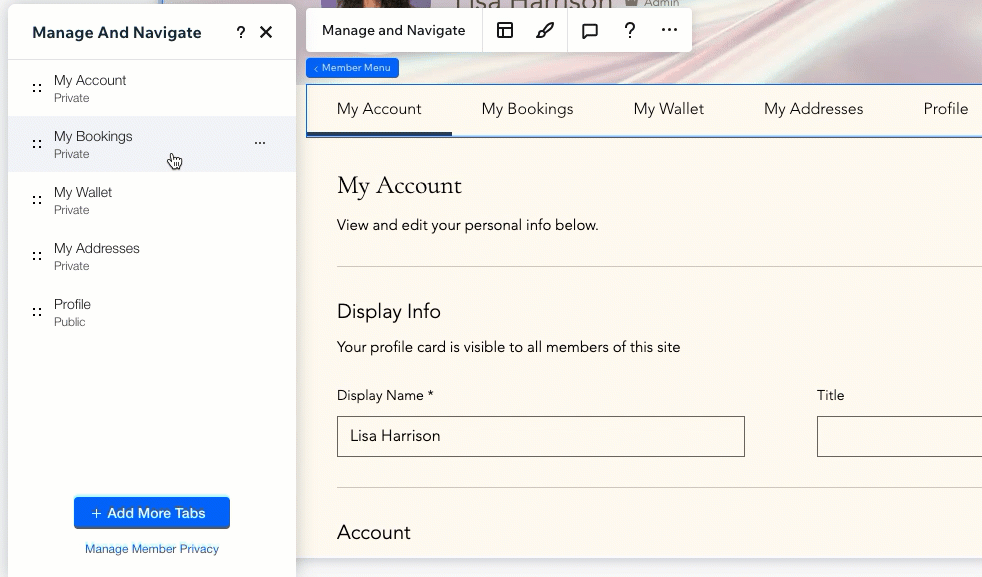
To access and customize a tab:
- Go to the Member Page in the editor.
- Select the Member Menu.
- Click Manage and Navigate.
- Click the relevant tab to access it.
- Customize the tab to your liking:
- Select the tab.
Tip: Usually, the content of the tab is displayed in a single widget. This widget is what you need to select. - Click Settings.
- Use the available settings to customize the tab's texts, design and layout.
- Select the tab.

The Members Area includes both private and public tabs. Private tabs (e.g. Account Settings) usually include a member's personal info, whereas public tabs (e.g. Profile) are visible to any site member.
Showing exclusive member-only content
Add custom pages to the Members Area, on top of the built-in tabs. This is a great way to make announcements and market exclusive promotions. You can design these custom pages from scratch, based on the content your client wants to show their members.
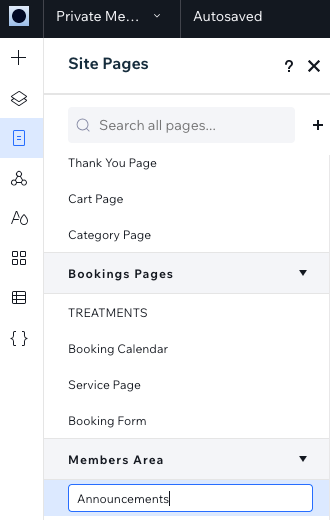
To add a private member page:
- Click Pages
 on the left side of the editor.
 - Click + Add New Page at the bottom.
- Click Add under Members Area Page.
- (Optional) Customize the page's name and permissions:
- Rename the page: Double-click the page and enter the new name.
Tip: This automatically changes the page's name in the Login Bar menu. - Limit the page to specific roles or pricing plans:
- Hover over the page and click the More Actions icon
 .
. - Click Settings.
- Click the Permissions tab.
- Select the relevant option under Which members can access this page?.
- Hover over the page and click the More Actions icon
- Rename the page: Double-click the page and enter the new name.
What's next?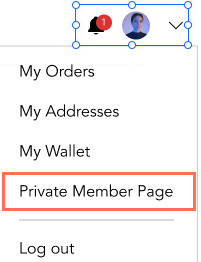
Once you create a custom page, it's automatically added to the Login Bar menu.
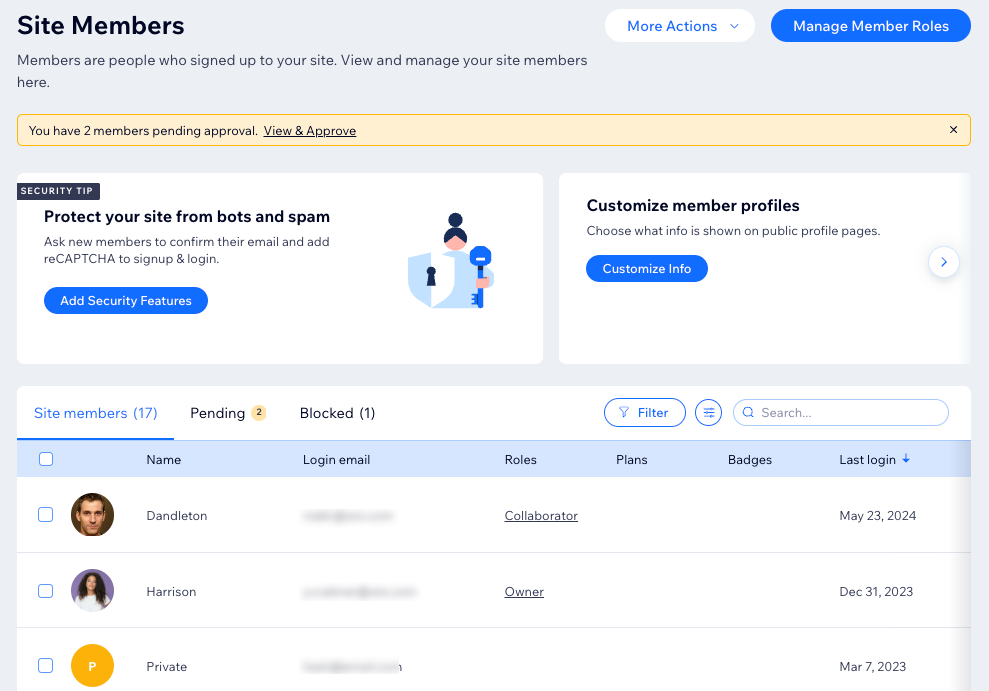
Viewing and managing site members
Once you make the Members Area live, visitors can sign up by clicking the Login Bar.
Head over to the site's dashboard to see and manage the member list. The list is divided into current members, members who are waiting to be approved, as well as members who were reported or blocked.
To view the member list:
- Go to the relevant site dashboard.
- Click Contacts on the left.
- Click the More Actions icon
 at the top right.
 - Select Site members.
- Click a tab at the top to view members and their details:
- Site Members: All current members of the Members Area.
- Pending: View any member requests if you have chosen to require approval for potential members.
- Reported: View any members who have been reported by other members.
- Blocked: View any members you've blocked from your Members Area.