

Wix Invoices: Creating Automations
7 min
In this article
- Step 1 | Create a new automation
- Step 2 | Choose a trigger
- Step 3 | Choose what you want to add to your automation
- Add a delay
- Add a condition
- Choose an action
- Step 4 | Activate the automation
With Wix Automations, you can easily streamline your billing process and save time on repetitive tasks. Set up automated actions that run whenever an invoice is sent, paid or overdue. For example, you can remind your customer that they still need to pay an invoice.
Step 1 | Create a new automation
When setting up your automation, choose the Invoices trigger and whichever action you want to occur based on the client's payment status.
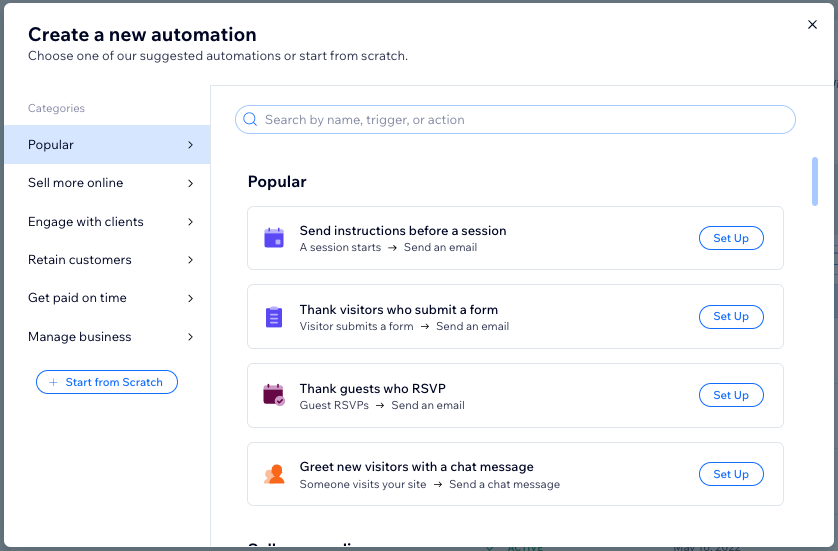
To create a new automation:
- Go to Automations in your site's dashboard.
- Click + Create Automation at the top right.
- Choose how you want to start creating your automation:
- From Scratch: Click Start from Scratch to begin from a blank automation template.
- Suggested automation: Use the categories or search bar to find the suggested automation you want to edit. Then click Set Up next to the automation.
- Click the title at the top left to give your automation a name.
Step 2 | Choose a trigger
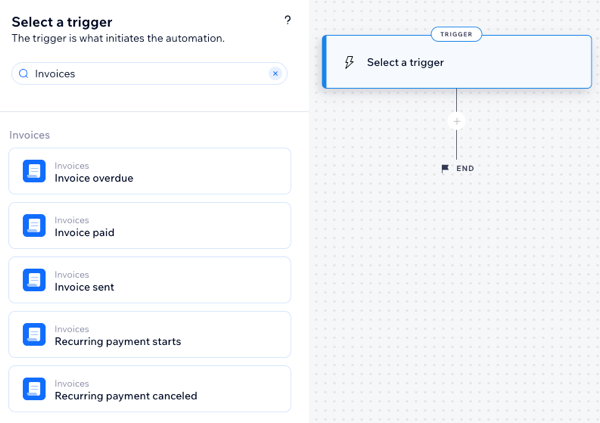
To get started, select the trigger you wish to initiate the automation.
To choose a trigger:
- Type Invoice in the Search for triggers or apps field.
- Select the relevant trigger:
Invoice overdue

Invoice paid

Invoice sent

Recurring payment starts

Recurring payment canceled

Step 3 | Choose what you want to add to your automation
After selecting a trigger, continue setting up your automation using the available steps: Delay, Condition, and Action. You can add these steps anywhere in the automation sequence, depending on the logic you are trying to implement.
Add a delay
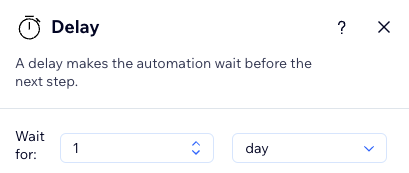
Add a time buffer between steps. For example, if your trigger is 'Invoice overdue' and your action is 'Send an email', you might want to delay the automation by sending that email after a certain period of time has passed.
To add a delay:
- Click + to add a step.
- Click Delay.
- Click the up and down arrows (or enter a number in the field) and click the drop-down to choose between days, hours, and minutes.
Note:
If you don't add a delay, the action is performed immediately.
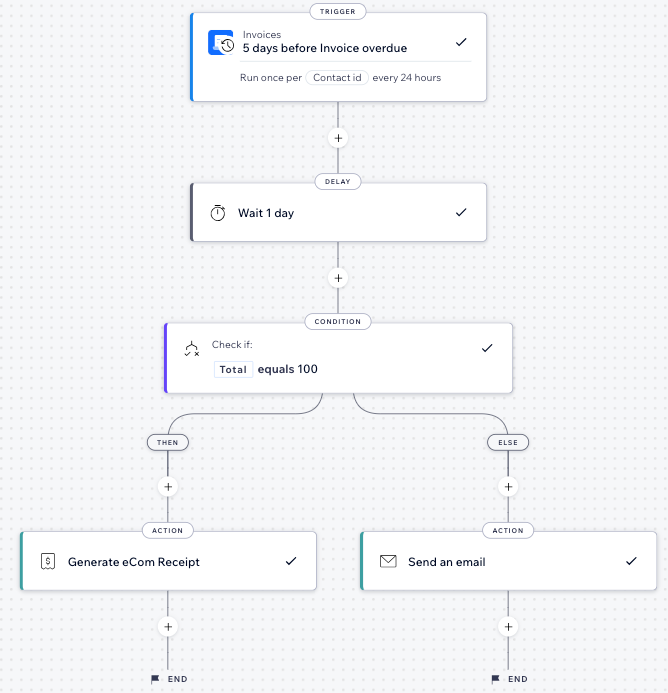
Add a condition
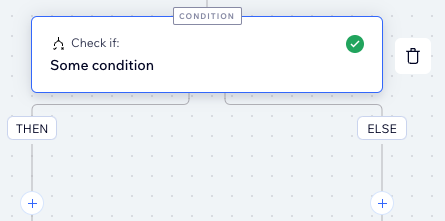
Conditions let you create complex automation flows by defining criteria for continuing the flow. In the ‘THEN’ path, the automation flow continues only if the condition is met. You can set an 'ELSE' path to define what happens if it isn’t.
To add a condition:
- Click + to add a step
- Click Condition.
- Click the Select a property field and choose the dynamic field that the automation collects when it runs (e.g. 'Cancellation reason').
Tip: Learn more about the property picker and all that it offers. - Click the Select logic drop-down and choose an operator that will compare the received data with the value (e.g. 'is greater than').
- Click the next field to set the value (e.g. '3').
Tip: Click Customize to create custom workflows using the formula field. - (Optional) Click + Or or + And to add more criteria to the condition.
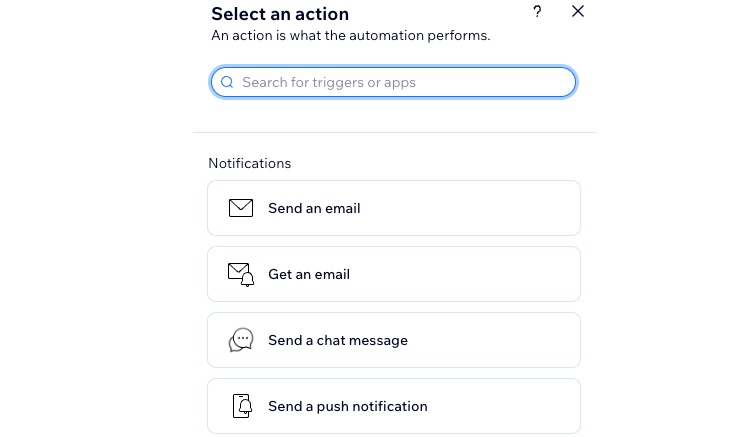
Choose an action
Actions are what the automation performs. For example, if your trigger is 'Invoice paid', you might want to send an automatic 'Thank you' email. In the 'Select an action' panel, you can find and customize the action that is relevant to the selected trigger.
To choose an action:
- Click + to add a step.
- Click Action.
- Choose an action from the panel.
Note: The actions available will differ based on your trigger choice. - Set up the action using the available settings. Learn more about using actions in Wix Automations.
Step 4 | Activate the automation
Click Activate at the top right is you're ready to turn on the automation. You can click Save to save the automation as a draft if you're not ready to activate it yet. After saving or publishing, the automation now appears on your Automations page where you can monitor, edit, deactivate, or delete according to your needs.
Tip:
Learn more about using Wix Automations to streamline your business.
