Wix Editor: Adding and Editing Text
3 min
In this article
- Adding text to your site
- Editing your text
- FAQs
Text plays a crucial role in your site, grabbing your visitors' attention and keeping them engaged. With the Wix Editor, you can easily add, edit, and delete text to ensure your content is always fresh and compelling.
Clear and engaging text helps potential customers understand what you provide, making them more likely to choose your business.
Adding text to your site
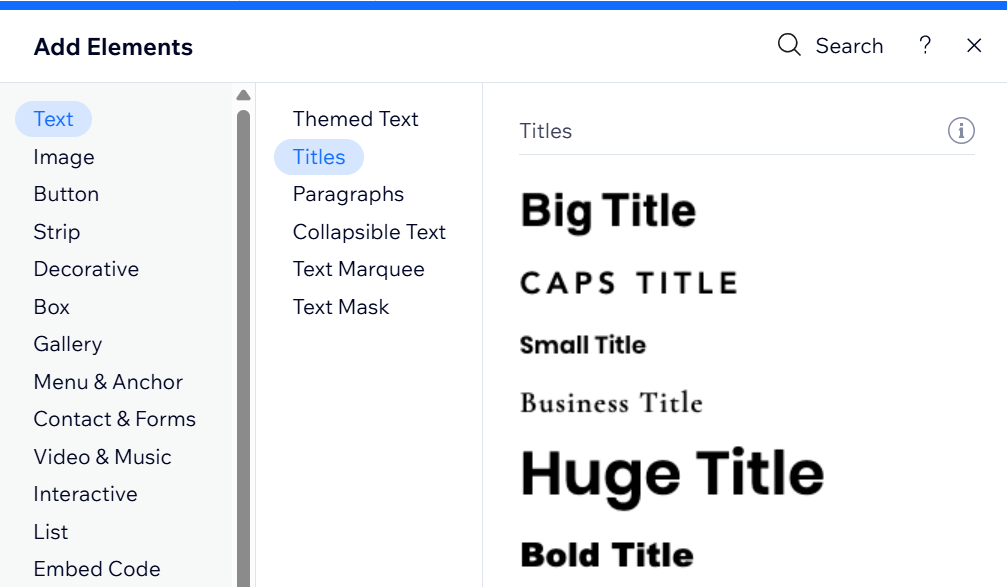
Add a text element to your page to begin building your site content. There are a variety of title and paragraph designs available, as well as options that match your site's current theme.
To add text:
- Open the relevant page in your editor.
- Click Add Elements
.
- Click Text.
- Select a text type:
- Themed Text: These text elements have been handpicked for you as they match your template's look and feel.
- Titles: These should be used for headings on your site to let your site visitors know what the pages or sections are about.
- Paragraphs: These should be used for most of the text on your site, and should contain most of your site's content.
- Click and drag your chosen text element to add it to your page.

Tip:
Your editor uses your browser's spell check whenever you add text to your site. If you can't see spell check in your editor, make sure it is enabled in your browser.
Editing your text
Once you've chosen and added text to your page, edit its content. We recommend entering information that is relevant to the page or section to ensure an engaging experience for your visitors.
To edit your text:
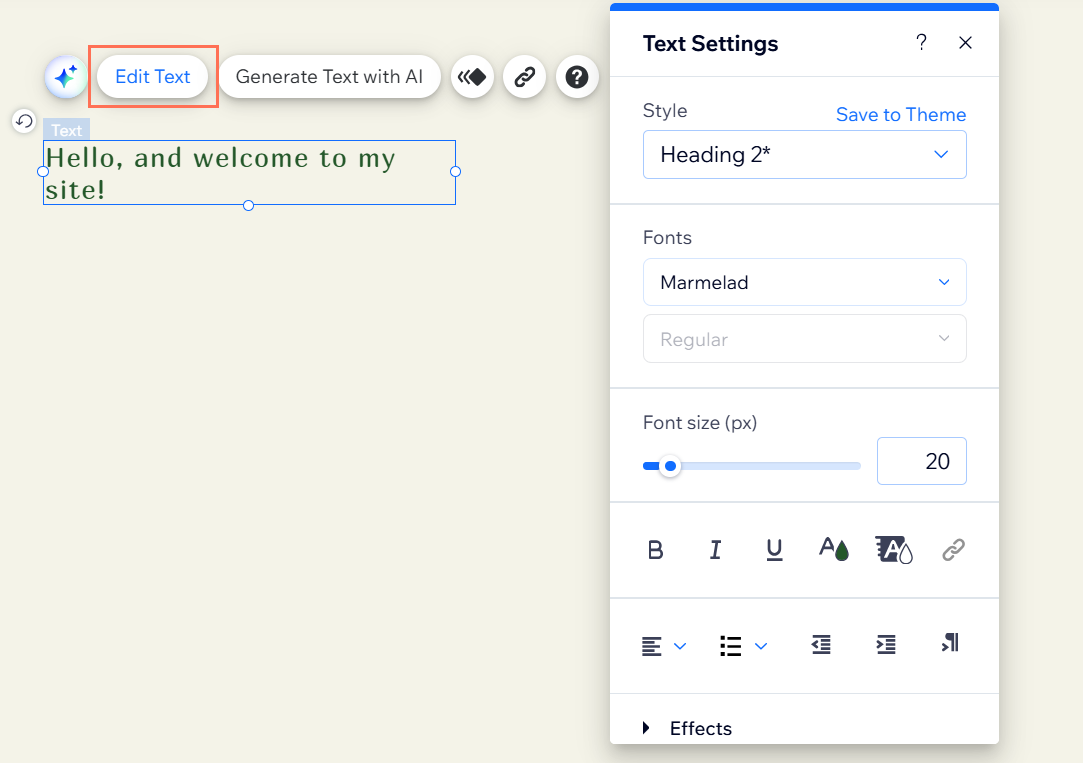
- Click the text element in your editor.
- Click Edit Text.
- Type or paste your text in the text box.
- Press Enter on your keyboard.

What's next?
Customize your text's formatting and design to complement your page's look.
FAQs
Click a question below to learn more about adding and editing text.
Do text boxes in the editor have a character limit?
Can I paste text into a text box?
How do I edit text in menus on my site?
Is it possible to place text in front of an image?
Anything else I should know?


