

Wix Editor: Uploading and Using Your Own Fonts
3 min
In this article
- Uploading your own fonts
- Using your own fonts
- Deleting an uploaded font
- Important information about uploading fonts
Get your message read the way it was meant to be by uploading and using your own fonts. You can use them in text elements and anywhere else you can choose a font (buttons, contact form, menu etc)
In this article, learn more about:
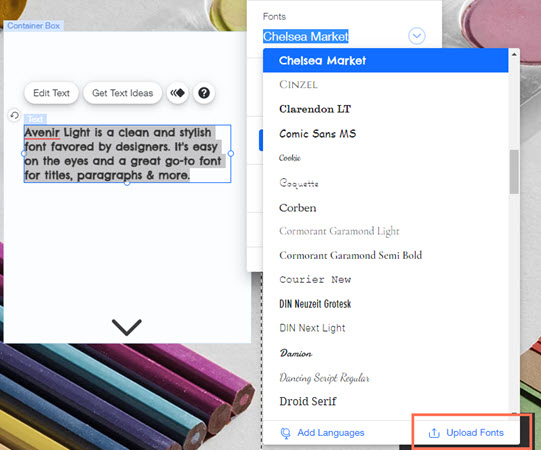
Uploading your own fonts
- Click the text element in the Editor.
- Click Edit Text.
- Click the Fonts drop-down.
- Click Upload Fonts to upload your own.
- Click Done once the font has uploaded.
Note:
Uploading fonts larger than 4MB can affect your site's performance and speed. We recommend using system fonts available from Wix, as they're optimized for your site.
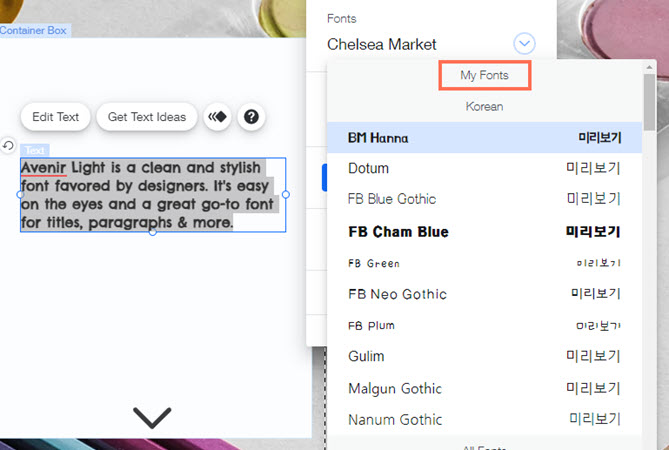
Using your own fonts
- Click a text element in the Editor.
- Click Edit Text.
- Click the Fonts drop-down.
- Select the font you uploaded under My Fonts.
Deleting an uploaded font
- Click a text element in the Editor.
- Click Edit Text.
- Click the Fonts drop-down.
- Click Upload Fonts.
- Click the Delete icon next to the relevant font.
- Click Delete.
Important information about uploading fonts
- Make sure that you have the rights to use the fonts you upload.
- You cannot use your uploaded fonts in the Wix Blog and some apps.
- You can upload fonts in TTF, OTF, WOFF2 or WOFF formats. The font does not have to be a web font, as it is converted upon upload to your Wix site. Note: We recommend using fonts in the WOFF2 format, as these are optimized for your site's performance.
- We do not provide support for issues from uploaded fonts.
- When uploading font files, sometimes the upload is unsuccessful. To resolve the issue, convert the original file to another file type and re-upload the file. You can find an online converter here. You can convert the file to TTF, OTF, WOFF2 or WOFF formats. Our conversion process is set up to make sure that the fonts you upload display correctly across all devices.
- When you transfer a site to another Wix account, any fonts that you have uploaded will work and be displayed correctly in the secondary account. The text with the uploaded font can be edited freely in the secondary account, however, you will not see the uploaded font in the Fonts drop-down menu inside the Editor in the secondary account. It is only displayed in the primary account in the Fonts drop-down menu.
- To use an uploaded font in a secondary account after transferring a site:
- Copy the text which already has the uploaded font applied to it by selecting it and pressing Ctrl+C (Cmd+C on Mac).
- Double-click a new or existing text box, click where you want the text to be pasted and press Ctrl+V (Cmd+V on Mac).
- To use an uploaded font in a secondary account after transferring a site:
