

Wixel: Creating and Customizing Slides
6 min
In this article
- Step 1 | Create your slide outline with Aria
- Step 2 | Customize your slides and design
- Step 3 | Present and export your slides
- FAQs
Use Wixel slides to turn a rough idea or existing file into a clear, polished presentation. Aria, your AI design agent, helps you outline your topics, build slides for each one, and match everything to your brand so you can focus on your story and your audience.
Note:
Actions that involve generating or editing slides with AI use AI credits.
Step 1 | Create your slide outline with Aria
Start by telling Aria what your presentation is about and who it is for. You can share an existing file or start from a short prompt. Aria scans your content, pulls out the main topics, and builds an outline so every key point has a place in your deck.
To create slides from your content:
- Go to your project in Wixel.
- Choose how to create a Slide presentation:
- Share a file: Upload an existing file with all the information you want in the presentation so Aria can extract the key information and generate your slides.
- Describe with AI: Tell Aria what you want to present and who it is for. For example, A 10-slide pitch for a new fitness app for investors or a workshop about social media basics for small business owners.
- From scratch: Manually add Slides and add elements from the action bar if you already know the structure you want. Click Add Design and then click Slides.
- Enter the audience for your presentation so Aria can adjust the tone and level of detail. For example, marketing team, new clients, or students.
- Review the topics that appear from the side panel:
- Check that every important concept or chapter from your content appears in the list.
- Click to rename, add, or remove topics if something is missing or not relevant.
- Drag topics up or down to change the order they appear in your presentation.
- Click Approve Topics to confirm the topics.
- Review the presentation's outline:
- Click a slide to rename the title, and add or remove information from the talking points.
Tip: Click the Suggestions icon to get ideas for new slide titles and talking points.
 - Add new slides or sections if something is missing.
- Drag sections or slides to change the order they appear in your presentation.
- Click a slide to rename the title, and add or remove information from the talking points.
- Click Approve Outline to confirm the outline.
- Click Select on the style you want your presentation to have.
- Once everything is approved, Aria will generate the first version of your slides.

Step 2 | Customize your slides and design
Once Aria has created your slides, you can fine-tune the content and control how the deck flows from one idea to the next. You can edit every slide by hand or use AI to speed up changes to the design or add animation.
Note:
When you select a slide to change its content or design, only the text is available to edit on the generated slide.
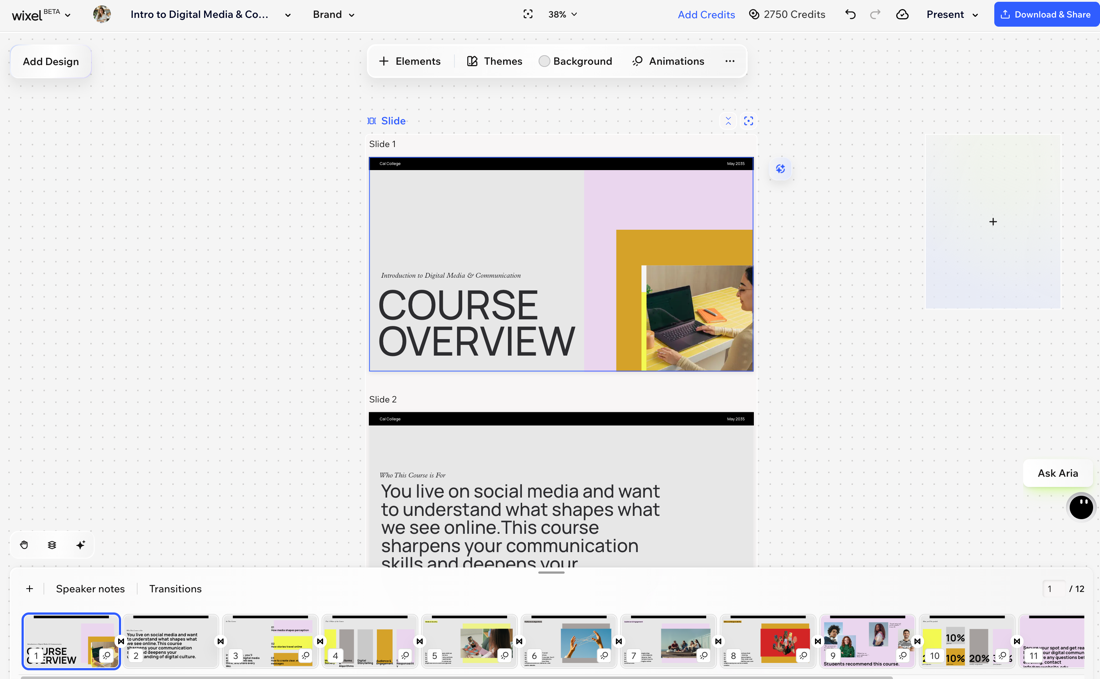
To customize your slides:
- Select the relevant slide in your project.
- Use the action bar to customize each slide:
- Add Elements: Add more elements to your slide.
- Theme: Change the theme of a slide.
- Background: Change the background of a slide.
- Edit Elements: Duplicate the generated slide to break it into individual elements that can be edited.
- Use the slides panel to organize your deck:
- Drag and drop slides to change their order and adjust how your story unfolds.
- Click the More actions icon
 and choose what to do:
- Skip slide: Keep it in the presentation but skip when presenting.
- Duplicate slide: Duplicate a slide to reuse and then edit the content.
- Delete slide: Delete a slide you no longer need.
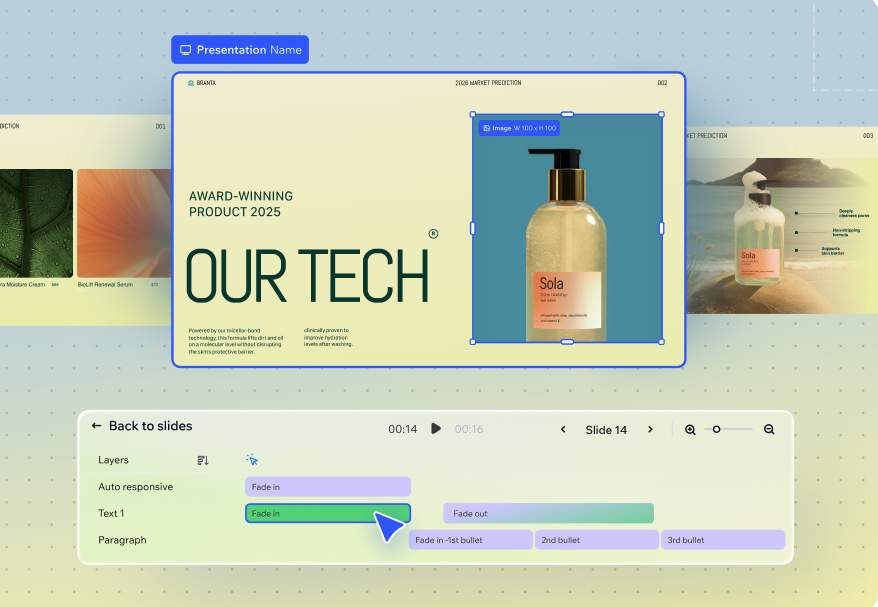
- (Optional): Choose how to continue customizing your presentation from the slides panel:
Add
 to add a new slide.
Speaker notes
Transitions
Animations
 .
. 
Step 3 | Present and export your slides
When your slides are ready, you can present directly from Wixel or export the deck to use in other tools. Choose the mode that works best for how you like to present and share your work.
To present or export your slides:
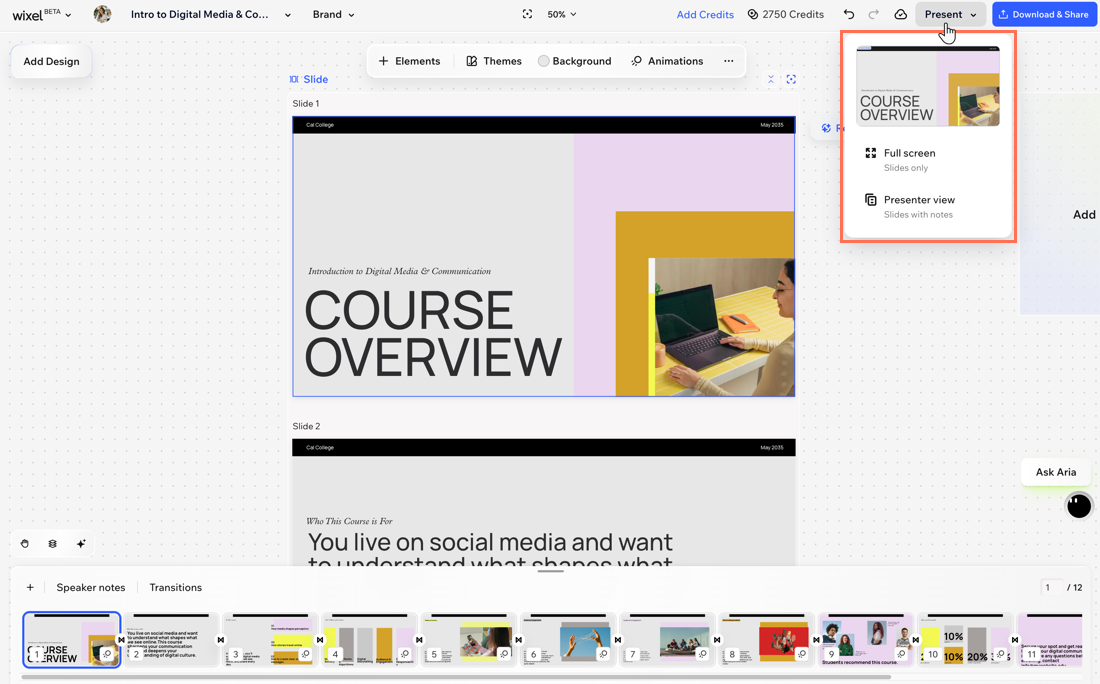
- Click Present and choose how you want to show your Wixel project:
- Full screen: Start a standard full-screen presentation view that only shows the slides.
- Presenter view: Open a presenter view that shows your slides along with your speaker notes, so you can stay on track while your audience only sees the slides.
- Click Download & Share to export your slides.
FAQs
Click a question below to learn more about Slides.
How do I change the topics after Aria creates them?
Can I use Aria to adjust the presentation for a different audience?
Do animations and transitions use AI credits?
What export formats are available for slides?
