

Wix Studio: Creating and Setting up a Workspace
6 min
In this article
- Creating a workspace
- Changing the settings of a workspace
- Changing your workspace settings
- Changing your business info
- Adding teammates to a workspace
- Deleting a workspace
- FAQs
Experience effortless project and team management with the Wix Studio workspace, built specifically for agencies and enterprises. Easily organize your projects, collaborate with teammates, and connect with your clients, all in one place.
With a single Wix account (one email address), you can be part of multiple workspaces. For example, if you work for multiple agencies or businesses then you can switch between their workspaces as needed. This eliminates the complexities of managing multiple accounts.
The workspace is also packed with powerful tools to simplify your workflow, boost productivity, and save you valuable time and resources. Learn more about the workspace.

Before you begin:
Learn how to switch to the Wix Studio platform.
Creating a workspace
Create a workspace tailored to your business needs, keeping everything organized and in its right place.
Before you begin:
We highly recommend sticking to one workspace unless you're managing multiple agencies or businesses. Each workspace operates independently, without any shared elements such as sites, templates, teams, Partner program progress, etc. Maintain this focused approach to enhance efficiency, clarity, and effective collaboration within your team.
To create a new workspace:
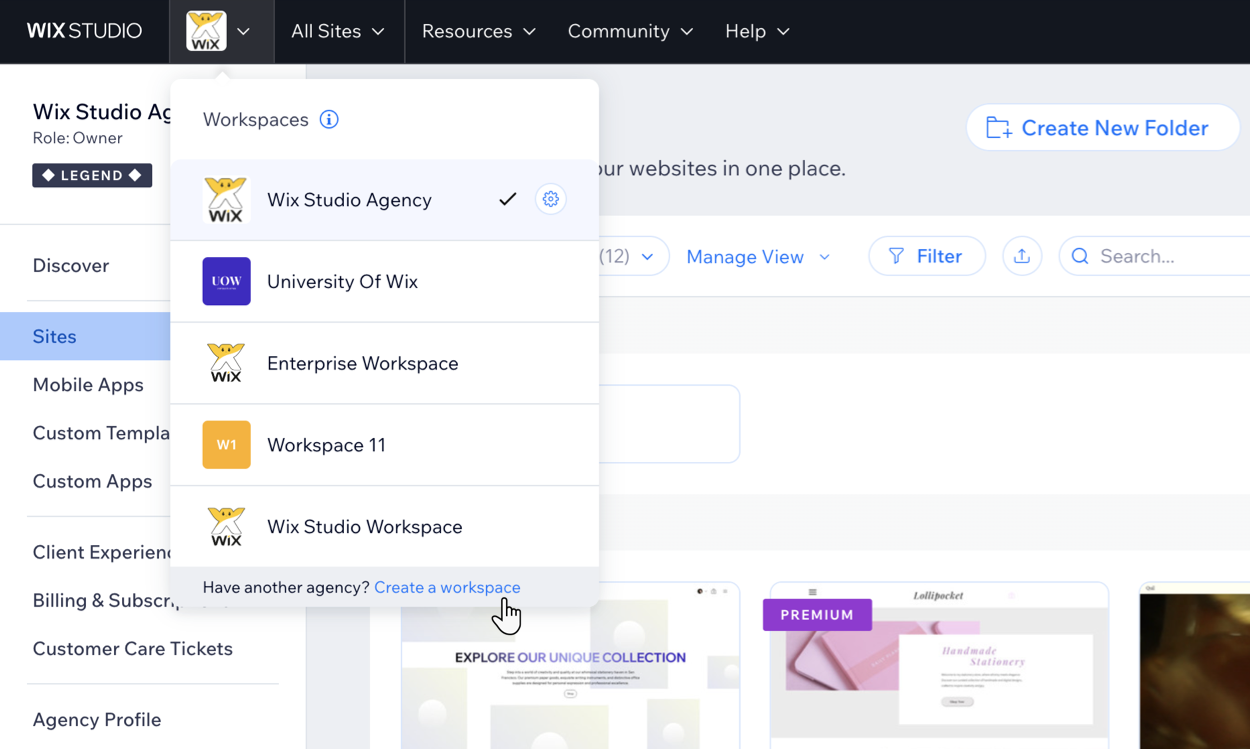
- Click the Workspaces drop-down at the top of Wix Studio.
- Click Create a workspace.
- Enter the details of your workspace:
- Workspace name: Add a name that will help all teammates identify the workspace easily.
- Workspace logo: Upload a logo for your workspace.
- Click Create a workspace.
Changing the settings of a workspace
- Click the Workspaces drop-down at the top of Wix Studio.
- Click the Settings icon
 next to the relevant workspace.
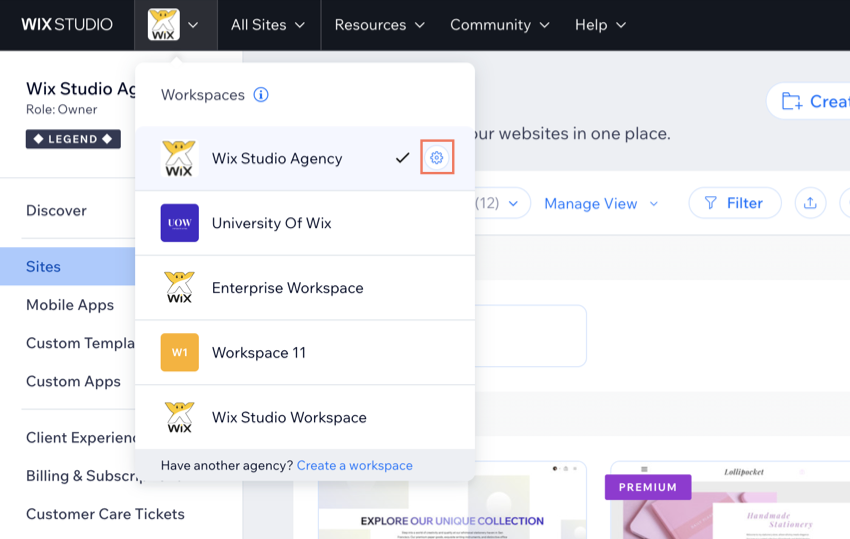
- Change the relevant settings:
- Workspace name: Add a name that will help all teammates identify the workspace easily.
- Workspace logo: Upload a logo for your workspace.
- Site URL prefix: Changing the site prefix will affect the URL of any site that isn't connected to a domain. Any shared links will need to be updated manually.
- Click Save.
Change the settings of your workspace at any time in your Workspace Settings, and define the business information that will be visible to your clients in your Business Info.
Changing your workspace settings
Notes:
- Only the teammates in the workspace see the workspace name and logo.
- You can only change the workspace settings if you are an owner or co-owner of the workspace.
Changing your business info
- Go to Business Info in your Wix Studio workspace.
- (If needed) Click the Workspaces drop-down at the top of your Wix Studio workspace to choose the workspace you want to access.
- Change the relevant settings:
- Business and site details: Add your business name, site URL, and upload your logo.
- Location and contact info: Add your address, email, and phone information.
- Currency and region settings: Choose which currency, dates, numbers, and measurements will be displayed on your invoices.
- Click Save.
Notes:
- When you select your invoice currency in Business Info, this currency will be reflected in your Invoices tab under Getting Paid Settings. However, if you change the currency directly in the General tab under Getting Paid Settings, Wix will use this currency for your invoices instead.
- To access your Getting Paid Settings go to the Invoices tab in your Wix Studio workspace, click More Actions, and then click Update invoice settings.

Adding teammates to a workspace
If you are the owner of the workspace, you can invite people to join your workspace. Go to Team to start adding your teammates.
You can assign different roles and permissions to your teammates so that they can access specific parts of the workspace and carry out different actions.
To add teammates to your workspace:
- Go to Team in your Wix Studio workspace.
- Click + Invite Teammates.
- Enter the teammates' email address.
- Assign them a role and set their permissions.

Deleting a workspace
Important:
- If you only belong to one workspace and you delete it, you will also close your account.
- Be cautious when deleting a workspace as this action cannot be undone.
When you delete a workspace in Wix Studio, it permanently deletes all projects, settings and data associated with that workspace. You can only delete the workspace if you're the owner.
To delete a workspace:
Before you begin:
Before you delete a workspace, you first must move the sites in that workspace to Trash. If your workspace has any Premium plans, subscriptions, or domains in it, you'll also need to cancel or transfer them first to another account. Learn more about deleting your workspace.
- Go to Workspace Settings in your Wix Studio workspace.
- Click the arrow next to Delete this workspace.
- Click Delete Workspace.
- Follow the instructions to confirm permanently deleting the workspace and all its data.

FAQs
Click a question to learn more about workspaces in Wix Studio.
Is there a limit on the number of workspaces I can belong to?
How do I switch between workspaces?
Is there a limit to the number of teammates in a workspace?
Can I add a site contributor without making them my teammate in the workspace?
Can I move sites from one workspace to another?
Can I transfer plans between sites that are not in the same workspace?
Can I move unassigned domains or plans from one workspace to another?
