


Wix Stores: Updating Products by Exporting and Importing Them
9 min
In this article
- Step 1 | Export your products to a CSV file
- Step 2 | Updating the exported file
- Step 3 | Import your file
- Step 4 | Handling errors
- Video tutorial
- FAQs
Important:
We're in the process of releasing a brand-new product creation page. If the first field you see is 'Images and videos', you have the previous version and should follow these instructions on importing products.
Need to make multiple updates to products in your store? You can do so using a spreadsheet. Start by exporting the existing product data to a CSV file. After updating the information in the correct format and saving your changes, import the file back into your store. Your products will then update to reflect the new data.
Tip:
You can also make certain bulk changes in the Wix dashboard.
Step 1 | Export your products to a CSV file
You'll start the import process by clicking More Actions and selecting Import.
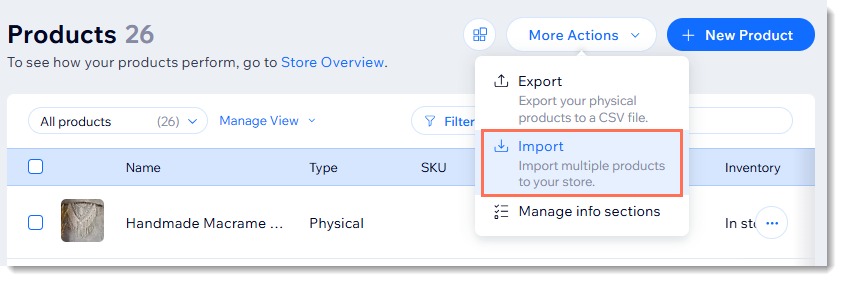
From there, you'll be able to export a list of your existing products in the correct format.
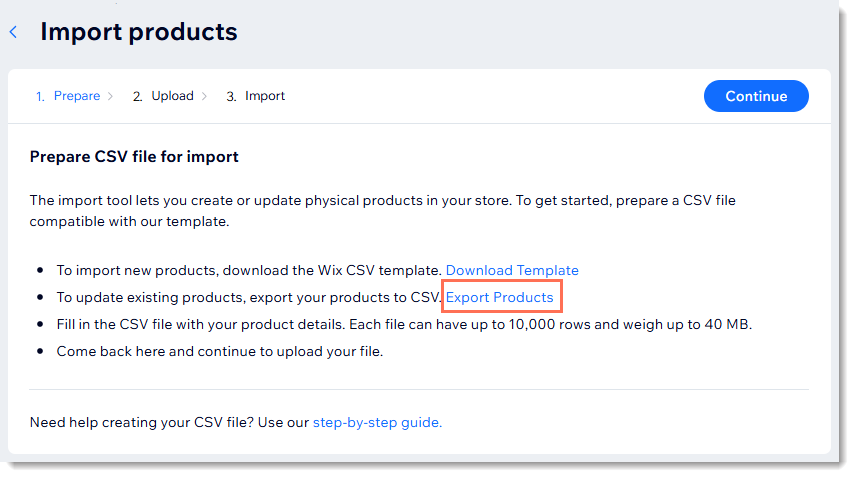
To export your products:
- Go to Store Products in your site's dashboard.
- Click More Actions.
- Click Import.
- Click Export Products.
- Open the CSV file.
Note: Mac users should open the file with Numbers or Excel version 15 or higher. - Save the exported file in CSV (Comma delimited) format.
Overview of how products are displayed in the CSV file


Step 2 | Updating the exported file
Add new products or make changes to existing products in the CSV file you exported.
To update the file:
- Enter the product data into the CSV file, following the instructions in the table below.
- Save the file in a CSV format.
Important:
To successfully upload products, make sure to follow these instructions:
- Do not add or delete columns.
- Do not edit column names.
- Add data to all mandatory fields (marked in the table below)
- When adding new products, if you're unsure how to fill out non-mandatory fields, leave them blank and make changes to products later.
Column | What is it? | Instructions |
|---|---|---|
handle | A unique label used to identify the product. | Each product variant must have the same handle as the product. Missing handles are automatically added. |
fieldType | Each row must be a product, a variant, or media. | Field is mandatory Must be PRODUCT, VARIANT or MEDIA. This field is case sensitive. |
name | The name you gave your product. | Mandatory for PRODUCTS Rows with VARIANTS or MEDIA should be left blank. Max. length: 80 characters |
visible | If item is hidden or visible in your online store. | Must be TRUE or FALSE. This field is case sensitive. If left blank, marked as TRUE |
plainDescription | Your product description. | Max. length: 16000 characters |
media | Your images, GIFs, or videos. | Must contain either 1 media URL or 1 media ID. Media IDs are automatically added when exporting. For new media, add an image URL to the template. Tip: See FAQ below to learn how to find the URL of uploaded media. Important: Add each product image, GIF, or video in a separate row. The row order determines the media display order on your site. |
mediaAltText | Alt text added to media. | |
ribbon | Ribbon that appears on product on live site. (e.g. New) | Max. length: 30 characters 1 ribbon allowed per product. |
brand | The product brand attribute. | Max. length: 50 characters |
price | The current price of the product or variant. | Field is mandatory |
strikethroughPrice | Strikethrough price is a display of a crossed-out original price. | Must be higher than the product's price. |
baseUnit | The price per unit base price. | E.g. to define a price per 100 grams, enter 100. This price is per product. |
baseUnitMeasurement | The unit of measure used for the base unit. | E.g. to define a price per 100 grams, enter G. This field is case sensitive. Supported units: SQFT, YD, FT, IN, GAL, QT, PT, FLOZ, LB, OZ, SQM, M, CM, MM, KG, G, MG, CBM, L, CL, ML, UNSPECIFIED |
totalUnits | Actual measure of the product or variant. Used for price per unit. | E.g. if a product contain 500 grams, enter 500. For products with variants, leave the product row empty. |
totalUnitsMeasurement | The unit of measure used for the total product quantity. | E.g. if a product contain 500 grams, enter G. For products with variants, leave the product row empty. This field is case sensitive. Supported units: SQFT, YD, FT, IN, GAL, QT, PT, FLOZ, LB, OZ, SQM, M, CM, MM, KG, G, MG, CBM, L, CL, ML, UNSPECIFIED |
cost | The product's cost of goods. | No more than 9 digits No more than 2 digits after decimal point |
inventory | Product or variant inventory amount | Must be IN_STOCK, OUT_OF_STOCK, or an inventory number (e.g. 55). This field is case sensitive. Fields left blank are automatically marked OUT_OF_STOCK |
preOrderEnabled | Whether pre-order is enabled for this product/ variant | Must be TRUE or FALSE. This field is case sensitive. |
preOrderMessage | Message displayed to customers on a pre-order product or variant. | Text must be between 1 to 250 characters. |
preOrderLimit | Number of products or variants customers can pre-order. | To set a pre-order limit, you need to enter a specific inventory number in the Inventory column (not IN_STOCK or OUT_OF_STOCK) |
sku | Stock keeping unit of the product or variant. | Max. length: 40 characters Can be made up of characters or digits. Variant SKUs should be unique. |
barcode | The barcode of the product or variant. | Max. length: 40 characters Must be unique |
weight | Product or variant's shipping weight | No more than 9 digits No more than 3 digits after decimal point |
productOptionName[1] | The name you gave to a product option (e.g. color, size) | Max. length: 50 characters |
productOptionType[1] | The type of product option, color or drop-down. | Mandatory for product options. Must be either SWATCH_CHOICES or TEXT_CHOICES This field is case sensitive. |
productOptionChoices[1] | Option choices | PRODUCT rows: Enter all products options, separated by semicolons [ ; ] Examples: Small;Medium;Large or #FFFFFF:White;#808080:Grey VARIANT rows: Enter a single product option choice. Examples: Small or #FFFFF:White |
modifierName[1] | The name you gave to a product modifier (e.g. Name to Embroider) | Max. length: 50 characters |
modifierType[1] | The type of modifier: color drop-down, or text. | Must be either SWATCH_CHOICES, TEXT_CHOICES, or FREE_TEXT This field is case sensitive. |
modifierCharLimit[1] | The maximum number of characters customers can enter. | Must be 500 or less. Relevant only for FREE_TEXT modifiers. |
modifierMandatory[1] | Whether it's mandatory for customers to fill out the text field. | Must be TRUE or FALSE. Relevant only for FREE_TEXT modifiers. This field is case sensitive. |
modifierDescription[1] | Modifier choices. | SWATCH_CHOICES: Enter the color choices separated by semicolons [ ; ] TEXT_CHOICES: Enter the drop-down choices, separated by a semicolons [ ; ] FREE_TEXT: Enter the field title. Max. length: 150 characters |
Step 3 | Import your file
Now you're ready to go back and import the file. Click Continue to get started.
To import your file:
- Go to Store Products in your site's dashboard.
- If the import screen is not already open, reopen it:
- Click More Actions.
- Click Import.
- Click Continue.

- Click Upload File and upload your saved file.
- Click Import.
Note: You'll see a summary of successfully uploaded items. Any errors will be displayed by row for review.
Note:
If you have many products, it may take up to one hour for images to upload. You can continue working on your store while the uploads complete in the background.
Step 4 | Handling errors
If any of the rows in the file contain critical errors, you'll see it in the summary as soon as the import is complete. For more detailed information, click Generate Error CSV.
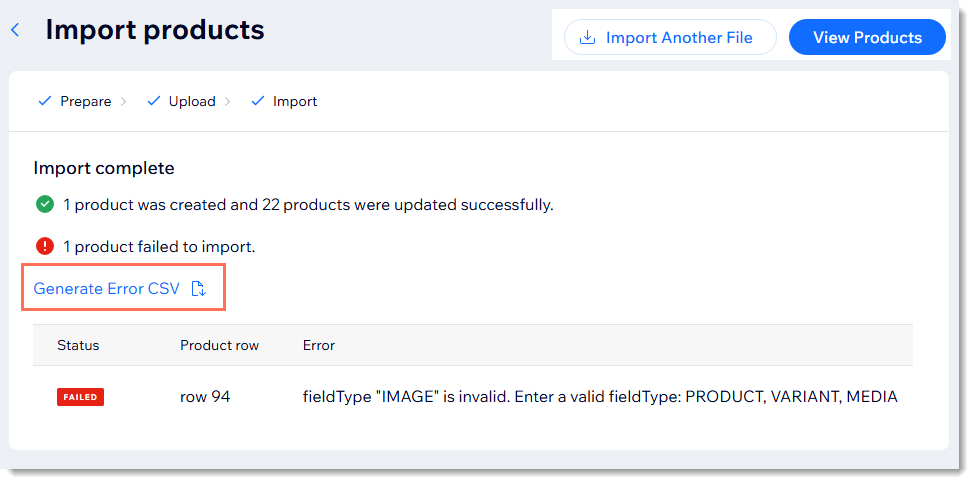
To handle errors & upload a corrected file:
- Click Generate Error CSV and open the file.
- Review the errors.
Note: Learn more about what the import errors mean and how to fix them. - Go back to the CSV file, and correct the errors.
- Click Import Another File to import the corrected file.
Video tutorial
Watch the video tutorial, or check out the FAQs below.
FAQs
Can I use the import tool to move products from one Wix store to another?
How can I import products from other eCommerce platforms?
How can I find the URL of an image, GIF, or video in my Wix store?


How many products can I import using one file?
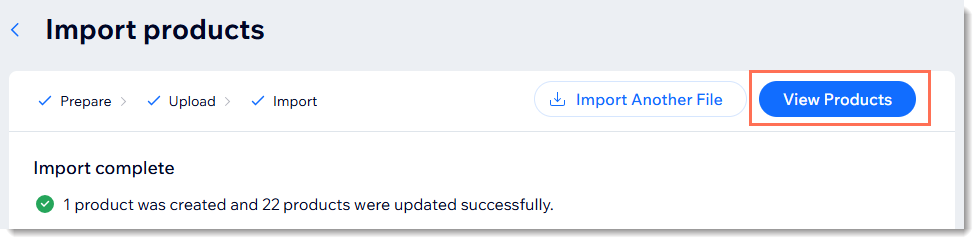
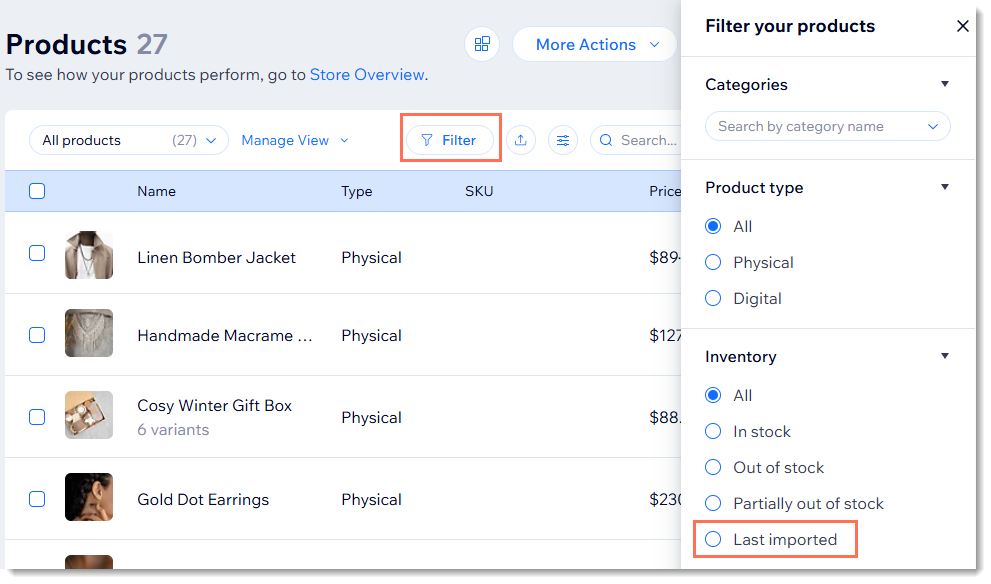
How can I view the products I just imported?
Can I import digital products?
Can I import a product file with non-Latin characters?

Can I upload a file with superscript or subscript characters?
What happens if I import from a store with a different currency?
