

Wix Pipelines: Customizing Your Pipelines
5 min
In this article
- Customizing your pipeline settings
- Customizing your pipeline cards
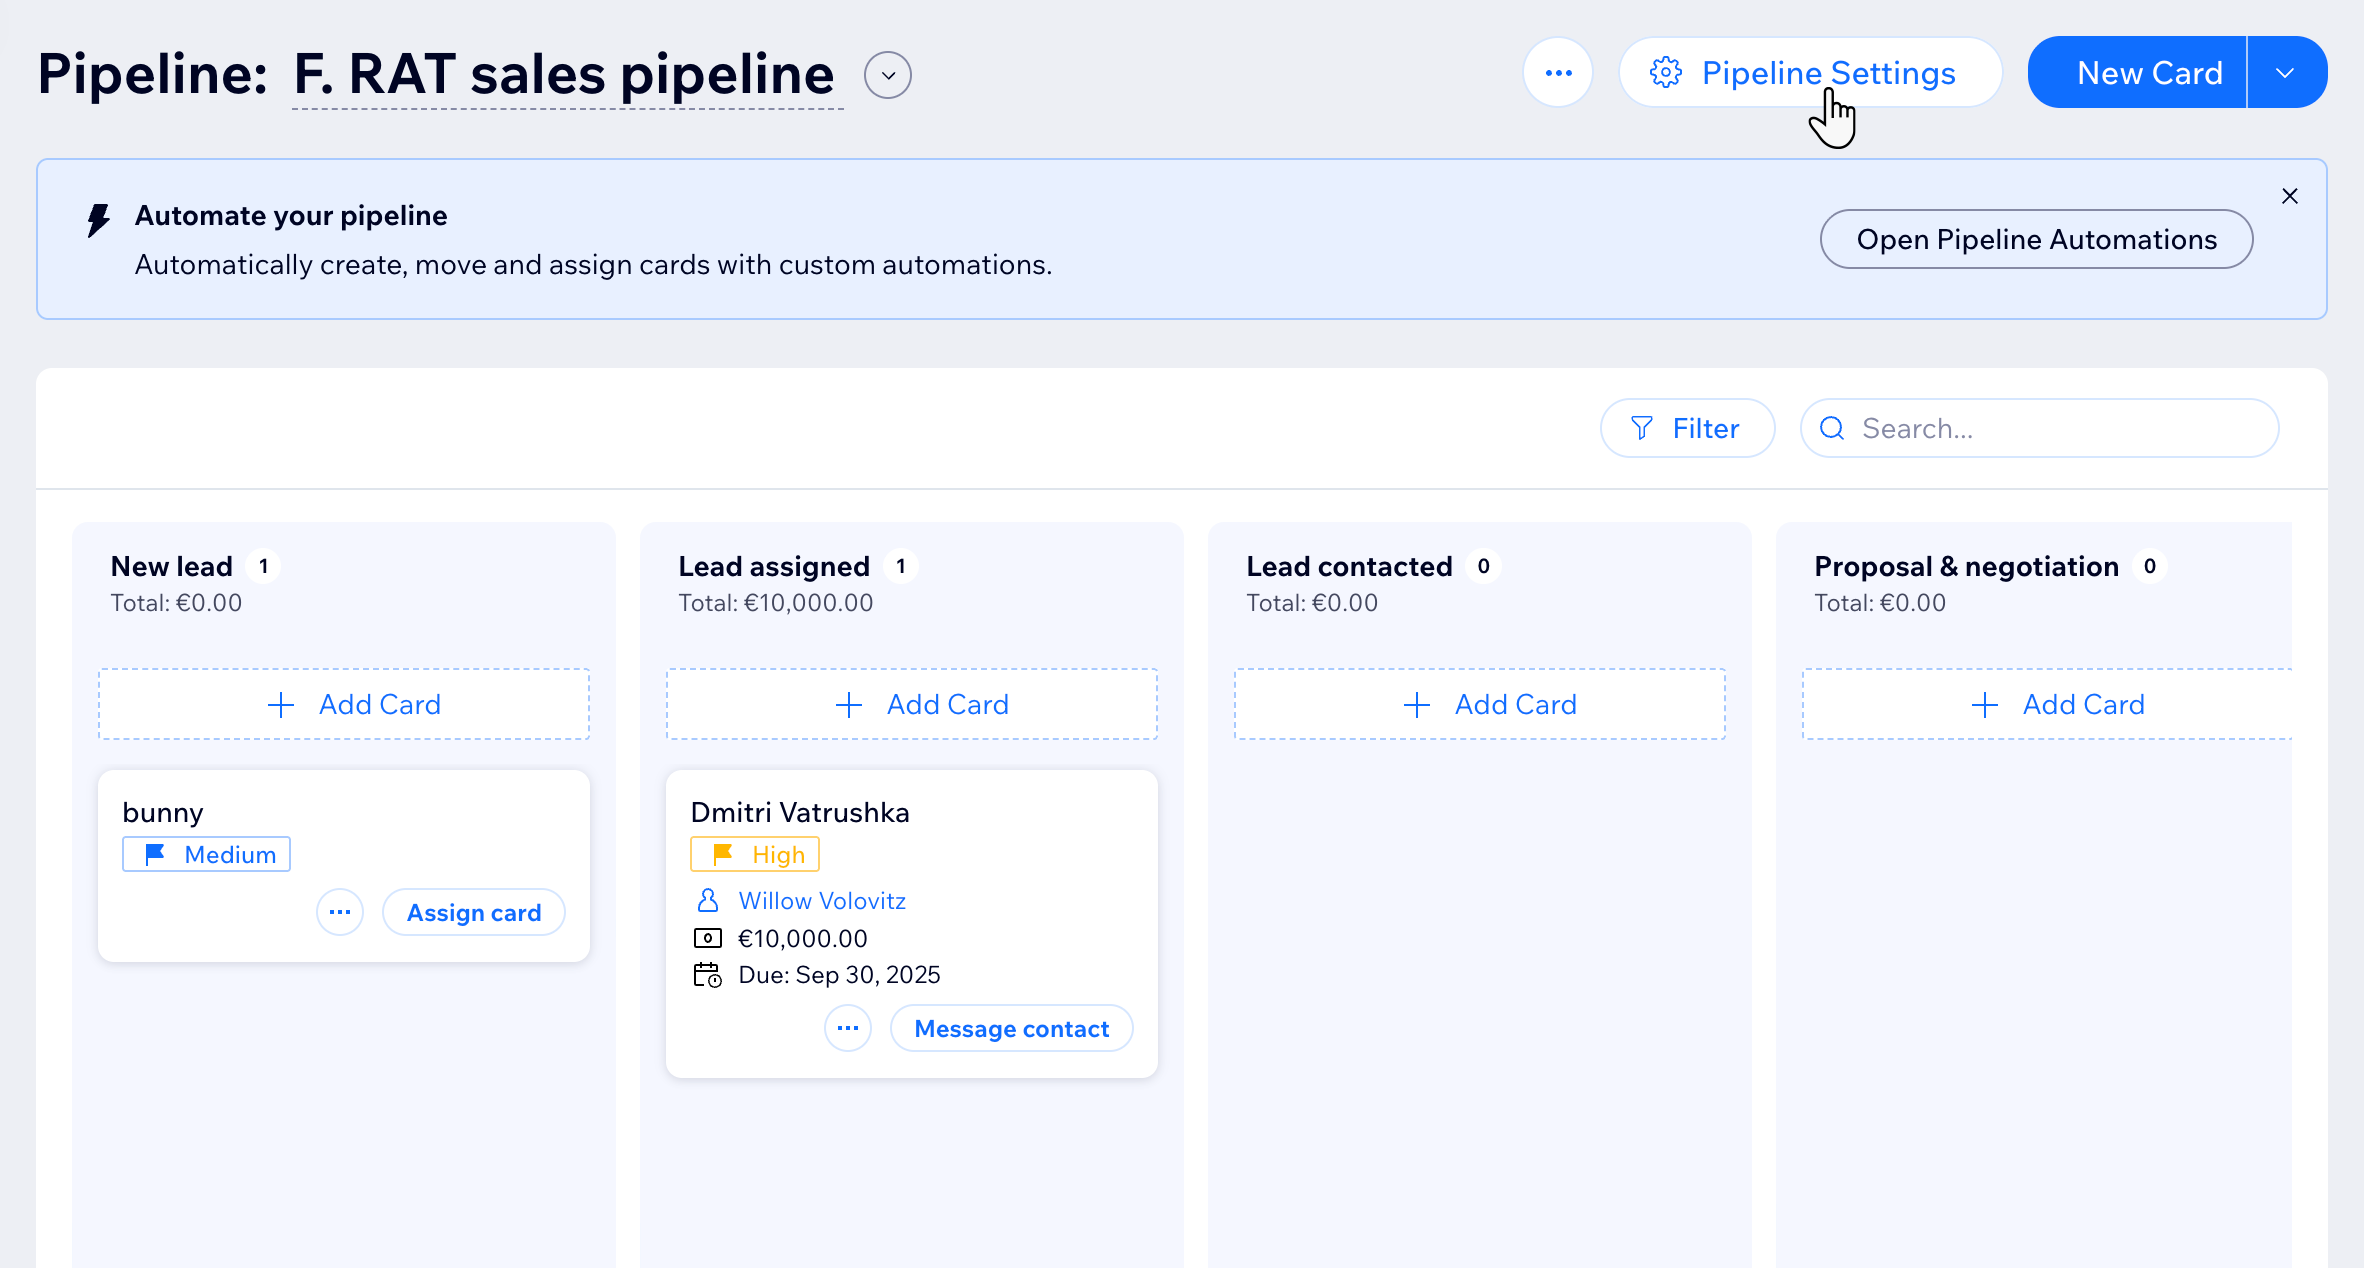
Wix Pipelines let you organize each stage of your business process, so you can track deals, tasks, or projects from start to finish. A pipeline is a series of customizable stages such as "New Lead," "In Progress," or "Completed," designed to fit your team’s workflow. Use pipelines to move work forward, automate key actions, and measure results in one place.
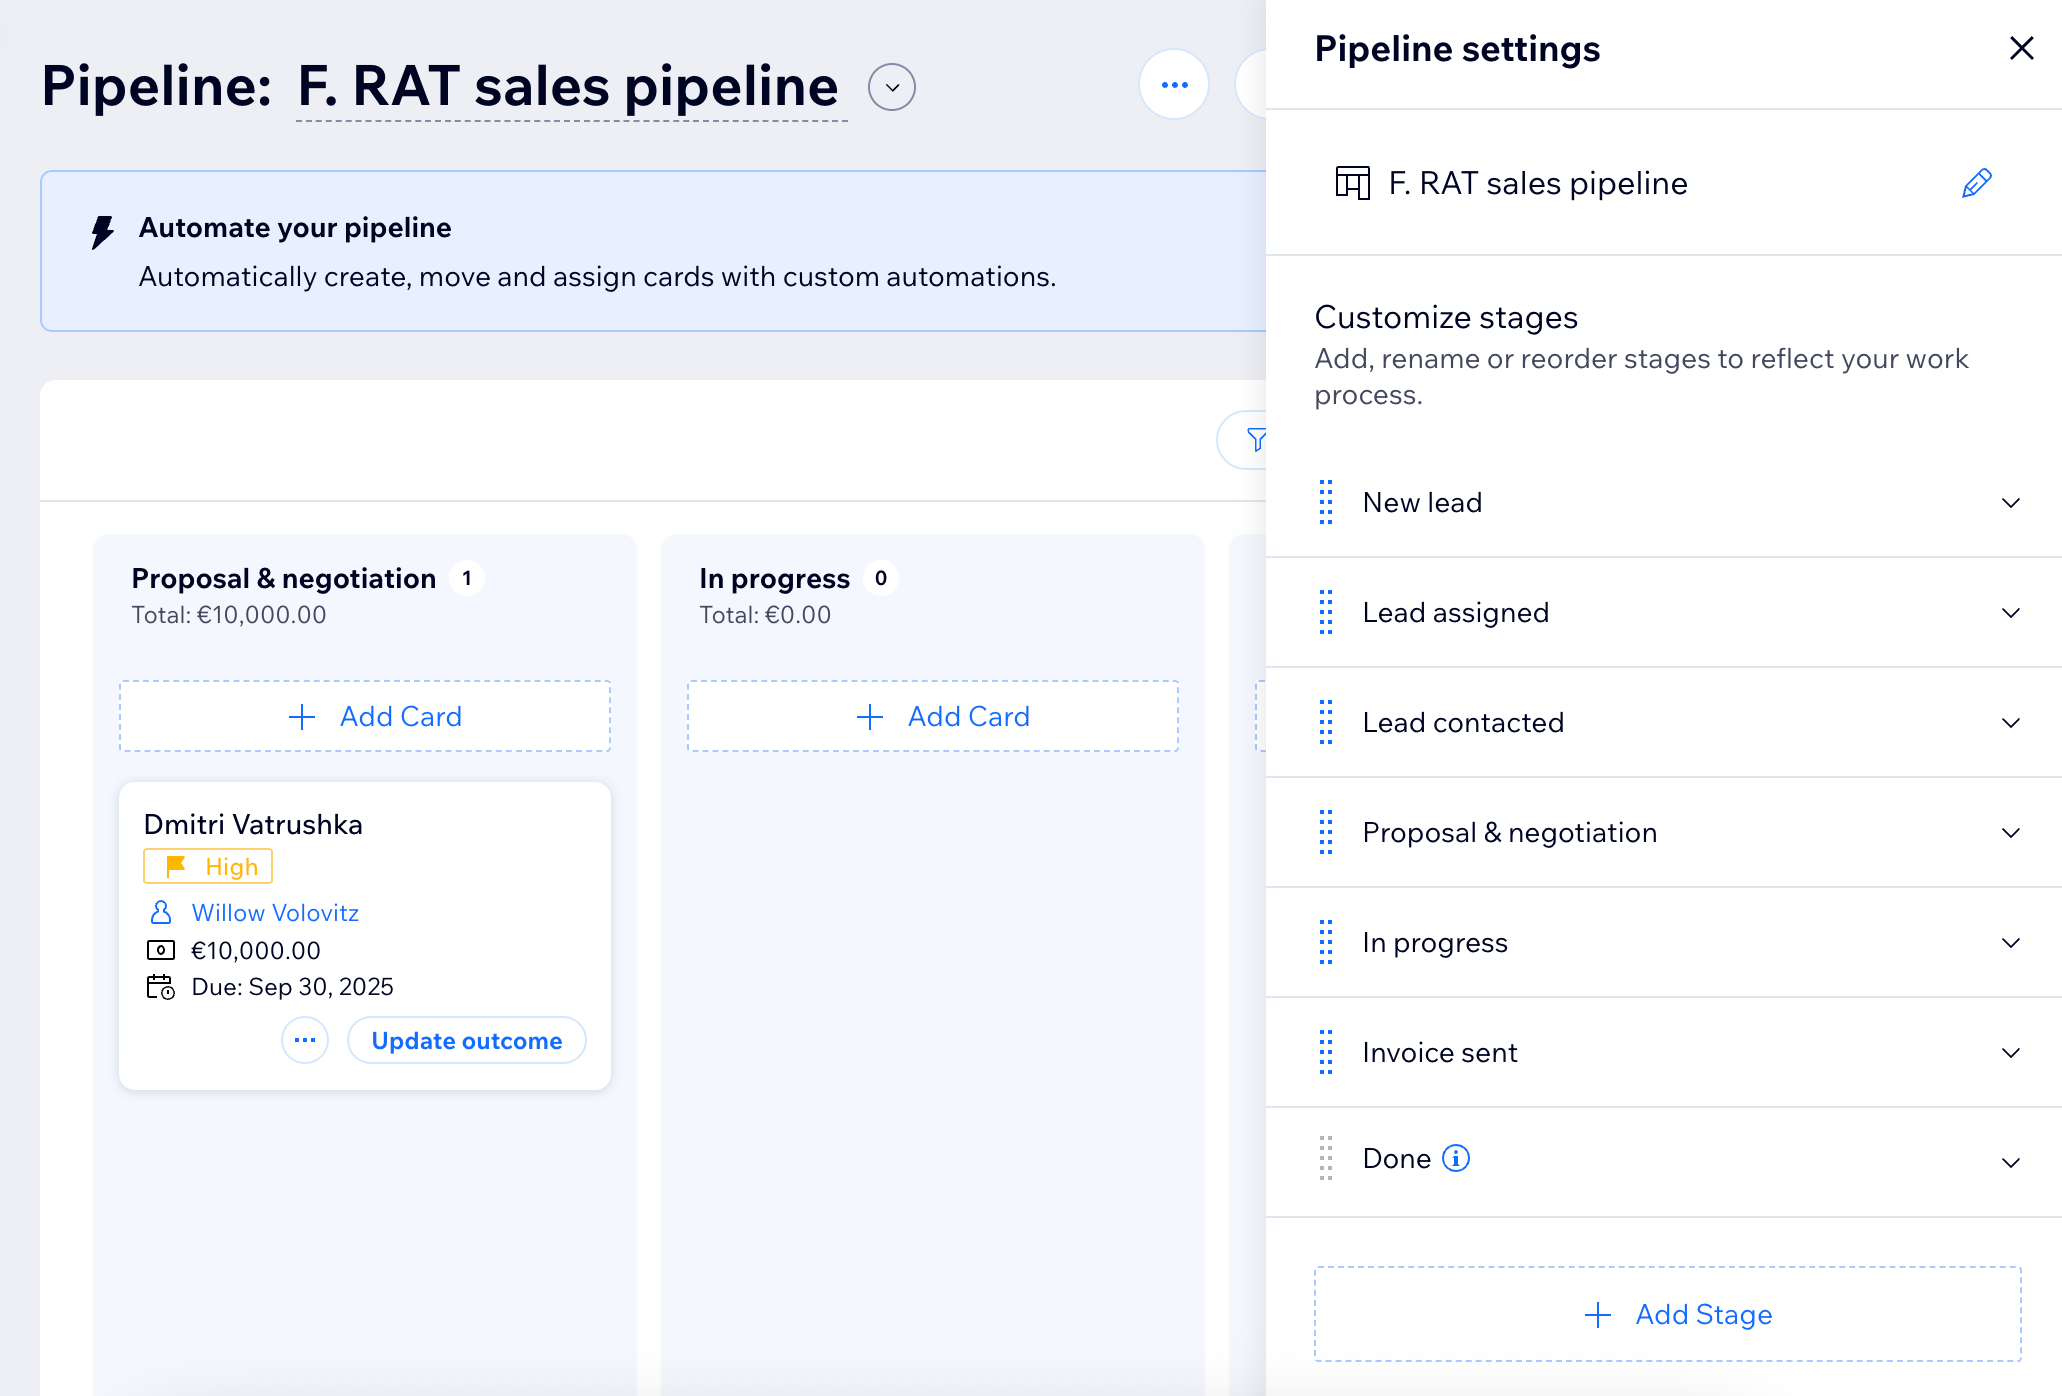
Customizing your pipeline settings
Use your pipeline settings to shape how work flows for your team. You can rename the pipeline, add or edit stages, choose the main action button for each stage, and review any connected automations. This keeps your process aligned with your business and helps cards move forward without missing key steps.
To customize your pipeline settings:
- Go to Pipelines in your site's dashboard.
- Select the relevant pipeline from the drop-down at the top.
- Click Pipeline Settings.
- Choose what to do next:
Rename
Add a stage
Customize a stage
 next to the relevant automation and choose what you want to do next:
Tip:
You can also rename your pipeline by clicking the pipeline name at the top of the page.
Customizing your pipeline cards
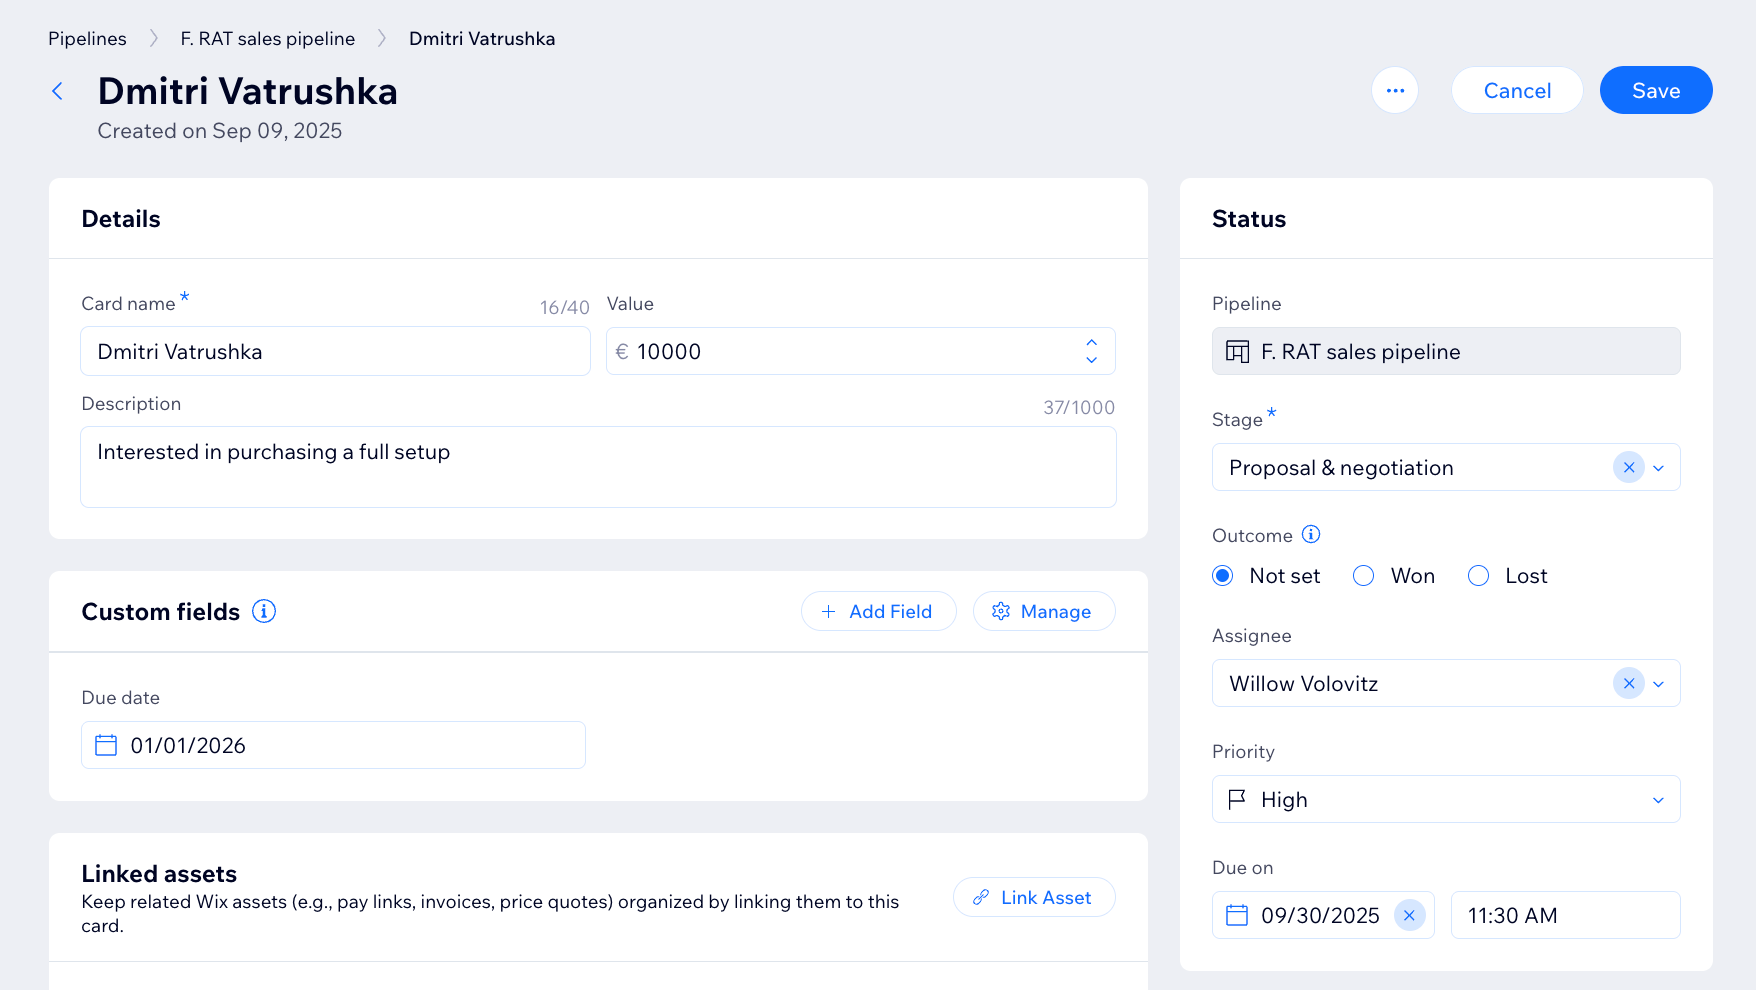
Customize your cards to keep every lead and deal clear, organized, and up to date. From the card’s edit view, you can adjust details like value, stage, outcome, assignee, due dates, custom fields, linked assets, and tags so each card reflects its real status. This helps you see what is happening at a glance and know exactly what to do next.
To customize your pipeline cards:
- Go to Pipelines in your site's dashboard.
- Select the relevant pipeline from the drop-down at the top.
- Choose what you want to do next:
Perform quick actions on a card
Edit a card's details
Learn more about automating your pipelines to control how cards move and update.
