

Wix Pipelines: Automating Your Pipelines
5 min
In this article
- Step 1 | Install suggested automations
- Step 2 | Create or manage an automation
- Step 3 | (Optional) Choose a different trigger for your automation
- Step 4 | Choose an action
- FAQs
Automations in Wix Pipelines help you keep leads, price quotes, and invoices moving through each stage without manual updates. Install suggested automations during setup, or create custom ones from your pipeline settings to keep every opportunity up to date.
Step 1 | Install suggested automations
Suggested automations help you get started faster by handling routine actions in your pipeline. For example, you can create a card when someone submits a form, move a card when it is assigned, or update a card when an invoice or price quote is sent.
Before you begin:
- Create a form on your site to collect leads.
- Create a pipeline in your site's dashboard.
- Publish your site.
To install suggested automations:
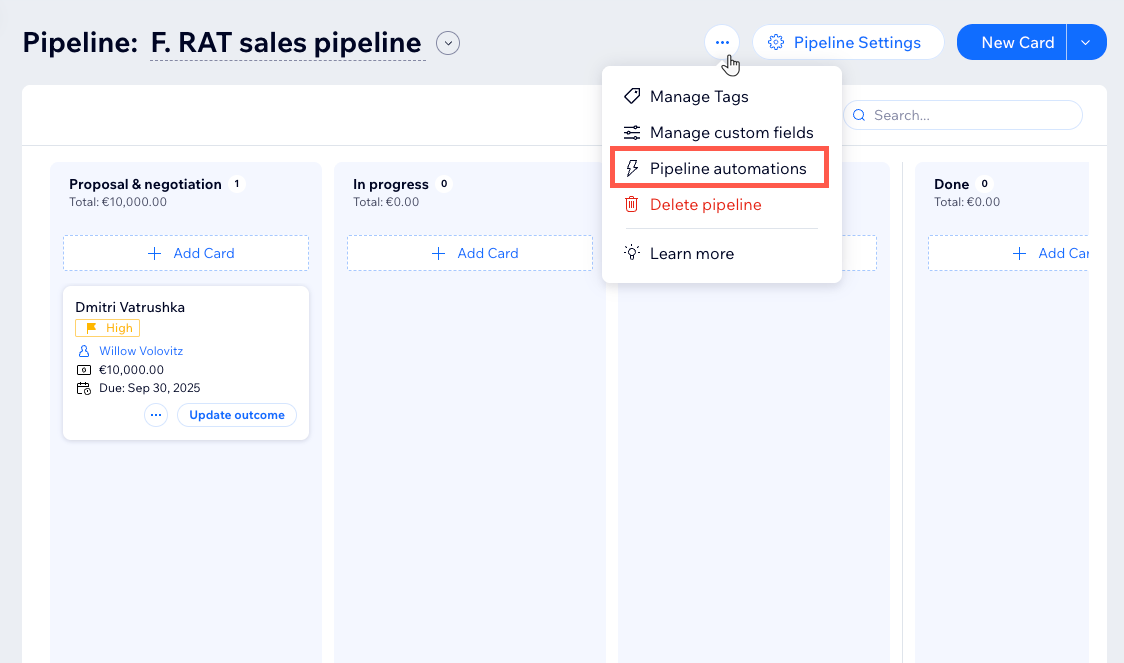
- Go to Pipelines in your site's dashboard.
- Click the More Actions icon
 at the top.
 - Select Pipeline automations.
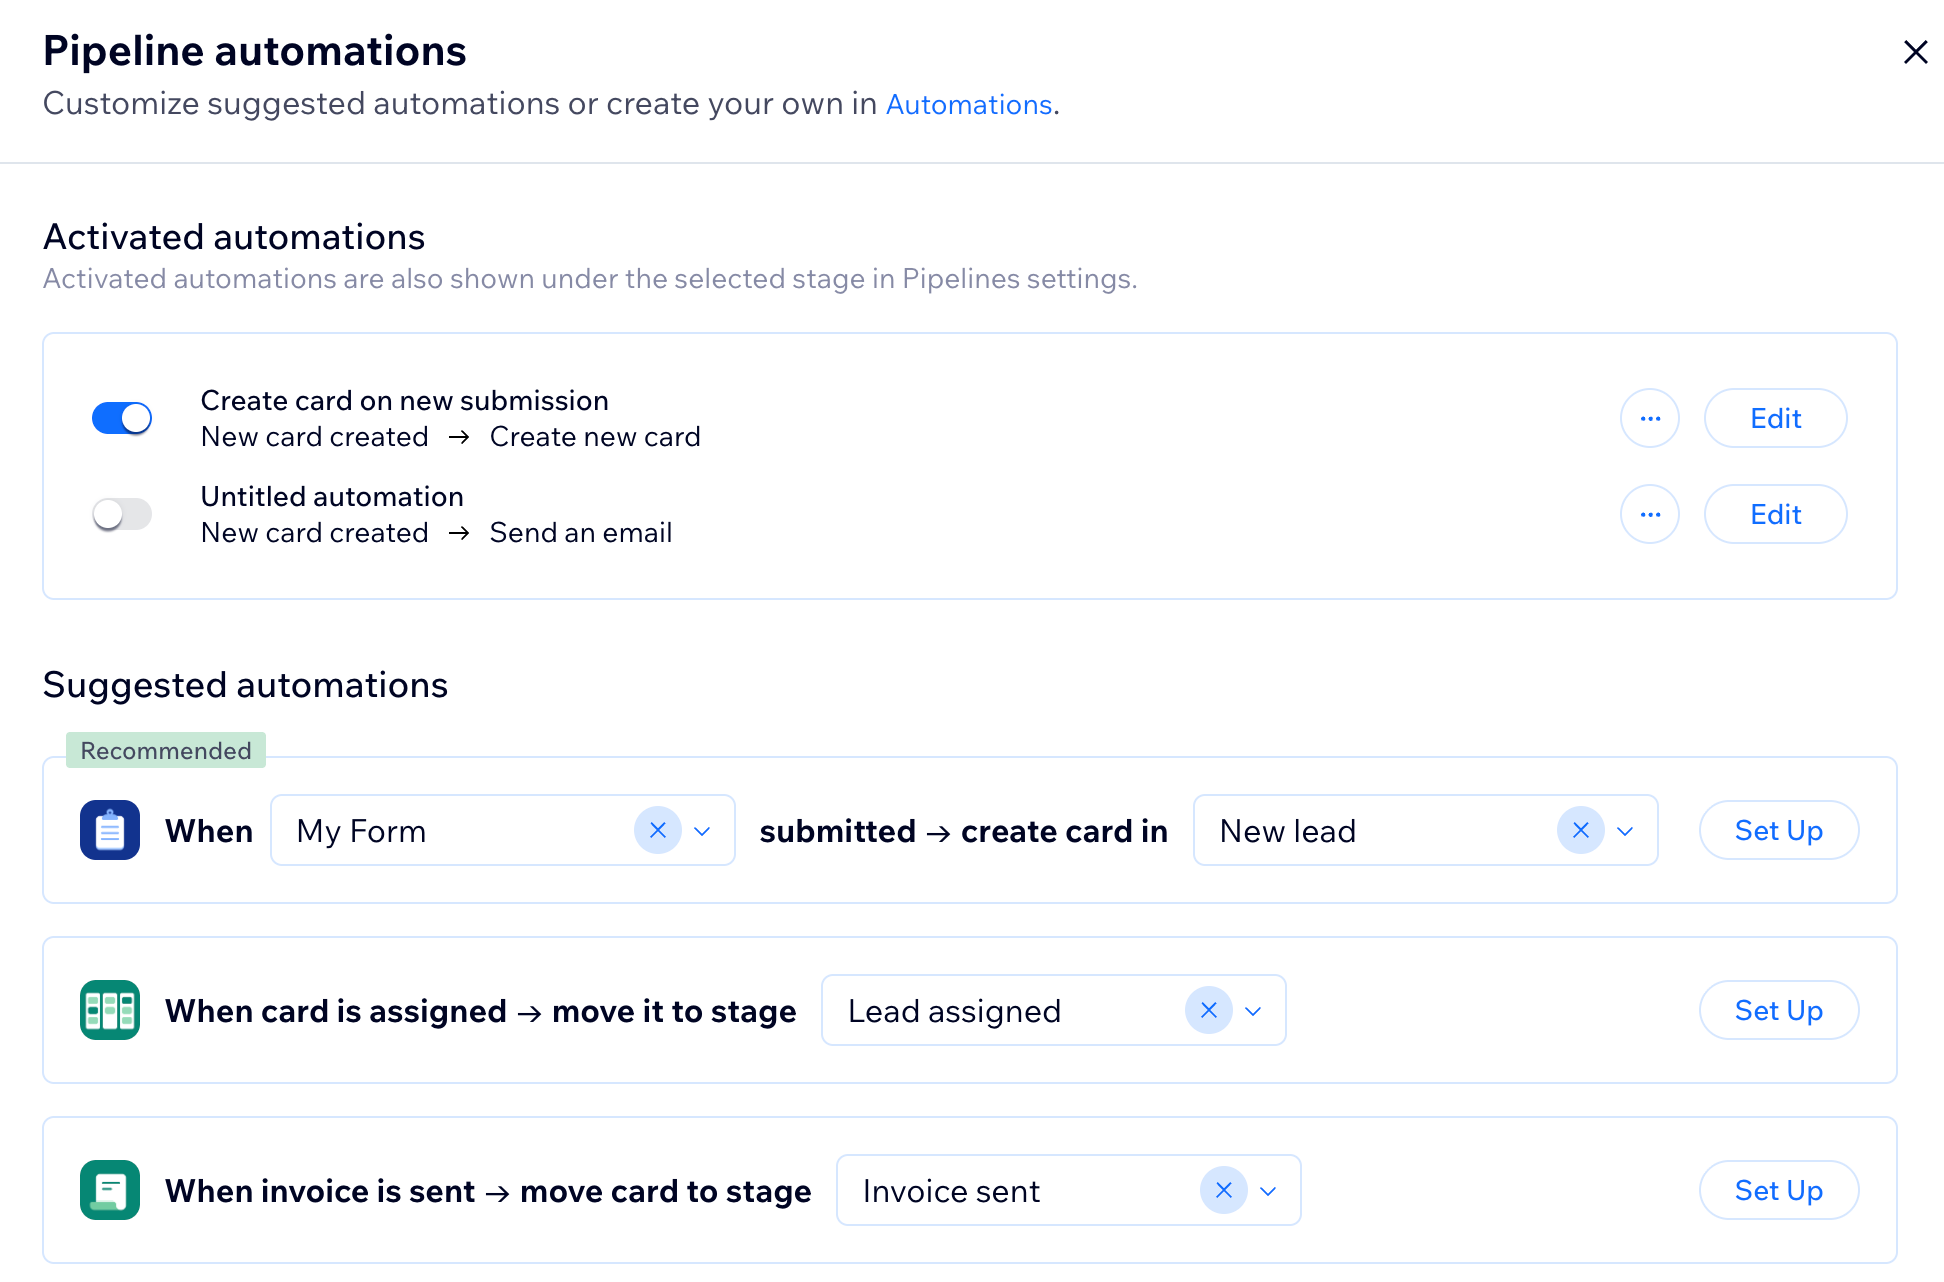
- Click the dropdown(s) on the automation you want to use and select the relevant form or card.
- Click Set Up.
- Repeat these steps for any other suggested automations you want to use.
Tip:
Click Create Custom Automation at the bottom if you want to start from scratch.
Step 2 | Create or manage an automation
Create custom automations from your pipeline settings, or edit existing ones for a specific stage. Each automation uses a trigger to start the flow and one or more actions to update your pipeline automatically.
To create or manage an automation:
- Go to Pipelines in your site's dashboard.
- Click Pipeline Settings.
- Select the relevant stage.
- Choose what you want to do:
- Edit an existing automation: Click the More Actions icon
 next to the relevant automation under Stage automations and select Edit.
 - Create a new automation: Click Create in Automations.
- Edit an existing automation: Click the More Actions icon

Step 3 | (Optional) Choose a different trigger for your automation
A trigger is the event that starts your automation. Type "Pipelines" in the search bar to view only the relevant triggers. The triggers you see depend on the automation you are creating and the apps connected to your site.
Available triggers
- Asset linked / unlinked: Linked assets help you keep related Wix items, such as pay links, invoices, and price quotes, organized under the relevant card. Run an automation when an asset is linked to a card in your pipeline.
- New card created: Run an automation when a new card is added to your pipeline.
- Card moved to stage: Run an automation when a card is moved to a different stage.
- Card assigned: Run an automation when a card is assigned or unassigned.
- Card updated: Run an automation when a card’s value, priority, outcome, or custom field is updated.
Tip:
To improve accuracy, combine Contact and Asset Linked.
To choose a trigger:
- (In the Automation flow) Click the trigger.
- (Optional) Type "Pipelines" in the search bar to view only pipelines triggers.
- Select a trigger from the list.
- (Optional) Edit the relevant pipeline, stage, assignee, or other trigger settings.
- (Optional) Click the Trigger once per person toggle to limit how often the flow can run for the same person.
Step 4 | Choose an action
Choose an action to decide what happens after the automation is triggered. Depending on the action you select, you can create a new card, find an existing one, move it to another stage within the same pipeline, or update its details.
Available actions
- Create new card: Add a new card to a pipeline automatically.
- Find matching card: Locate the most relevant existing card based on a business action, such as sending an invoice.
- Move card to stage: Move an existing card to a different stage automatically.
- Update card details: Change an existing card automatically.
Notes:
- Select the card’s current pipeline to complete the action.
- Select Allow move back to let cards move both forward and backward.
- The pipeline sets the card’s currency.
To edit, replace or add actions:
- Choose what you want to do next:
Edit an existing action
Replace an existing action
Add another action
FAQs
Click a question below to learn more about pipeline automations.
Can I edit or turn off a pipeline automation later?
Can I move a card to a different pipeline automatically?
How do I see whether an automation worked?
Where can I learn more about Wix Automations?
