


Manually Creating an Order
In this article
- Step 1 | Add items to the order
- Step 2 | (Optional) Select a business location
- Step 3 | Add a customer to the order
- Step 4 | (Optional) Add a discount
- Step 5 | Add a delivery method
- Step 6 | Create the order
Important:
- This article is relevant for Wix Stores, Wix Bookings, Wix Restaurants Orders and Pricing Plans.
- The ability to manually create an order is not available for Wix Donations.
Keep your records and inventory up-to-date by manually adding orders that you process offline (e.g. in-person or phone-in orders).
You can also use manual orders for custom products or services that you offer. For example, create a custom necklace for a client and sell it by creating a manual order. You decide the price of this unique product.
Important:
Creating a manual order does not automatically generate a payment request. You can, however, request payment in any of the following ways:
Step 1 | Add items to the order
You can add any of the items you offer to the manual order. They can be:
- Store products (except for subscriptions)
- Bookings appointments (not classes or courses)
- Restaurant menu items (available with the new restaurant orders app)
- Pricing plan (Plans are sold 1 at a time and can't be added to orders with other items)
In addition, if you're creating a custom item for your buyer, you can add the item and set a custom price.
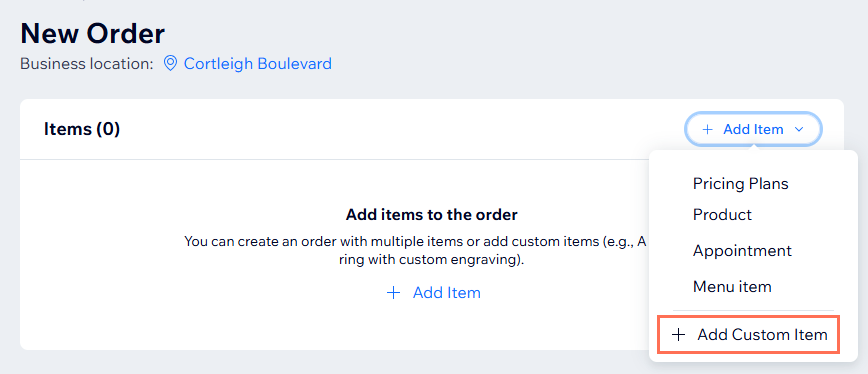
To add items to an order:
- Go to Orders in your site's dashboard.
- Click +Add New Order.
- Choose what you want to add:
Add a store product
Add a Wix Bookings appointment
Add a Wix Restaurants Orders menu item
Add a pricing plan
Add a custom item
Step 2 | (Optional) Select a business location
If you have more than one business location, you can select the branch that's associated with this manual order.
Note:
After you add a business location and complete the manual order, it's not possible to edit the location. If necessary, you can cancel the order and create a new one.
To select a business location:
- Click Select location.
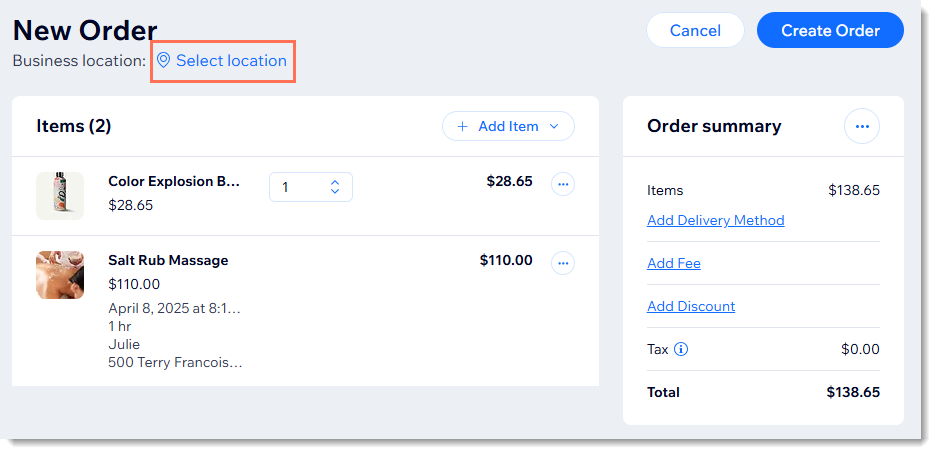
- Select the relevant location and click Save.
Step 3 | Add a customer to the order
Now you can add your customer's details to the order. If this is a return customer, you can simply select them from your customer list. Otherwise, you can add them as a new customer.
Notes:
- If you're planning to ship the order, make sure you include an address.
- The customer's address is used to calculate tax for each order. If it's missing, the billing address is used. When both are missing, the tax rate is set to 0%.
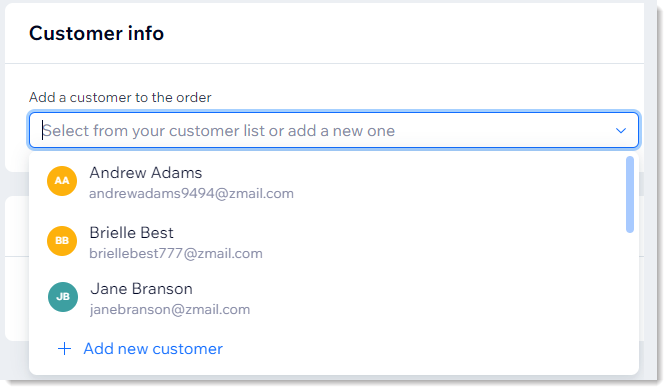
To add a customer to the order:
- Click the Add a customer to the order drop-down.
- Select an option:
- Existing customer:
- Select a customer.
- (Optional) Click the Edit icon
 to view or edit the customer's details.
- New customer:
- Click + Add new customer.
- Enter the customer's details.
- If the customer asks to subscribe to your site (e.g. to receive updates and blog posts) click the Never subscribed drop-down next to Primary email and select Subscribed.
- (Optional) Add an address.
- (Optional) Add a label.
- (Optional) Assign the customer to someone on your team.
- (Optional) Click Add New Field to add more client info and fill out the new field.
- Click Save.
- Existing customer:
Step 4 | (Optional) Add a discount
Now you can optionally provide your customer with a discount. Note that it is not possible for customers to redeem a coupon on a manual sale, but you can replace this with a discount of the same value.
To add a discount:
- Click Add Discount.
- Enter the discount amount.
- (Optional) Enter a note about the discount (not visible to customers).
- Click Apply.
Step 5 | Add a delivery method
Tip:
This step is relevant only for store and restaurant orders and custom orders marked as physical products.
Before you create the order, you need to set how that order is going to get to your customer. Choose from any of the relevant shipping, delivery, or pickup options available in your store or create a custom shipping rate.
To select shipping settings:
- Click Add Delivery Method.
- Select an option:
- Don't charge for delivery
- Select an existing shipping, delivery, or pickup option:
- Click Select from your shipping, delivery or pickup options.
- Select an option from the dropdown and click Add.
- Create a custom rate:
- Click Create a custom shipping rate.
- Enter the shipping name (e.g. Express shipping).
- Enter the rate.
- (Optional) Add scheduling:
- Click the Add scheduling toggle to enable it.
- Enter the date and time.
- (Optional) Select the Is this a pickup order? checkbox.
- Click Add.
Step 6 | Create the order
After checking that all the details are correct, you can go ahead and click
Create Order.
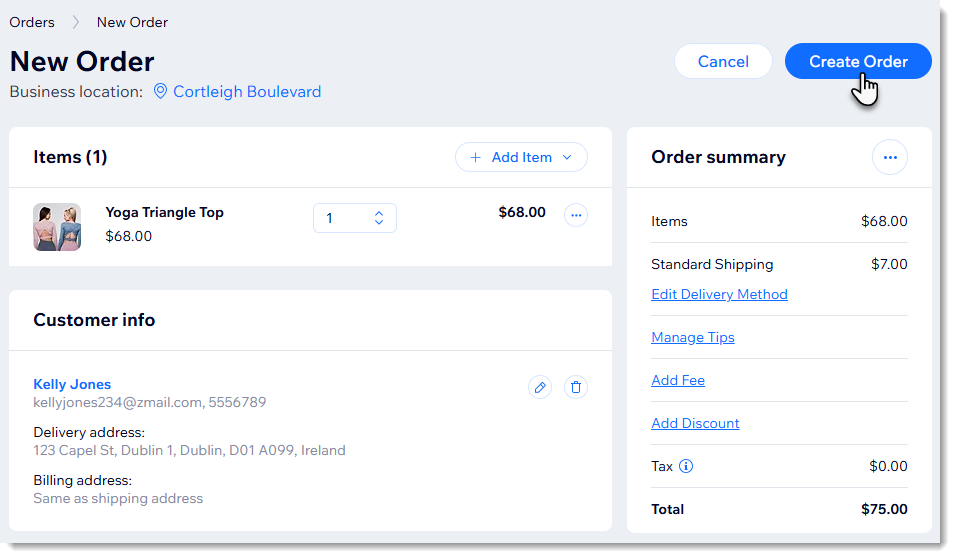
What's next?
The new order appears in the Orders tab of your site's dashboard. Make sure to contact your customer to arrange payment.
