Wix Loyalty Program: Creating Automations for Your Loyalty Program
4 min
In this article
- Giving loyalty points
- Responding to changes in points activity
Automations allow you to focus on the bigger picture by taking care of smaller tasks for you. With the Wix Loyalty Program, you can set up automations that automatically give loyalty points or respond to any changes in a customer's points activity.
For example, you could automatically give loyalty points when a customer books a session, or automatically assign a badge to a customer who earns enough points for a reward.

Giving loyalty points
To automatically give loyalty points to customers for something they do on your site, you need to choose a trigger from the list of options and set 'giving loyalty points' as the action. For example, submitting a form triggers the action of awarding loyalty points.
Note:
Creating an automation to give loyalty points is the same as creating a "way to earn" (as you did when you set up your loyalty program). Creating a Loyalty automation will add it to your list of "ways to earn" in your dashboard and the Loyalty Program page on your live site.
To set up this automation:
- Go to Automations in your site's dashboard.
- Click + Create Automation at the top right.
- Choose how you want to start creating your automation:
- From Scratch: Click Start from Scratch to begin from a blank automation template.
- Suggested automation: Use the categories or search bar to find the suggested automation you want to edit. Then click Set Up next to the automation.
- Click the title to give your automation a name.
- Choose a trigger from the trigger selection panel and set it up.
Note: Based on the trigger you choose, you will see different settings to finish configuring the trigger. - (Optional) Enable the Trigger once per person toggle to limit trigger frequency:
- Select the person from the trigger data: Decide how often the automation can be triggered for the same person (e.g. Contact ID, Post Author Contact ID, Visitor ID etc.).
Tip: This is useful for triggers that might occur repeatedly. - Trigger once per person every: Select this checkbox if you want to set a specific amount of time that should pass before the automation can be triggered again for the same person.
- Select the person from the trigger data: Decide how often the automation can be triggered for the same person (e.g. Contact ID, Post Author Contact ID, Visitor ID etc.).
- (Optional) Add a delay between a trigger and its action, to have the action occur after a certain amount of time passes.
- (Optional) Add a condition to make the automation occur when certain conditions are met.
- Set up your action:
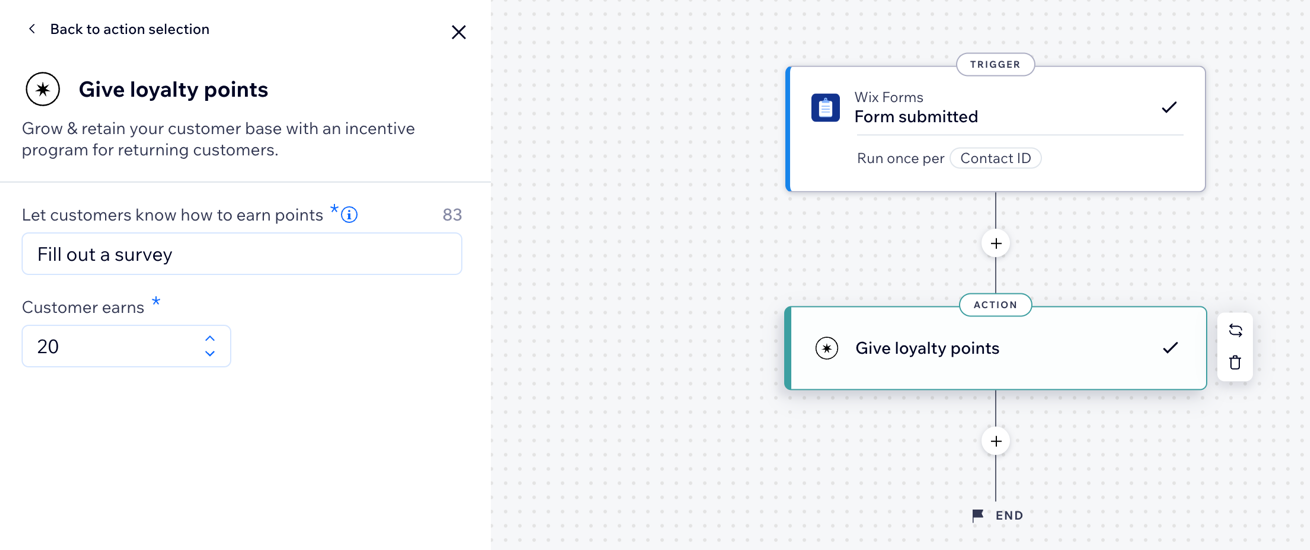
- Select Give loyalty points from the panel.
- Enter a description of this way of earning points in the Tell customers how they can earn points field.
Note: This description should reflect the trigger you've chosen for this automation (for example, if your trigger is a visitor submitting a form, this will be the way they earn points). - Enter the number of points awarded in the Customer earns field.
Note: If you've added tiers to your loyalty program, select the tiers you'd like this "way to earn" to apply to, and the number of points a customer in each tier will earn. - Click Apply.
- (Optional) Click + to add another step. You can make a chain of follow-up actions from the initial action.
- Click Activate to save and activate the automation. It now appears on your Automations page where you can monitor, edit, deactivate, or delete according to your needs.
Responding to changes in points activity
To automatically respond and take action based on changes in a customer's points activity, you can set up an automation that uses the Wix Loyalty Program as the trigger. For example, when a customer earns 100 points, it triggers the action of assigning them a badge.
Note:
By default, your loyalty program includes an automation that sends customers an email when they earn a reward. Make sure to activate that email automation if you want to use it.
To set up this an automation:
- Go to Automations in your site's dashboard.
- Click + Create Automation at the top right.
- Choose how you want to start creating your automation:
- From Scratch: Click Start from Scratch to begin from a blank automation template.
- Suggested automation: Use the categories or search bar to find the suggested automation you want to edit. Then click Set Up next to the automation.
- Click the title to give your automation a name.
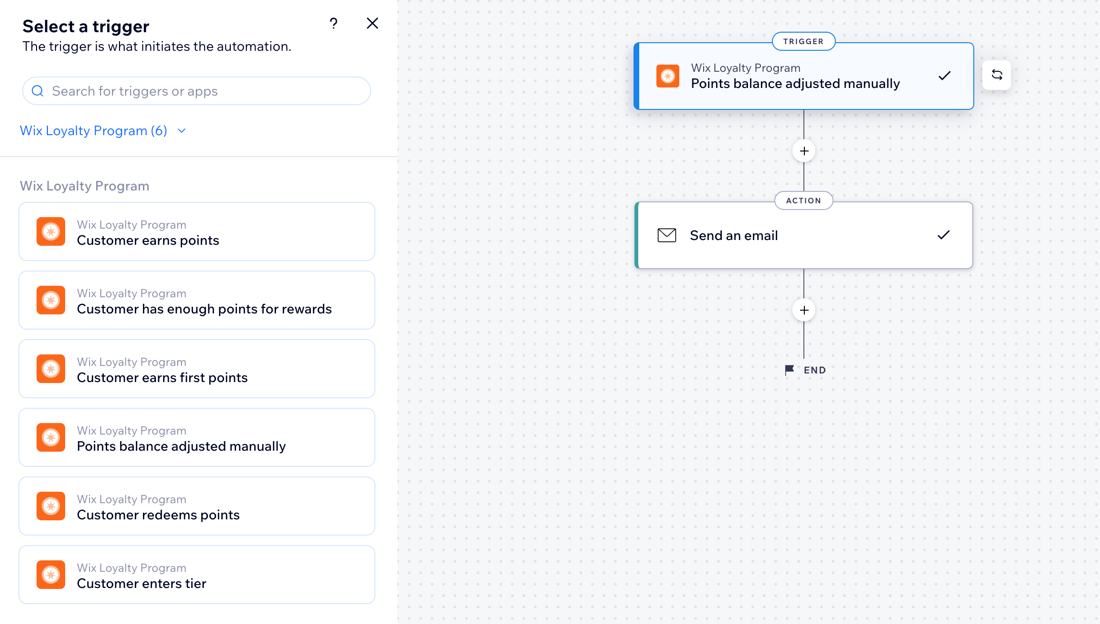
- Select Wix Loyalty Program from the All triggers drop-down.

- Choose a trigger from the list.
Note: Based on the trigger you choose, you may see different settings to finish configuring the trigger. - (Optional) Enable the Trigger once per person toggle to limit trigger frequency:
- Select the person from the trigger data: Decide how often the automation can be triggered for the same person (e.g. Contact ID, Post Author Contact ID, Visitor ID etc.).
Tip: This is useful for triggers that might occur repeatedly. - Trigger once per person every: Select this checkbox if you want to set a specific amount of time that should pass before the automation can be triggered again for the same person.
- Select the person from the trigger data: Decide how often the automation can be triggered for the same person (e.g. Contact ID, Post Author Contact ID, Visitor ID etc.).
- (Optional) Add a delay between a trigger and its action, to have the action occur after a certain amount of time passes.
- (Optional) Add a condition to make the automation occur when certain conditions are met.
- Click + to add a step and select an action.
- (Optional) Click + to add another step. You can make a chain of follow-up actions from the initial action.
- Click Activate to save and activate the automation. It now appears on your Automations page where you can monitor, edit, deactivate, or delete according to your needs.